A magnetic tool holder for small spaces can clear your workbench without eating into the aisle. Measure the tools in the position they’ll hang, then check where your hand goes as each tool comes off. This guide shows how to fit a short rail beside a vise, under shelving, or on a suitable steel cabinet.
What fits in a small workshop?
A short rail mounted where tools already pile up is the easiest starting point. A fixed strip works when your wall or bench can accept approved fasteners. A magnet-backed strip can use a flat steel cabinet side. In either case, the usable span, handle clearance, and direction of removal determine fit.
Before buying, decide which five or six tools cause the most clutter. That number is a planning exercise rather than a capacity rule. In one garage, the short list might be two drivers, diagonal cutters, and a combination wrench. In another, the same space might hold one pair of oversized pliers and a file. Place your candidates on the bench to see which tools genuinely belong in one row.
| Available space | Configuration to consider | Measure before buying |
|---|---|---|
| Short wall section beside a vise | Short screw-mounted rail | End holes, jaw travel, route of long stock |
| Shallow steel cabinet side | Slim magnet-backed strip | Flat contact patch, tool projection, drawer access |
| Shelf-front or bench backsplash | Fixed strip on suitable support | Tab height, finger clearance, handle drop |
| Two gaps divided by an outlet or bracket | Two independent short rails | Usable span in each gap and access to the obstacle |
| Narrow aisle with people passing | Recessed placement or enclosed storage | Tool depth at rest and while being removed |
Measure the installation in three directions
A catalog dimension usually tells you the length of the holder. A small shop also needs space for the tools to hang, project, and move through a short arc. Measure all three dimensions with the garage in its everyday configuration, including the parked car, lowered shelves, and equipment you keep beside the bench.
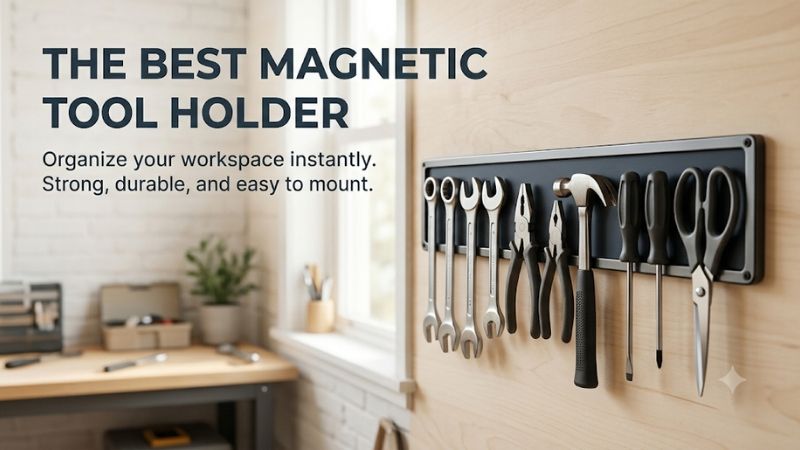
Measure the flat span and mounting area
Start with the area that can support the whole rail, including the end brackets or magnetic backing. Measure between permanent interruptions, then mark the positions of door trim, outlet covers, screws, studs, and any seams or stamped ribs. Leave yourself room to install or remove the rail later.
For a fixed installation, use the hole pattern in the listing or the manufacturer’s template. Even an 8-inch strip can be awkward if the fasteners land too close to the edge of a narrow board or shelf upright. An approved backer can solve the spacing problem, provided it has its own suitable support and the finished assembly keeps the necessary working clearance.
For a magnet-backed holder, test the exact patch rather than an adjacent panel. Make sure the face is steel that attracts a magnet and is sufficiently flat for the intended holder. A refrigerator-like finish or a steel-colored appliance panel can conceal nonmagnetic material. A small test magnet reveals attraction, but the holder’s instructions and the loaded configuration determine suitability.
Mark the longest handle and the widest grip
Lay out each tool in the position you expect to store it. A 10-inch screwdriver hanging shaft-up can run into a shelf or make its handle harder to reach. Pliers may need more width at the handles than at the jaws. Draw the full outline so you can see interference before the holder arrives.
Include the way you hold the tool as you take it down. If you normally grab a driver around the middle of its handle, give your fingers room on both sides. A row of tools that fits edge to edge on paper may still be annoying when you have to pinch one by its tip. Preserve space for ordinary retrieval rather than packing an extra driver into the last narrow gap.
On two rows, mark the longest tool on the upper strip and the path it takes as you remove it. A long handle can sweep into the lower row. A small shift sideways or a staggered row can solve that interference where two directly aligned strips are clumsy.
Measure projection and the motion needed for removal
Projection is the distance your setup sticks out from its mounting surface. Include the holder, the thickest grip, and the room needed to lift or pull the grip clear. Check that space against the route you walk, the cabinet drawer you open, and anything that passes along the same side of the bench.
A strip with more stand-off can leave room behind handles. That helps near a broad workbench, where reaching behind a wrench might otherwise scrape your knuckles. In a narrow passage, the same stand-off can expose an edge to sleeves, a vacuum hose, or carried lumber. A low-profile strip paired with slimmer tools may be a better fit in that spot.
Try the motion with the bench covered by whatever you normally work on. A flat panel, open case, or temporary clamp may put your shoulder in a different position than during an empty-workbench test. If the tool can only come off at a strained angle, change its placement or keep it in a drawer.
Choose a mount that matches your space
Compact storage often benefits from a movable rail, especially when the layout changes. Permanent mounting can offer repeatable placement in a shop where the work stays in one place. Compare the force at both ends of the system, where the rail attaches to its support and where each tool touches the rail.
Fixed rails on a wall or bench
A fixed holder fastens to a suitable wall or bench, leaving the front magnet responsible for tool retention. This can be useful beside a vise or sharpening station where tools come off repeatedly. Plan the fastener pattern and substrate before you choose the row length or mark your wall.
Use the manufacturer’s installation directions and hardware suitable for the substrate. A wooden panel can receive a holder only if it and its support are suitable for the finished installation. For masonry, framed walls, and manufactured benches, use the method approved for the actual surface. A fixed rail with the wrong anchoring can pull loose even with light tools.
If there is wiring or plumbing behind the proposed area, establish a safe mounting plan before drilling. Moving the rail a few inches to known support can be easier than fitting every tool to the original position. In rented spaces, check what mounting work is allowed. A cabinet-side option may avoid permanent changes.
Magnet-backed strips on steel
A magnet-backed strip needs usable contact at the rear even when no tools are on it. A flat side panel is usually easier to assess than a curved corner or a door with decorative ridges. At the front, favor tools with broad areas of exposed steel and check how they sit after release.
Surface dirt and metal fragments can hold a magnetic strip away from the cabinet or scratch the coating. Keep both contact surfaces clean, set the holder down as directed, and lift it for repositioning instead of dragging grit across the paint. Check the panel again after moving a cart or changing tool positions.
Movement makes a difference. A holder may seem fine on a stationary door and shift when the door closes firmly or a drawer slams nearby. Install portable storage on a fixed panel where possible. Use drawers, fitted clips, or a latching case for items that must stay secured while a cart moves.
Can a short multipack use space more efficiently?
Two short bars can work around an interruption that leaves poor clearance for one long bar. That makes a mixed-length set useful for a bench with a shelf bracket in the middle. Compare active magnetic lengths for each strip, since the end sections still occupy some of the available space.
For example, imagine a 10-inch gap left of a bracket and a 16-inch clear stretch to the right. An 8-inch bar can fit the first location if its fasteners and handles clear. A 12-inch bar can fit the second, leaving some room for fingers around outer tools. An 18-inch single bar would require a different position altogether.
A multipack saves money only if you can use the extra bars. Map your actual stations first. A single rail near the bench plus a shallow tray for rarely used pieces may be easier to live with than three disconnected strips holding duplicates.
Plan the holder around the work you do
A small workshop gets more value from a rail assigned to a repeatable task. Start with tools that interrupt that task when they disappear under a pile. Then remove tools that can stay inside a kit or drawer until needed. Keep the placement close enough that returning a tool feels natural.
A narrow garage bay with a parked car
Park the car in its usual place and open the nearest door fully before choosing a mounting point. The useful wall area can shift dramatically when the door or side mirror occupies the aisle. Check the projection of your longest tool before you decide that a bare wall has enough room.
A cabinet side facing inward toward the bench can be more usable than a rail facing the car. If you have only a slim aisle, give the rail to compact wrenches and drivers, and store tools with hooks, sharp edges, or thick handles inside drawers. Include the clearance needed by people carrying bags or boxes on the same route.
A portable strip may be convenient if it moves between a protected storage position and a work position. Unload it before relocation when the manufacturer calls for unloading, and favor stationary use. When you do not have an appropriate steel panel, a portable tray on the bench can supply the same temporary access.
A workbench tucked underneath shelving
A shelf keeps useful wall space close, but it can restrict access above and behind a magnetic bar. Measure the lip, support brackets, and the screw access behind the mounting tabs. Make sure that tools can come forward without knocking containers off the shelf or trapping fingers between the shelf and rail.
The shelf face can be useful for a short line of small wrenches if it offers suitable support. A backsplash is often easier to reach and leaves the shelf edge free for clamps or lights. Use the rail orientation allowed by the manufacturer. Hanging tools below a shelf makes dropped tools more consequential, especially if the bench is used for hands-on assembly beneath them.
If you wear work gloves for the associated task, make a dry test with them on. The clearance that feels fine in bare hands can be irritating for gloved retrieval. A larger grip gap between fewer tools may make the row much more usable.
A compact mechanic’s station
Give the rail the few wrenches and pliers you use on almost every job, and keep full socket sets together. That prevents one length of rail from becoming a catchall for items you rarely use. A fitted socket rail can sit inside a drawer and preserve space on the wall for tools that are easier to grab individually.
Plan for the moment when a tool is oily and your attention is on the work. Wipe it before returning it to a magnetic holder. If a tool rocks or rotates on contact, give it a safer place. A push or pull with oily hands can also move an inadequately supported cabinet-mounted strip.
A bench drawer is useful for ratchets with bulk near the head. A shallow open tray can handle the tools you are using during the current job. A fixed or magnet-backed strip handles repeated one-at-a-time access. Each choice is easier to evaluate when you look at the actual tool path during work.
Check retention, safety, and everyday upkeep
The smallest tool arrangement can lose its advantage if tools creep, bump into each other, or collect filings every day. Check what happens when the tools sit, when you take them down, and when you clean the area. Move tools to mechanical storage if their shapes or surroundings make magnetic retention unreliable.
Keep the bar and the tool contact in view
A flat wrench face and a round driver shaft can behave differently on the same rail. A thick handle can hold exposed steel away from the magnet or create leverage as the tool settles. A workable layout gives each tool a stable resting position with enough room to reveal movement before it disturbs another.
If the holder lists a load limit, obey it for the specified orientation and mount. Avoid applying a pull-force figure as a wall load. A tape measure or a small ruler can help compare gaps and a scale can help tally total tool weight, but neither establishes retention for a shape with limited contact.
Establish the final layout with light items first in a clear area and follow the instructions. If a tool slips, the bar rocks, or the support flexes during normal retrieval, remove the tool and reassess. Critical or heavy equipment belongs in storage with suitable mechanical support.
Protect tools, surfaces, and the people nearby
Place sharp or pointed tools where they cannot catch a sleeve or land on someone’s hand. Use guards or a fitted rack where appropriate. Keep magnetic holders and loose fragments away from children. Follow manufacturer guidance around equipment sensitive to magnets, especially where a rail shares a cabinet with instruments or electronic gear.
Fine steel particles can gather on the face near a grinder or sharpening station. Unload tools before cleaning as directed, then use a method approved for the holder. Avoid rubbing trapped filings into coatings or sliding precision measuring tools through residual debris. Wipe oily contact areas before returning tools.
Check the tightness of installed hardware at the intervals recommended in the instructions. Inspect again if the bar gets bumped or the bench moves. An awkward tool worth keeping near at hand may be better placed in a shallow drawer than returned to a holder that needs frequent adjustment.
Frequently asked questions
The usable dimensions of a magnetic tool holder depend on its mounting and the real tools around it. These questions cover short rails, cramped corners, portable cabinets, and situations where a compact tool storage choice needs slightly more clearance than the product photo suggests.
Is an eight-inch holder big enough for hand tools?
An eight-inch holder can be useful at a dedicated station for a few compact tools. Check the active face first, since end hardware can reduce space. A short driver and two small wrenches may fit comfortably, while two wide-handled pliers can use the same length before you add space for your fingers.
Lay the tools out to scale, choose which direction each handle hangs, and reserve room for removal. Then match your layout to the holder’s documented usable face.
Does a stronger magnet let me pack tools closer together?
Closer spacing changes access more than it changes the attraction a tool experiences. Handles may overlap or hit one another during removal. A strong front magnet may also require more deliberate pulling, which makes a weak rear mount or flexible shelf face more apparent when you remove tools one-handed.
Use the spacing you can repeat in the middle of a job. Keep tools separated enough to retrieve them independently and distribute them within the approved load limits.
What should I use if my garage cabinet is aluminum?
An aluminum panel will provide no ordinary magnetic attachment for a magnet-backed strip. Look for a separate supported mounting surface, a manufacturer-approved fixed installation, or a cabinet-compatible organizer that attaches mechanically. Check the warranty and owner instructions before modifying a cabinet.
If a permanent change is unsuitable, a drawer insert, a small parts tray, or a portable tool pouch can keep the same tools near the work. That preserves the aisle and does not depend on cabinet magnetism.
Can I set up a short rail on an existing pegboard?
Use a rail and a pegboard installation compatible with the mounting arrangement. Consider the pull that occurs as you lift a tool off, which can be more noticeable than the rail’s resting weight. A thin board that flexes whenever a tool comes off can make the setup frustrating and loosen hardware.
Check the support and spacing first. If the pegboard is already full or flexible, a short rail on a securely supported neighboring surface may work better.
Conclusion
For a small garage, start with a short rail sized to the tools you actually use. Measure the active face, tool projection, hand room, and nearby door movement with the shop in use. Choose fixed mounting for an approved support or a removable strip for flat, suitable steel, and give bulky or poorly balanced tools a separate storage spot.
More from Amazon
Programs that pair well with the guide above. Offers and eligibility are set by Amazon and may change.
Collect the home and kitchen items you want in one registry that guests can shop from.
Create a wedding registrySet up recurring deliveries of everyday items on eligible products. Terms and savings are set by Amazon.
Explore Subscribe & SaveFree shipping on eligible items, Prime Video and more. Eligible new members can start with a free trial.
Start a Prime free trialAudiobooks and podcasts to listen to on the go. Eligible new members can start with a free trial.
Try Audible freeAs an Amazon Associate we earn from qualifying purchases.