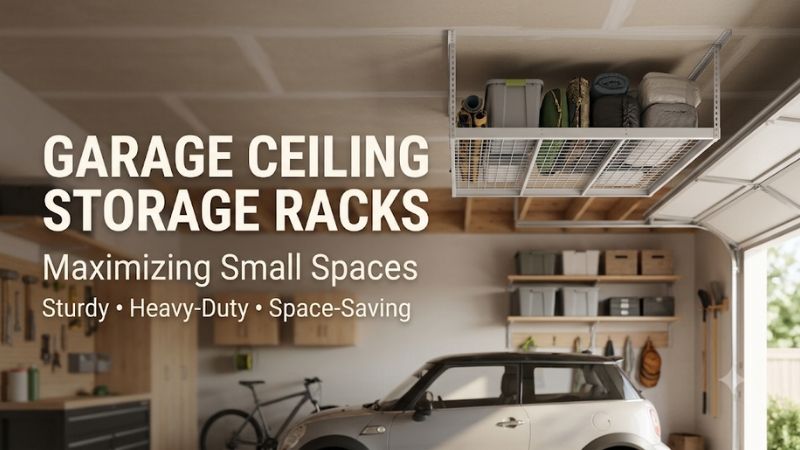
A garage ceiling storage rack for small spaces pays off when you can still park, open the door, and take down a tote without emptying the garage first. The best location is often a short bay or a narrow strip beside the vehicle. Measure the moving parts, loading space, and bins before choosing the rack’s shape and drop.
How to measure for a garage ceiling storage rack for small spaces
Measure the garage in its normal condition, with the usual vehicle parked and everyday equipment where it belongs. Mark the areas that need to stay open for people, doors, and maintenance. Then screen each potential mounting area for space above the deck, space below the rack, and a practical way to retrieve a container.
Draw the occupied ceiling before marking storage space
Start by drawing the walls, door tracks, opener, lights, and any ceiling hatch. From the floor, a pale surface between fixtures can look like a continuous bay. Once you add locations that require maintenance access and zones used by moving parts, you may find that the usable space is a small rectangle or an offset strip.
Draw the garage from above and from the side. The top view lets you judge whether a compact deck can sit alongside the opener rather than crossing it. The side view captures how far the rack and its contents hang into the room. Include the heights of the objects you handle, the way the vehicle opens, and the working area around any tools or appliances.
Now add stationary items that take up space below the ceiling. A workbench near the wall can make one edge of a rack impractical to approach. A raised bike or a tall cabinet can occupy space near the rack even if the storage pieces do not touch. Mark the floor spots where you can position suitable access equipment under normal conditions. That is the geometry that will determine whether a partly loaded rack remains usable.
Use the drawings to screen locations. Bracket positions come from the exact model’s manual, and the supporting structure needs separate confirmation. A clear patch of ceiling can be a promising place to look, but it does not tell you where a connection is possible. Have the actual framing and proposed loading verified when there is uncertainty.
Track the garage door and vehicle through their full movements
An open sectional door can look safely under a spot when it is stopped. During movement, the panel and hardware may enter a larger envelope. Check the full cycle safely and refer to the door and opener information. If you cannot verify the envelope or maintenance clearance, have a qualified garage-door professional establish it.
Mark the travel of the door panels, rollers, opener arm, and other components relevant to that location. Observe from a safe place. Use the resulting boundaries to screen the entire rack, including approved accessories or stored items that extend below the deck. Leave the clearance required by the relevant equipment and its service instructions.
Next, check the vehicle in its actual position. A car’s roof may comfortably clear a rack while its open hatch travels into the same area. A taller passenger may stand directly beneath the rack when loading the trunk. A roof box or seasonal carrier can change the dimensions. Include features you truly use throughout the year. A garage that fits on a typical weekday should still work on the days you use those features.
If a suggested position depends on the door or vehicle opening to a reduced height, consider whether everyone can use the garage safely and as intended. Moving the rack to the side or choosing a narrower deck often preserves more useful space. Plan storage around existing equipment and its prescribed operation.
Work out the actual headroom above and below the deck
Published drop and useful bin height are two different measurements. Look at the model’s drawing to identify where its stated height begins and ends. Then calculate the space beneath the lowest projection, including the frame and any approved accessory or load that hangs below the main storage deck.
For example, a ceiling at 102 inches and an assembly reaching 18 inches down leave 84 inches of clear height under that part. At 24 inches of drop, the same calculation leaves 78 inches. Those examples are starting measurements. Compare them only with fixtures or moving objects that pass through the same area, then allow the required clearance around that equipment and how people use the garage.
Above the deck, measure the opening a bin must travel through. A 14-inch-high box may appear to fit under a 16-inch opening. A latch, raised rail, or the upward motion needed to shift the box can use most of that difference. Make a floor-level mock-up with light materials. Reproduce the approximate deck edge and the overhead barrier and try an empty container to see how the move works.
You may be able to keep a shallow drop by using shallower totes and redistributing lightweight contents. That change can be economical if you are storing fabric or flat decorations. Tall rigid gear may be better in a lower location. Decide on the bin and the rack configuration together, since either one can move your available headroom by several inches.
Measure the work of retrieval as carefully as the installed rack
Walk through the proposed retrieval with the vehicle and bench in position. Find the clear floor area in which you will use appropriately selected access equipment. Then find a stable place to put a tote after lowering it. The access area may need more room than the space you use to park or pass beneath the rack.
A garage can accommodate a rack above a hood and leave no safe way to reach its nearest edge while the car is parked. That arrangement might suit items that come out twice a year. It becomes inconvenient if the same household reaches for the container every couple of weeks. Give overhead space to items whose retrieval schedule matches the access you will have.
Think about the intended users. A comfortable reach varies by person, ladder, and tote. Do the preliminary checks at floor level and follow the rack and access equipment instructions for actual use. If a particular item requires awkward overhead handling, another person or another storage type may be appropriate. Keep heavy and hard-to-grip objects low.
Record the location that works when the garage is busy. If the spot also serves as a bicycle parking area, workbench stance, or route to the house, you may need to move those activities for every retrieval. Place the most frequently used gear where it can come down without disrupting a normal day.
Choose a rack shape that works in a small garage
Think of the deck as a set of reachable tote positions. A compact square works in a short bay if one or two edges can be approached. A short rectangle can make up for limited depth with width. A long, narrow design keeps a row visible if the full ceiling strip and its mounting locations are suitable.
A compact square for a short, clear pocket
A square rack can make use of an isolated ceiling area bordered by a light, wall, or other obstruction. Its depth and length stay similar in either direction. Decide which edge will serve as the entrance for the bins before choosing a model, then check if the positions at the rear remain reachable or should be left open.
A 45-inch-square platform is a useful reference. The HyLoft 00625 also lists a 16-inch minimum adjustment, making it an example of a compact deck with a shallow setting. A 48-inch square is only three inches larger in both directions, but another product may have a substantially deeper minimum drop. Confirm both dimensions and mounting arrangements. A footprint match alone cannot tell you whether either rack leaves enough room below.
At floor level, arrange your current totes in a square and try removing the ones behind the first row. If removing a rear tote would require moving the rest of the deck’s contents, rearrange the inventory along two reachable sides or reduce the number of containers. For single-edge access, smaller containers may make a diagonal or staggered layout easier to manage.
Keep the low-frequency group toward less convenient positions, provided they are still safe to reach. Put the most accessible items near the edge, following the manufacturer’s loading directions. The goal is a compact shelf that stays easy to use after the first month, with space for somebody to put a bin back correctly.
A short rectangle beside the opener or behind the door
A short rectangular rack often fits when the clear span ends at a fixture or the garage’s ceiling is divided by equipment. A 3-by-6-foot deck offers more row length than a small square and less depth than many full-size racks. Its long edge can face the open area where you can retrieve the most commonly used items.
Say the clear ceiling area is 76 inches long, with a light at one end and a door track near the other side. A six-foot deck looks promising on length alone. Add the externally projecting hardware, approved bracket layout, a safe margin for operating equipment, and room for service. A smaller deck might fit those real constraints better if the catalog footprint takes up almost the full span.
Put the largest container at the point where the loading opening is widest. Check whether each bin can be lifted from its own spot without hitting a neighboring support. Label the ends you can see while standing below. If you can use a single row of medium bins, the design avoids repeated moves to reach things at the back.
Short length does not tell you the minimum drop. Compare that specification at the same time as the nominal shape. A rack that fits between fixtures can still leave too little headroom beneath the deck. In that case, the right move may be selecting shallower containers and a model with a documented setting that accommodates them.
A long, narrow deck where a wide rack would intrude
A narrow deck can preserve a strip of clearance over the middle of the garage while keeping storage along one side. It is useful when you need more length for a single row of totes and have compatible framing along the run. Inspect the ends of the proposed installation as carefully as you inspect its midpoint.
Set out an eight-foot row of boxes with the labels and handles pointing toward the expected loading edge. A design around 32 inches deep may offer enough room for a range of ordinary bins, but check the actual deck opening for your containers. A case oriented on its side to fit the row may be harder to grip or may require storage conditions the manufacturer does not allow.
Trace the usable edge along every part of the run. If shelving or a bench occupies half of the access strip, the real advantages of the longer deck can disappear. Check where the rack crosses a bright light that you rely on or affects an adjacent fixture that needs service. The best part of an eight-foot rack may be only six feet long if those problems remain.
A long arrangement also affects more framing positions. Confirm the complete span and installation requirements. If two compact racks would fit around a central obstruction, have their proposed mounts and combined loads evaluated together. Each rack may fit individually while using parts of the same structure.
Plan the rack around the way the garage is used
A small garage can have different restrictions on a weekday and a weekend. Design around the use that happens most often and check whether seasonal work still fits. The following examples show how parking, headroom, and workshop activities change which ceiling location is worth using.
One-car garage with a vehicle parked every night
The best starting point is a location where the rack can remain independent of the vehicle’s normal use. Draw the vehicle’s parked position, open doors, and hatch sweep. Look for a short area near one end or a ceiling strip beside it that leaves room to use the garage and provides a clear place for retrieval.
Build the plan around one job, such as loading for a camping trip. Decide whether that job normally happens inside or outside the garage. If the vehicle is often pulled out for packing, a ceiling position over its parked outline can make sense for camping gear. If it stays in the garage while you use the surrounding area, a rack that depends on moving it will be less useful for anything needed on short notice.
Preserve the normal route from the house to the vehicle and from the vehicle to the garage exit. Consider what people carry on that route. It may include groceries, sports bags, or a long household item. An overhead rack can preserve floor area but create a new obstacle along a path that rarely appears in a product picture.
A compact rack and a small lower shelf can work well together. Put light seasonal gear overhead and give daily tools, cases, or heavier items a separate lower spot. This lets you keep the overhead setup small enough to preserve access to the entire bay.
Low ceiling with a door opener and several lights
With limited overhead room, rank rack settings before comparing capacity. Find the lowest permitted position that clears the equipment below, then check whether any available rack setting provides enough useful space above its deck. If the candidate is close to the boundary, have the actual layout checked instead of relying on rounded dimensions.
Short, flexible bins can make the difference. For example, a household with tall storage tubs for decorations may find that shallow containers with similar contents are easier to handle and allow a higher deck position. Review cost and packing efficiency while doing the mock-up. If you need several new totes, compare the full setup with a suitable wall shelf before ordering.
Look at where the shadow of a loaded rack would fall. A light hidden behind a tall tote may no longer serve the center of the garage as well as it did before. Preserve adequate lighting along storage access and the area where you walk or work. Treat the full height of the planned bins as part of what will occupy the ceiling space.
In some rooms, the overhead area works for only one or two categories of light gear. A small rack still has value when it frees a specific part of the garage. If there is no suitable structural location and no practical clearance for retrieval, a shallow shelf mounted as directed to a suitable wall may be the more usable answer.
Shared garage with bicycles, cabinets, and a workbench
A garage used for repairs or bikes needs clear paths for items that are wider or longer than a person. Map how a bike turns into its storage position and how long stock reaches the bench. A ceiling rack can help by moving lightweight seasonal bins away from those paths if its access position does not compete with the workshop.
Place a bike in its normal position and carry typical equipment through the garage. Account for the height of bike handlebars and for any approved wall supports already in use. If a bench stands below the preferred ceiling bay, confirm the rack has a separate access position that does not require using the bench as an access platform.
Check cabinet swings. A tall door can pass through space required for the rack or its access equipment even if the cabinet body fits under the deck. Try opening adjacent storage with the loading position marked on the floor. If the door and access area conflict only occasionally, move the ceiling items infrequently. If the cabinet needs to open every time you use the rack, revisit the location.
Give priority to items that finish a project. Hand tools, clamps, sandpaper, and repair supplies should stay where you can reach them while working. Seasonal cases and soft gear can occupy the overhead area. This keeps the working surfaces free and ensures the overhead rack is not part of the routine every time you start a repair.
How to keep a compact rack useful once it is loaded
The best rack layout preserves a way to find, grip, and remove each container. Pack the rack by realistic access frequency and weigh containers loaded. Review the exact instructions for how the load must be distributed, then keep the setup within the limits approved for the product and structure.
Use containers that fit and leave room for hands
Pick bins based on their outside dimensions and grip. A short container with easy handles can be simpler to retrieve than an oversized box filled because there is space inside. Start with the pieces of equipment that need a particular shape, then find the shallower or more manageable size for everything else.
Label the side you can see from the floor. Two labels can help if you access the rack from adjacent edges. Place frequently retrieved items toward the accessible side, subject to the prescribed load arrangement. Keep a simple list of the heavy or bulky cases that belong on lower storage so they do not drift into an overhead position.
Do a final check whenever the garage changes. A new opener, different vehicle, added shelving, or replacement totes can alter clearances. Update the rack inventory when contents get heavier. Several extra items distributed without a plan can make the garage arrangement differ substantially from the one you originally had evaluated.
Know when a smaller rack or lower shelf solves more
An overhead rack should have a specific job. If you cannot name the totes it will hold, clear floor space in the garage first and see what needs a permanent home. The smallest appropriate rack often handles the seasonal clutter without taking headroom from a future vehicle or workshop project.
Ask whether the space you want back is actually on the floor. Moving lightweight bins from a standing shelf to a ceiling rack may let you remove that shelf or free it for tools you currently leave on the bench. If the shelf will stay full of the same things anyway, a new rack may add little. Choose a plan that changes the use of the room in a concrete way.
Conclusion
For a small garage, choose the rack by its accessible loading edge, its actual drop, and the dimensions of the bins it needs to hold. A shallow square or one-row deck often preserves more usable space than a large platform. Verify the full door and vehicle movements and have the proposed mounting and loads confirmed before installation.
More from Amazon
Programs that pair well with the guide above. Offers and eligibility are set by Amazon and may change.
Collect the home and kitchen items you want in one registry that guests can shop from.
Create a wedding registrySet up recurring deliveries of everyday items on eligible products. Terms and savings are set by Amazon.
Explore Subscribe & SaveFree shipping on eligible items, Prime Video and more. Eligible new members can start with a free trial.
Start a Prime free trialAudiobooks and podcasts to listen to on the go. Eligible new members can start with a free trial.
Try Audible freeAs an Amazon Associate we earn from qualifying purchases.