A digital torque wrench for small spaces needs a head that fits over the fastener, a handle you can move, and an alert you can detect from your working position. Measure the room around the socket first. Then choose a drive size and torque range that cover the job without adding unnecessary bulk.
What makes a digital torque wrench fit a tight space?
Choose the wrench around the tightest part of the job. Some fasteners have little room above the socket. Others are easy to reach straight on, but a nearby panel blocks the handle. An electronic display and a fine ratchet can help once the tool fits. Start by identifying which physical limit is in the way.
For a low-range job, a short fixed-head wrench such as the 12-3/8-inch ACDelco Tools ARM601-3 can make a difference. If the restriction is the head and the wrench needs to clear a nearby part, the slim 1/4-inch GEARWRENCH 85194 offers a different solution. A flex-head 3/8-inch model such as the 85195 may suit mid-range work. Compare their accuracy bands and drive interfaces before evaluating access.
| What blocks the work? | Feature to compare | Check with the complete setup |
|---|---|---|
| Cover directly above the bolt | Head thickness and socket height | How much space is left when the socket is seated |
| Bracket beside the head | Head width and socket outside diameter | Whether the wrench can approach on axis |
| Fender or frame near the handle | Overall length and grip position | Room for your hand through the final pull |
| Small return path | Ratchet arc | Whether the mechanism can reset |
| Tool must run around a nearby obstruction | Flex angle or approved offset accessory | Wrench instructions and effective length |
| Screen faces away | Audible or vibration feedback | Whether you can identify the target signal |
Measure the complete tool before buying
An on-paper fit becomes useful only when you include the socket, head, grip, and movement. You can often map the problem at the vehicle with a conventional ratchet and the same socket you intend to use. Keep the vehicle or equipment secured according to its service procedure while you check access.
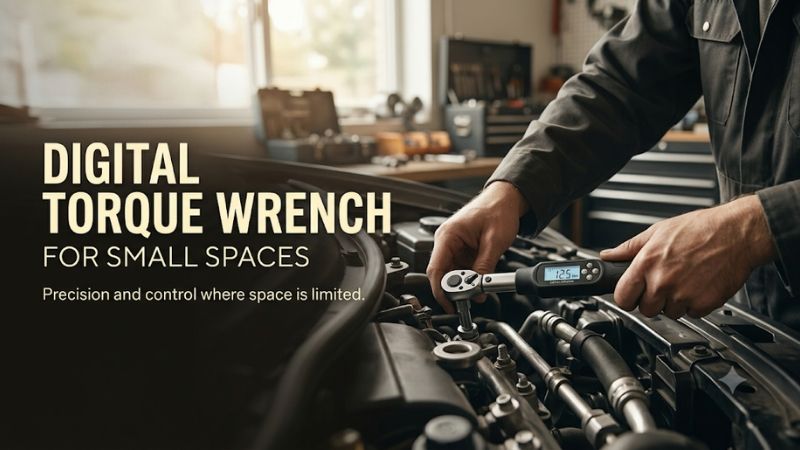
Measure the height above the seated socket
Seat the appropriate socket on the fastener with the equipment in its safe service position. Note how far it projects above the fastener and where the next obstruction begins. A shallow socket may free enough room for an electronic head. A recessed bolt or protruding stud can still require a deeper socket.
Remember that the drive tang inserts into the socket. Overall socket height and head thickness can help screen candidates, but a simple addition can overstate assembled height. If a manufacturer publishes dimensions for an assembled configuration, use them. Otherwise, compare a physical example or mock up the working stack using the actual socket.
Measure at more than one fastener when the same assembly has a repeating bolt pattern. An easy front bolt may have extra room that the rear bolt lacks. Buy for the hardest verified access point if the same tool needs to finish the entire pattern. If safe access requires a component to be removed according to the service instructions, include that step in your planning.
Check the width around the head
A shallow ratchet can still be too wide to fit between two walls or inside a recessed bracket. Measure across the available approach at the socket, then compare the widest relevant part of the head. The outside diameter of the socket also matters, especially around a flange or narrow opening.
Reducers and adapters can add width or stack height even when the drive sizes connect correctly. A native smaller drive can free space if its socket fits the fastener and its wrench covers the specified torque. Choose the smallest complete assembly that meets the job requirements, including the torque rating of each accessory.
Look for protruding release buttons or reversing levers if the available head clearance is very limited. If an obstruction presses the lever as you work, the head geometry is a poor fit even if the socket can reach. A mockup with the fastener fully seated exposes problems that a catalog photo can hide.
Mark where your hand has to travel
Tape a strip of paper or cardboard at the planned fastener center, then trace the handle positions you can reach. Allow room for your knuckles and wrist through the movement. Include the manufacturer’s grip location. Grabbing nearer the head just because a nearby panel blocks the handle can change how a wrench reads.
Ratcheting arc tells you about the rotation needed before the next engagement. It says little about the space available for the final pull. A fine head may reset several times in a narrow pocket, yet the wrench can still be too long to pull squarely when the joint tightens. Confirm a stable grip and a controlled stroke.
Consider travel at the handle tip. For illustration, a 3-degree rotation at a point 16 inches from the pivot sweeps about 0.84 inch along an arc. At 24 inches it sweeps about 1.26 inches. Those figures describe the geometry alone. Allow more room for the hand and any extra movement the mechanism or surrounding hardware requires.
Choose the head and drive that solve the obstruction
A flex head, a smaller drive, and a finer ratchet each solve a different access problem. Comparing them together is useful, especially when one feature forces you to give up something else. Start with the bottleneck you measured and buy the design that removes it while leaving enough torque capacity.
When a flex head helps
A flex head lets you aim the handle away from a nearby obstruction while keeping the socket seated. This can help around ribs, housings, or a bracket that blocks a straight handle. The amount and direction of flex vary, and each wrench has its own instructions for applying torque with the head positioned.
Before making the final pull, confirm the wrench can maintain the position through which it needs to travel. A handle that starts clear of an obstruction may still clip it after a few degrees. Keep the drive aligned with the fastener. Follow model instructions on head position, loading, and angle measurement when the joint requires a rotation stage.
A shorter fixed wrench can still win where the only problem is end clearance. It may have fewer moving parts to position and a simpler approach to a visible fastener. Compare a short fixed body with a longer flex-head model before assuming extra articulation will solve the actual problem.
When fewer degrees of return arc help
A 3-degree ratchet needs less nominal movement for the next engagement than a 5-degree design. This helps when you repeatedly have to reset the handle close to a wall. It offers little extra value on an open bench, where you can already reset and pull freely through a comfortable working arc.
Read how the manufacturer describes the mechanism. A ratchet with 120 engagement positions can use a mechanism other than a single gear with 120 physical teeth. For buying purposes, the published arc and head dimensions are the useful figures. Compare them with the clearance you actually have.
Consider a shallow 1/4-inch tool if the head is the limiting point. Consider a shorter 3/8-inch tool if the handle is the limiting point and your sockets already fit. If the fastener calls for torque beyond the range of those tools, find an approved service approach that accommodates the required wrench rather than forcing the compact option outside its limit.
How drive size and torque range interact
US garage wrenches commonly use 1/4-, 3/8-, and 1/2-inch square drives. Smaller drives often come with smaller heads and sockets. The drive size describes the connection, while the published torque range and accuracy band determine what the wrench can measure reliably for the intended task.
A 1/4-inch electronic wrench with a nominal 2–20 ft-lb range sounds appropriate for light work. If its published accuracy applies from 20% of full scale, that claim begins at 4 ft-lb, which equals 48 in-lb. A 35 in-lb fastener still calls for a different documented band. For frequent sub-48 in-lb work, a lower-range wrench or a suitable torque screwdriver may be a more appropriate purchase.
A lower-range 3/8-inch wrench can overlap a 1/4-inch model on torque and differ substantially in fit. Existing sockets can make the 3/8-inch tool convenient, but a shallow 1/4-inch socket may still be the only one that clears a narrow recess. Review the head, socket, and target together.
Understand extensions and offset accessories
An accessory can solve access while changing how steady the pull feels or how torque is delivered. Separate added reach along the drive axis from an offset that moves the fastener center away from the drive. Check the wrench and accessory instructions before relying on either arrangement at a safety-critical joint.
Straight socket extensions add reach
A straight, coaxial socket extension moves the ratchet away from the fastener along the drive axis. The handle can then sit above an obstruction. With the centers aligned, the extension does not change the lever arm in the same way as an inline crowfoot. Keep the assembly aligned and use suitable accessories.
Use the length that clears the obstruction and still gives you control. A long extension can make it easier to lean sideways and let the socket tilt or lift. If the space forces an angled approach, consult the service instructions and approved accessory guidance before the final torque pass.
A wobble extension or universal joint introduces different geometry when operated off axis. Follow the tool instructions for calibrated final work. A tool that reaches the bolt only when it is heavily articulated may call for a different service route. Keep track of whether you are solving a seating problem or merely moving the handle.
Crowfoot wrenches can change effective length
A crowfoot can reach the sides of a fitting when a conventional socket cannot pass over it. Its opening shifts the fastener center relative to the wrench’s square drive. When that offset extends along the handle centerline, it changes the effective lever arm and can change the torque delivered to the joint.
Some manufacturers describe using a crowfoot at 90 degrees to the handle so the in-line effective length stays the same. Confirm that the tool and application support that arrangement and that the orientation can be maintained. If the job requires an inline offset, use the formula or electronic compensation specified for the wrench and the actual effective dimensions.
A hypothetical example shows why the distinction matters. With a 12-inch effective wrench length and a 2-inch forward offset, an idealized inline calculation for a 60 ft-lb fastener target would give about 51.4 ft-lb as the wrench setting. Use the manufacturer’s specified method for the real assembly. Nominal overall tool length can differ from effective length.
Digital adapters can be economical when space allows
A digital torque adapter sits between a compatible handle and socket. It can reuse tools you already own and provides electronic feedback without the cost of another complete wrench. It also adds height to the socket stack. In a crowded recess, that extra junction can remove the working room you were trying to gain.
Check whether the adapter display faces somewhere usable and whether its signal is distinct from other equipment. Read its approved drive and operating directions and use it only within its rated range. If the adapter clears the work by just a fraction, test whether you can still seat the socket and pull without side loading.
A dedicated compact electronic wrench is often easier to position when height is the main constraint. An adapter becomes more attractive on an open bench or at a wheel, where the stack has room and budget matters. Compare the whole tool you would put on the fastener before deciding.
Pick alerts that work when you cannot see the screen
A display can be easy to read under shop lighting and disappear as soon as the wrench faces down toward a bracket. Plan for the actual working angle. If you will mainly rely on sound or vibration, verify which signal means you are approaching the target and which one means you have reached it.
Use the approach signal to slow the final pull
A visible light sequence or changing tone can help you anticipate the target. Practice the alert sequence on a suitable setup as directed by the wrench manufacturer. Pull steadily, and slow down before the target. This is especially useful with a long handle or a joint that reaches the target quickly once seated.
Check whether hearing protection, a fan, or surrounding shop activity makes a buzzer hard to distinguish. Vibration can help when the screen faces away, provided the feedback is clear through the way you hold the wrench. A single alert type can be sufficient when you have a clear sight line and a quiet setup.
An electronic alert generally gives you information while you provide the force. Leave enough room to stop the pull cleanly. If a cramped stance makes you jerk the handle or brace sideways, change your approach. The best wrench setup lets you apply a smooth pull from a stable position.
Plan the angle step separately
A torque-angle procedure calls for an initial torque and then a specified turn, sometimes in stages. Check the service instructions for both stages before putting the wrench into position. A short return arc can assist repositioning, but the tool’s manual determines whether and how angle measurement survives a pause or ratchet reset.
If the planned rotation cannot be completed by the supported method in the available space, establish another service-approved position or use an appropriate separate angle tool. Keep the socket fully seated and follow zeroing instructions. Some assemblies require replacement hardware and a particular order. Set the wrench up for the complete procedure before tightening the first fastener.
Practical examples for cramped garage repairs
Three similar-looking jobs can have different fit requirements. A recessed housing bolt needs height planning. A fastener by a sidewall needs an unobstructed pull. A fitting under a line may need an approved offset. Treat those as separate access problems when deciding what to buy for your garage.
Low-torque housing bolts near a lip
A low-torque housing bolt close to a raised lip can leave little room for a large drive or thick extension. First compare the specified value and unit with the candidate’s verified accuracy band. Then test a shallow socket of the proper size and examine whether the head can sit squarely above the bolt.
If the compact wrench reads below its accuracy band, choose a lower-range tool that fits rather than relying on the displayed number. If the service information describes a sequence for the housing, use the sequence. Consistent loading of a group of fasteners can matter as much as correct torque on any one bolt.
Mid-range fastener beside a sidewall
A 3/8-inch fastener near a sidewall can have good headroom and almost no space at the handle. Try positioning a short wrench with the same socket before deciding whether length is the issue. A flex head may route the handle past the sidewall and create a better position for the final pull.
If a smaller drive would need a reducer or put the torque value outside the tool’s band, keep the appropriately rated drive and change the access plan. Bring the handle into a stable position before loading it. Use the prescribed grip and take a deliberate pull with clear hand room around the target stroke.
Recessed fastener with room above the obstacle
A recess may trap the head where the socket first engages. If a straight extension lifts the ratchet above the obstruction without compromising seating, a standard fixed-head wrench may already solve the problem. Check for space around the exposed handle and be deliberate about keeping the extension in line with the fastener.
Compare that setup with a thin head alone. In one case you gain access by moving the wrench upward. In the other you gain access by reducing the total stack. Test whether either approach gives a clean line of force. If both fit, choose the one that gives steadier control at the specified grip point.
Frequently asked questions
These questions address the measurements shoppers frequently omit until they reach the fastener. Keep your socket and service specification available while comparing answers. The right head length on a retailer page becomes useful only when the complete stack, accuracy coverage, and final operating motion all work in the space.
Is a short handle always better in tight spaces?
A short handle needs less room near its end for a given angular movement. A longer handle may place your hand beyond an obstruction or provide more comfortable leverage. Measure your grip position and available path first. For a higher target, check whether you can apply a smooth pull with the shorter lever.
Should I choose 1/4-inch drive for every confined job?
Use 1/4-inch drive when it accepts the appropriate sockets, fits the job, and covers the target within its documented accuracy band. Some confined fasteners need more torque or a different socket geometry. A short 3/8-inch wrench or an approved straight extension may solve those jobs without exceeding a smaller tool’s limits.
Does a flex head measure angle in every position?
Read the manufacturer’s instructions. Wrench designs and angle procedures differ, including how the tool should be positioned and zeroed before a turn. If you have to flex, release, or reset the wrench during the movement, verify the supported procedure before starting the rotation on the actual fastener.
How do I avoid overpulling when the display is hidden?
Use a model with an audible or vibration pattern you can recognize and practice it on an appropriate setup. Approach the target gradually instead of pulling sharply. If the working angle leaves no way to identify the target reliably, choose a different wrench or an approved access route before attempting the joint.
Conclusion
For tight repairs, start with the component that limits access. Choose a slim head for low overhead clearance, a short body for limited handle room, or a flex head when the handle needs to clear a bracket. Verify the socket fit, accuracy band, and target feedback in the position you will actually use.
More from Amazon
Programs that pair well with the guide above. Offers and eligibility are set by Amazon and may change.
Collect the home and kitchen items you want in one registry that guests can shop from.
Create a wedding registrySet up recurring deliveries of everyday items on eligible products. Terms and savings are set by Amazon.
Explore Subscribe & SaveFree shipping on eligible items, Prime Video and more. Eligible new members can start with a free trial.
Start a Prime free trialAudiobooks and podcasts to listen to on the go. Eligible new members can start with a free trial.
Try Audible freeAs an Amazon Associate we earn from qualifying purchases.