A laser distance meter for small spaces needs a short minimum range, a housing you can seat flat, and a target you can hit squarely. In closets, alcoves, and cabinets, those details matter more than the advertised maximum. Check the tightest opening first, then decide which measurements still need a tape.
What makes a laser distance meter for small spaces work
A closet can be harder to measure than an empty room because trim, shelving, and hardware compete for the same narrow sight line. Evaluate the size of the opening, the physical tool placement, and the target surface together. Each can limit a reading your meter is otherwise capable of taking.
Start with the shortest reading you need
The minimum range is the shortest specified distance the instrument can measure in its supported setup. A tool rated from 6 inches can cover most closet widths while missing a 4-inch gap. A short-range spec matters when tiny openings make up a regular part of your work.
Use a tape first to inventory the shortest three distances in a representative job. For a laundry niche, those might be the open width at the floor, the depth from the front trim to the back wall, and the clearance behind an appliance connection. The first two usually need an inside reading in feet and inches. The last one might require a direct contact measurement or a gauge among pipes and other obstacles.
Specifications illustrate why model names and maximums tell only part of the story. Bosch lists a 6-inch lower limit in the GLM100-23 manual. Klein publishes a 2-inch minimum for the 93LDM200. Those figures are useful for screening, provided the instrument fits the position and the beam clears the housing and nearby obstacles. A 2-inch lower limit does little for you if the tool taps a protrusion before it seats.
Check how the manual defines the starting reference for the operating mode. The laser needs an unobstructed path and enough room for the optical system to get a reading even when the instrument measures from the front of its housing. For single-inch hardware offsets, a ruler, combination square, or caliper is usually easier to position. Keep it near the job so you can verify the smallest clearances directly.
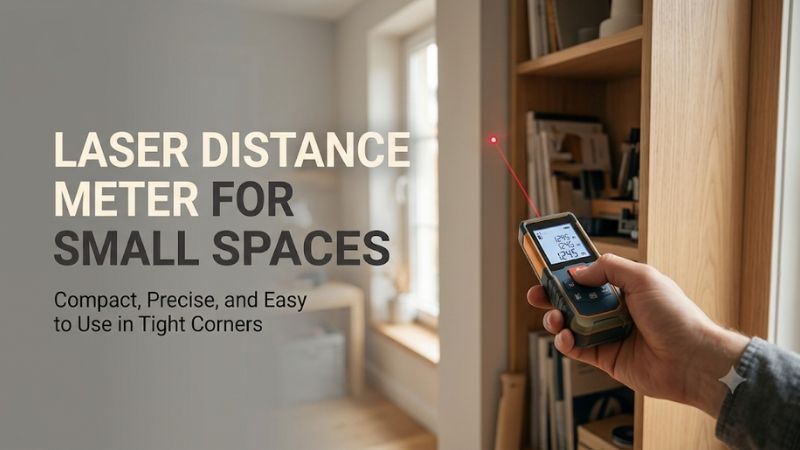
Check body shape, beam position, and buttons
Look at the back of the instrument the way you would look at the foot of a square. A broad, flat contact surface helps when the meter rests against a panel. Side clearance and button placement matter when a shelf, door track, or sidewall limits how you can hold it.
To see the difference, imagine taking inside widths under an existing bathroom vanity. The housing may touch a curved pipe while the laser exit appears open from above. Your finger can also push the tool off a square back face as you press the measurement key. A top button is fine where you can stabilize the body. When you can seat the meter with only a couple of fingers, a side button or another stable trigger position can help.
A useful buying check is to sketch the outline of the meter at full size on cardboard. Try the outline at the narrowest location and leave room for your thumb. Look at the drawing of the optics in the manual for the side from which the beam exits. A casing that clears a bracket may still send the beam into a hinge. If your buying choice depends on a millimeter-scale gap, test the real housing in the store or on arrival.
A wrist strap or pouch is useful in a crowded utility area, especially where the tool could fall behind fixed equipment. Route the strap away from the contact face so it stays clear when you seat the meter. If a rubber bumper or raised clip crosses that face, place the meter where the actual flat surface contacts the intended datum.
Read the reference setting before each new setup
The reference setting tells the device which point to include in its distance. Rear reference is convenient between opposing surfaces. A front setting or corner endpiece may help in specific positions where the meter is next to an edge or can reach only with the tip.
A simple example is an organizer between two sidewalls. Seat the rear against the left wall and aim at the right wall at the intended shelf height. The body occupies part of the opening, so a rear-reference result includes the distance behind the emitter back to the start face. A front-reference reading taken from the same position omits that part. A repeated response can look consistent even when the setting has put the datum in the wrong place.
Foldout endpieces are most valuable when an inside corner is otherwise hard to reach and reference behavior is clear. Confirm what happens when the piece is partially folded, fully extended, or pressed into an irregular corner. A thick bead of caulk, a damaged drywall corner, or a rounded base profile can keep the tip away from the point you mean to measure. Sketch the datum or mark it with removable tape if another person must reproduce it.
A change in reading close to the length of the housing is a clue that you should check the reference icon. A consistent smaller difference could come from a shim, panel face, or angle. Restore the normal reference after a special shot and record the state for the next reading. Look up whether the selected reference persists after power-down before relying on it across multiple visits.
How to size a closet, cabinet, or alcove with a laser
In a small opening, a useful reading has a named height, depth, and pair of contact faces. Decide which surfaces define the thing you intend to install. Then choose one or more repeatable positions where the beam can follow the direction those faces should be measured.
Create a matte target on the correct plane
Dark paint, textured surfaces, glossy tile, and clear glass can make a return harder to interpret. Try a light matte target with a clear mark in the middle. Position the presented face at the exact plane you need, especially when the finished clearance is already narrow.
For an alcove with glass on one side, aim at a removable matte card placed against the face you want to represent. If that card sits in front of the glass, its thickness can slightly shorten the displayed span. A paper target flush against the surface may be acceptable for a rough estimate. A thick block or target offset by a bracket requires accounting for the actual distance from target face to datum. Record whether the fixture will touch the tile, the backer behind the tile, or a separate shim plane.
Suppose a closet width looks smaller when the laser is lowered by five inches. Identify where the dot lands at each height. The lower shot may land on a baseboard instead of drywall, or on a pipe enclosure. Both values could be correct. The organizer design determines which one you need. Treat a target placed over an obstruction as a new plane and write down how you will account for it.
Catalog photos frequently show a clearly visible red or green dot in clean spaces. Your target may be concealed behind several identical white shelves. Label each shot with painter’s tape where appropriate, and pause after any interruption to verify that the beam still ends on the right object. Aim away from people and reflective surfaces such as mirrors.
Measure several heights and both depths
Walls and cabinetry are rarely perfect boxes. Measure inside width at the front and back of the installation and at each height that supports the part. A set of labeled dimensions tells you how the opening changes and gives you a way to verify the part’s path into position.
An entertainment niche is a good example. At the front, trim narrows the opening even though the interior is wider. A shelf may clear the front vertically when tilted, then hit a projecting mounting bracket as it rotates into position. Record front clear width, back clear width, and the diagonal available for moving the shelf. Verify any tight movement with a lightweight template of the actual part, including any lip or hardware that projects from the panel.
If the left and right sides are uneven, record measurements at the proposed cleat height, the face of the trim, and the back where the cleat ends. Ask whether a spacer, scribe strip, or chamfer is part of the installation before choosing the finished dimension. The smallest relevant span is often the controlling dimension, while a scribed fit depends on the contour at the actual point of contact.
Keep measurements of the installation and the delivery path distinct. A flat-pack cabinet may arrive in pieces and be assembled in the room. A rigid unit must pass a doorway and turn through a hall. Measure both the path and the final position before ordering. A full-size moving template can expose turns and handle clearances that a set of independent widths misses.
Catch slight diagonals before you trust the display
The beam measures along the path you aim it. In a small opening, tilting the body often shifts the endpoint to a different height or depth. Establish the intended horizontal or vertical line before taking the reading, and compare readings with the meter seated consistently.
Picture an alcove that is 24 inches wide on the intended line. A beam aimed 3 inches deeper than the starting point gives a diagonal about 24.19 inches long if the walls are parallel. The display may look precise, but the reported value describes a different path. The risk grows if the deeper shot also lands on molding or another plane. Mark the target location and keep the reference stable across repeats.
A small square or a spacer can help establish alignment on a known edge. Keep any spacer out of the reference plane unless its thickness is accounted for. If using continuous mode, a controlled sweep from a stable starting point can help identify a shorter return. Inspect the target throughout the sweep. A minimum reading on a pipe or narrow obstruction describes the distance to that obstruction.
Have the final number read back together with its labels. For instance, write “front width at shelf height, rear reference, finished drywall to finished drywall.” A handoff that only says 24 inches gives no way to distinguish left-to-right width from front-to-back depth. That ambiguity is expensive when the person cutting stock is at another location.
Choosing a laser distance meter for small spaces
Choose a measuring setup that covers your common opening and the shortest clearance you actually care about. A low minimum and accessible buttons can be worth paying for. Where the beam path is blocked, a tape or rigid measuring tool may solve the measurement more directly.
When a basic compact meter is enough
Typical closet surveys involve spans large enough for ordinary short-distance laser meters. A model with a readable display, clear units, and an easy rear reference can handle length, width, and an approximate ceiling height while you keep a physical tool for the last few inches.
Take a bedroom closet where you need widths of around 4 feet, a depth around 2 feet, and wall height. The smallest part of the estimate might be a 9-inch shelf section, which fits the typical minimum of a basic model rated from 6 inches. Most of the effort goes into recording which side has trim and confirming where the shelves stop. A paper plan with a clear label can be more useful than automatic area calculations when the opening has stepped edges.
Check the space to read the screen, especially in deep closets where you cannot easily move your head to the right side. A large backlit display has practical value if it presents fractions clearly. If you prefer decimal inches, make sure your saw setup or drawings use the same convention. A decimal of 0.25 feet equals 3 inches, while 0.25 inches is just a quarter inch. Consistent notation prevents an otherwise straightforward measurement from being copied incorrectly.
Buy the basic model if your shortest frequent reading is within specification and you can hold the tool along the intended line. Use the savings for a rigid rule or quality tape if your installs demand reliable cuts. Keep a pencil and low-tack markers where you can reach them while holding the unit.
When a short minimum or corner endpiece is worth it
A genuinely short minimum makes sense if you regularly need the open space between opposed faces and can place the housing without blocking its beam. An endpiece is a separate upgrade. It helps when the starting datum sits inside a corner or between surfaces wider than the tip.
Consider measurements around built-in bench seating. The main surfaces are open enough for a common pocket meter, but a recessed side gap may be about 3 inches in one direction. A model rated down to 2 inches could help if there is a stable reference and a flat accessible return. If the bottom and top have different widths, you’ll still want separately labeled readings or a direct checking tool.
For a deep inside corner behind a vertical partition, the smallest usable housing footprint may become more relevant than the lower distance specification. A slim foldout tip can create a defined point if it reaches the actual corner. Inspect the reference indication and keep the body in a position that aims at the matching point on the far surface. A perfectly seated tip with a mis-aimed beam still describes an unwanted diagonal.
When a short minimum and corner access solve regular work, compare both on an example opening before buying. A repeated job with restricted access can justify the premium. For a once-a-year fit check, a small combination square, slotted rule, or thin template can be more practical. Consider whether the contact surfaces are flat enough for that manual approach.
Where a tape, rule, or template belongs in the kit
A beam can cross a closet unobstructed but may miss the short, irregular details that determine the finished install. Use contact tools for hardware offsets, trim profiles, and cut marks. Use a template to check how a piece moves into position and meets uneven surfaces.
A classic measuring error comes from copying the back-wall clearance directly as the width of a shelf. First verify the front opening, then confirm the intended support height and areas where drywall bows inward. A stiff cardboard or thin hardboard template can show the scribe or eased corner that the actual material needs. For tooling or hardware that requires close tolerance, a rule or gauge can touch exactly where the dimension applies.
A tape can follow a curved face when you need the length along that surface. When you need a straight inside span and the blade cannot extend flat, a pair of sliding sticks can transfer the distance. Hold the sticks against the opposing faces, mark or clamp the overlap, remove them, and measure their combined length on a bench. Keep them aligned so the transfer preserves the right axis.
Use a tape when you need the physical location of a dimension from one fixed edge. A laser can indicate the overall length of a board or gap, while a rule establishes exactly where the cut line or screw center belongs. These jobs pair well because the first reports a span and the second transfers an endpoint directly to the workpiece.
Conclusion
Choose a meter with a documented minimum that covers your shortest recurring shot, then check that it seats securely and reaches a matte target. A basic compact model handles most closet layouts. Add a shorter-range meter or corner endpiece for repeat access problems and verify tight fits with a contact tool or template.
More from Amazon
Programs that pair well with the guide above. Offers and eligibility are set by Amazon and may change.
Collect the home and kitchen items you want in one registry that guests can shop from.
Create a wedding registrySet up recurring deliveries of everyday items on eligible products. Terms and savings are set by Amazon.
Explore Subscribe & SaveFree shipping on eligible items, Prime Video and more. Eligible new members can start with a free trial.
Start a Prime free trialAudiobooks and podcasts to listen to on the go. Eligible new members can start with a free trial.
Try Audible freeAs an Amazon Associate we earn from qualifying purchases.