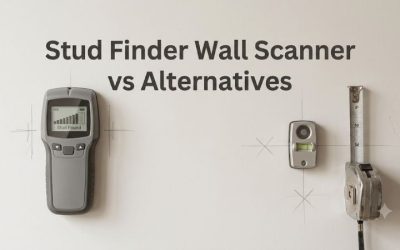
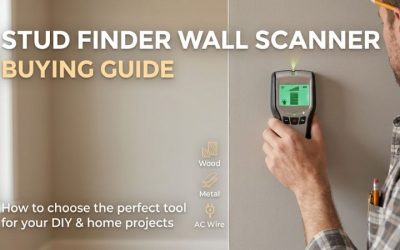
A stud finder wall scanner for small spaces needs to sit flat, travel far enough to give a useful reading, and leave you room to mark the wall. A long sensor array can be helpful on an open wall. Inside a narrow closet or beside a cabinet, a slim center finder or a separate reference line may make the job easier.
Choose a stud finder wall scanner for small spaces by access
A narrow area can limit three different movements. The scanner needs room to contact the wall, room to move through the scan, and room for your hand or pencil to transfer the result. Measure those paths at the actual project height. A product can fit inside the opening and still fail one of the other two checks.
Measure the available flat wall before comparing tool widths
Measure the uninterrupted wall area at the height where the bracket or rail will be installed. Include any cabinet edge, trim, jamb, or splash guard that stands proud of the surface. The width of the opening tells you whether you can place the scanner. The usable scan lane tells you whether the device can read a pattern.
For example, a wall strip may measure eight inches across, but a cabinet projection on one side could keep your wrist or the scanner body several inches away from the fastening point. A narrow housing makes contact possible. It may still need a starting position beyond the target, plus enough travel to see a result change. Check the model’s manual to understand that movement.
Put a piece of cardboard cut to the size of a shortlisted model against the wall. Reproduce the position of your fingers and pencil. Try to hold it flat with the other nearby surfaces exactly as they will be during the job. This quick mock-up can eliminate a scanner that seems compact when you look only at its front dimensions.
Account for the back of the scanner and its sensing footprint as well. Some products have a larger contact surface than you expect from the photo. Others have a relatively small body but require you to grip both sides or keep fingers away from a particular area. Use the tool according to the instructions so your hand position or a protruding edge does not interfere with operation.

Find room to verify a reading in both directions
A tight spot can make one scan direction easy and the return direction difficult. Start by checking the device instructions for the proper placement and calibration procedure. Where you can, reach the indicated feature from both directions and compare the positions. Treat a single reading made against an obstruction as an incomplete result.
In an open area, you can approach a probable stud from several inches away and watch the indication emerge. Near a cabinet, there may be enough room to put the tool on the wall but too little to see a useful transition. If it needs to start on a different area of the wall, move to a more open strip of the same surface above or below the obstruction.
A narrow strip above a trim piece can sometimes provide a useful scan lane. Mark a repeatable reference on removable tape or lightly in pencil where appropriate, then use a level to transfer that vertical reference. Verify the fastening location separately. A continuous vertical line does not rule out blocking, wall changes, or concealed services at the particular height where you want to drill.
When you cannot obtain a repeatable result on the same wall, look for accessible building information rather than trying to squeeze one more pass out of an unreliable position. Notes from an earlier installation, photographs made before the wall was closed, and an adjacent accessible space can help. Have the location checked if the uncertainty matters to the installation.
Plan how you will mark the result
A center mark is only useful if you can put it on the wall accurately. Some tools have a pencil channel. Others show a point or row of LEDs that you mark at an edge. Inspect where that point sits on the body and whether there is enough room to use it near a shelf or cabinet side.
An illuminated pointer can be easy to see on open drywall. Its value may diminish if a rail, backsplash, or shelf interferes with the view. A tool with a center channel can help in a narrow area, provided your pencil and hand still fit. Stand at the actual work position and check whether you can see the display and hold the scanner square at the same time.
If you plan to mark on tape, check the device instructions for the surface it expects. Some scanners are sensitive to changes in the contact surface. One approach is to use a small piece of tape beside the scan lane for notes, where it does not interfere with contact. Keep the final mark tied to a level or measuring reference that you can reproduce.
Record what the mark means. A dot can represent an indicated center, the edge of a reading, or an unresolved signal. During a closet installation several similar marks can accumulate quickly. Label questionable readings and recheck them before placing a bracket. Separating observations from fastening marks is especially helpful when the work takes more than one session.
Choose a scanner format that works in tight quarters
The best shape depends on whether you can move horizontally, see the display from the side, and use both hands. A simple center finder can be easy to aim between obstructions. A compact magnetic locator can help confirm fastener evidence. A spot-capable scanner has a role if the wall and required target are supported.
A slim center finder for narrow drywall strips
A slim center finder can make sense where there is a small lane of exposed drywall and an accessible position for the pencil. Look for a display, beep, or marking channel you can use when standing to the side. Check the scan path as well as how the tool feels in one hand.
The DeWalt DW0150 illustrates that workflow. It has a center-marking channel, directional indicators, and an audible signal. The practical comparison is how easily you can set and read the tool against your strip, rather than the number of indicators on the package. A full-width display may tell you more about an unusual signal but ask for more room to grip it.
If the planned screw position sits next to a cabinet, find out whether the scanner’s center actually reaches the spot. A tool placed against the edge of an opening can only report from its own sensing area. Transfer a verified reference from nearby when needed, and consider whether the two areas share the same construction and framing. Keep a separate check for possible wiring or plumbing at the hole location.
A compact center finder is often enough when you are replacing an organizer in a drywall closet and have room to verify the marks. It is less helpful where the entire opening is lined with metal or tile or there is insufficient flat contact. Buy a product specifically intended for the surface, or choose a different way to establish a sound mounting position.
A small sensor array for repeatable width clues
A compact array can show the indicated span so you can distinguish a narrow response from a broader region in repeated passes. The Franklin M70, with a listed three-inch display width, is an example of an inexpensive array. Compare the housing and grip dimensions separately from the published display width.
An array is a good fit when a small space still offers enough continuous drywall to place the device and move across a feature. Inside a closet, it can help where you want to draw a reference for a rail and the wall is open between adjacent shelves. Reading several lights at once can also prevent you from assuming a single beep represents the expected center.
Look at the layout of the area below and above the intended hole. A broad signal that appears only at midheight could be consistent with blocking or another feature. A repeatable line through several heights can be more suggestive of framing. Neither pattern establishes that the exact drill path is free of utilities. Treat the display as one view of the wall.
When hand room is especially limited, a compact magnetic finder can provide secondary evidence where fasteners are present and detectable. It can reach places a wider array cannot. Combining the two can make sense in a furnished room because each tool provides a different kind of clue without requiring you to remove built-ins.
A spot-capable scanner when a long sweep is impractical
Some scanners, such as the Bosch D-TECT120, offer spot detection. That can help when a continuous pass is difficult, provided you can maintain full contact and the wall material and target are supported. Compare the scanner’s actual body size and the mode you would use with the space around your intended mounting position.
Spot readings can help you examine several accessible points. They make the most sense when there is enough space to set the device fully and compare neighboring readings. You still need context. A single hit in a tight area could reflect nearby hardware or something else in the sensing area. Look for repeatable alignment and verify what the detected feature might be.
Metal components on furniture can complicate interpretation in a tight area. Visible shelf standards, cabinet fasteners, and corner details deserve a place on your working sketch. If a reading lines up with something you can see or already know is there, examine whether it can account for the signal before making assumptions about objects inside the wall.
Buying a premium tool for one tight spot can be hard to justify. If the regular work includes mixed materials and frequent restrictions on movement, the spot feature can make sense. If the immediate job is one shelf beside a built-in cabinet, you may be able to establish the framing from a nearby open section of the same wall and verify the proposed location separately.
How to handle common small-space installations
Different rooms create different kinds of ambiguity. In a closet, an earlier rail can obscure the easiest scan lane. Near a sink, the proximity of services can be more important than access. Beside a finished opening, multiple framing pieces and metal trim can affect what you see. Choose the workflow for the actual room.
Closet shelves and short wall-mounted rails
In a narrow closet, scan along an open section near the intended installation height. Check the area both above and below any existing shelf or rail. The goal is a repeatable indication of likely framing, followed by a layout that meets the shelf hardware’s instructions and keeps its fasteners in appropriate locations.
Decide whether the rail can span the support points you establish. A rail with multiple mounting slots can make it easier to use existing framing positions. A fixed bracket hole can give you less flexibility. Confirm the fastener and support requirements for the product before assuming the scanner needs to find a stud at one exact position.
Older closet installations may leave screws, drywall repairs, filler, or sections of added material. These can complicate readings. If one pass changes only where a previous bracket sat, examine that area from a different height. A nearby exposed face can provide a cleaner reading. Compare observations rather than ignoring a repeated anomaly because the planned rail must sit there.
Mark each verified position and line up the rail using the project instructions. A reference indicated on the scanner is separate from the load capacity of the assembled shelf. Follow the specified mounting method for the verified wall type. When the product needs framing at positions you cannot establish, reconsider the support layout before making holes.
Brackets beside cabinets and built-in units
A cabinet creates a narrow lane and a known source of fasteners. Examine the cabinet edge, visible attachment points, and the adjoining drywall. Compare scan results farther from the cabinet and at another height. Do not expect the edge of the cabinet to reveal the center of a framing member by itself.
If you can see a cabinet screw, its position may give you a starting reference. It may also be attached to a rail, blocking, or another support. A line of screws consistent with other framing evidence is more informative than one visible fastener. Check whether the required bracket location is on the same wall and whether the construction changes at the adjoining panel.
Hold the finder where the sensor can lie flat. Reaching around a projecting cabinet can tilt the tool just enough to change contact. If you do not have flat space for both the scanner and the grip required by its instructions, move to a better scan lane. Transfer only repeatable results, then check the final spot and its likely utilities separately.
This is a case where a small tool can save time. It is also a place where a metal response remains ambiguous until you understand it. If you encounter unexplained metal at the proposed hole, stop and investigate. A protective plate or another building feature can be present where framing seems likely.
Bathroom and laundry walls near fixtures
In bathrooms and laundry rooms, trace plausible routes for supply pipes, drains, and electrical cables before settling on a mounting point. Look at both sides of the wall where accessible. The location of a nearby sink, shower, receptacle, or washing machine can matter more than the convenience of a clear stud indication.
Identify the surface first. Plain drywall beside a fixture and a tiled wall above it may need different tools and procedures. Many stud finders specify drywall, and some app scanners expressly exclude tile. A suitable sensor mode or a clearer area of the same structure may help you build a better understanding. A negative scan does not establish that the wall contains no pipes or wires.
When you need to install a towel bar, small shelf, or similar item, check whether the product permits another mounting position or a different compatible installation method. A location with better access, known framing, and a clearer utility picture can be preferable. Choose the position and fastener only after establishing what is suitable for that specific surface and project.
If the job involves a safety-critical mounting, significant load, or a service route you cannot establish, have the condition verified by a qualified professional. The right outcome is a known support and a suitable path for the fastener. A scanner is one way to gather evidence about those two questions.
Short walls around doors, corners, and alcoves
Doorways and corners can contain more than one framing member, metal corner bead, fasteners, or a change in backing. Those features may produce readings that look different from a simple stud behind open drywall. Do a comparison pass on a more open section and return to the tight spot with a reference for what ordinary framing looks like.
Check whether an indicated feature continues up the wall or changes near the opening. A broad reading beside the jamb may be consistent with several framing members, but other details can affect the result. Look at visible construction and consult building records or accessible views when useful. Treat a customary framing layout as a starting point for verification.
Do not force the body into the angle. Keep the scanner flat and hold it in the orientation the instructions prescribe. If the expected point sits closer to the corner than the scanner can reach, measure what you can verify from an adjacent area and reconsider the bracket location if needed. Adjusting a layout can be a better use of time than trying to make a weak signal support it.
For a narrow alcove, make sure you can mount and level the object after marking. The tool may fit where a drill, driver, or bracket does not. Measure the full project, including the working room for approved fasteners, before choosing a scanner solely to fit a particularly awkward strip.
How to decide whether the tool fits before buying
Use a tape measure, a cardboard outline, and the exact product manual. Check the device width and thickness, how you grip it, whether the readout is visible, and where the mark goes. A small scanner earns its place when these measurements let you complete the task without compromising contact or confidence.
Make a mock-up with the object installed on paper
Mark the positions of the nearby shelves and bracket holes on a simple drawing. Put the cardboard scanner outline against the wall at the project height and check its travel. Run the same exercise a few inches higher and lower, where a verified vertical reference might be available. Record any position you cannot reach.
Test where the pencil or removable notation would sit. A scanner with a clear center mark may still require a second hand at an awkward angle. If you can only make the mark by lifting the sensor away from the surface, choose a tool with a better channel or establish a stable reference elsewhere. Buy for the whole workflow, including the moment you transfer the result.
Then rank the candidates. Give first consideration to tools compatible with the surface, then to those whose shape allows effective contact, and then to displays and extras. That order makes it easier to avoid paying for depth or app features that won’t improve the one spot you need to reach.
Allow for a result you cannot resolve in the available space
Before starting, decide what you’ll do if the readings disagree. Look for an approved scan lane, examine accessible building information, and use corroborating evidence where it is available. A suitable alternative bracket position or mounting method may be easier than trying to change what a confined space lets the sensor see.
If an unexplained signal or possible service route coincides with the proposed fastener, treat that location as unresolved. Do not use a pilot hole as a test. Use a location and support you can verify, or have the area assessed. That is especially important when the finished surface makes inspection and repair inconvenient.
Conclusion
Choose a compact center finder or small sensor array for narrow drywall with enough room to scan and mark. Measure the tool, grip, and pencil access at the actual project height. If the direct approach is blocked, verify a reference from an open section and check the intended fastener location before drilling.
More from Amazon
Programs that pair well with the guide above. Offers and eligibility are set by Amazon and may change.
Collect the home and kitchen items you want in one registry that guests can shop from.
Create a wedding registrySet up recurring deliveries of everyday items on eligible products. Terms and savings are set by Amazon.
Explore Subscribe & SaveFree shipping on eligible items, Prime Video and more. Eligible new members can start with a free trial.
Start a Prime free trialAudiobooks and podcasts to listen to on the go. Eligible new members can start with a free trial.
Try Audible freeAs an Amazon Associate we earn from qualifying purchases.