A retractable extension cord reel for small spaces should reach the workbench without crossing the door path or leaving a connector in the aisle. Start with a short reel and a clear wall route. Pick the mounting location only after checking both the lead-in to the outlet and the cord you pull to the work.
How to fit a retractable extension cord reel for small spaces
A compact housing can still take up more room than expected once the bracket swings and the cable end hangs down. Start by mapping everything the assembly touches. The input lead, frame, moving cord, connector, and your hand each need clearance through the full range of use.
Measure the lead-in and the working cord separately
The lead-in connects the reel to a suitable supply receptacle. The advertised extension length generally describes the cable you pull from the reel. Start by checking the exact drawing or instructions for both lengths, then measure the two routes you plan to use.
In one garage, the outlet sits above a bench and the nearest approved mounting point is offset by several feet. The supply lead must reach it directly without tension at either end. Measure the bends and the path to the receptacle. A long working cord gives no extra supply reach. If the short lead cannot reach a suitable source, select another approved location or have a qualified electrician assess the space.
For the output path, picture a reel whose outlet end descends 6 feet before turning toward the task. A bench 13 feet across the room could require over 19 feet once the drop, turns, and slack are included. The actual requirement depends on the route. Use string or a soft measuring tape to trace the path without putting any electrical cord under tension.
Note the manufacturer’s extension rule. Some reels require full payout before a load is connected, and some specify different limits for wound and unwound cord. A model chosen for an eight-foot run can still introduce a long cable into the room if full deployment is required. Choose a shorter assembly that suits the rating and work route when excess cable would obstruct a small area.
Measure the body, bracket swing, and connector together
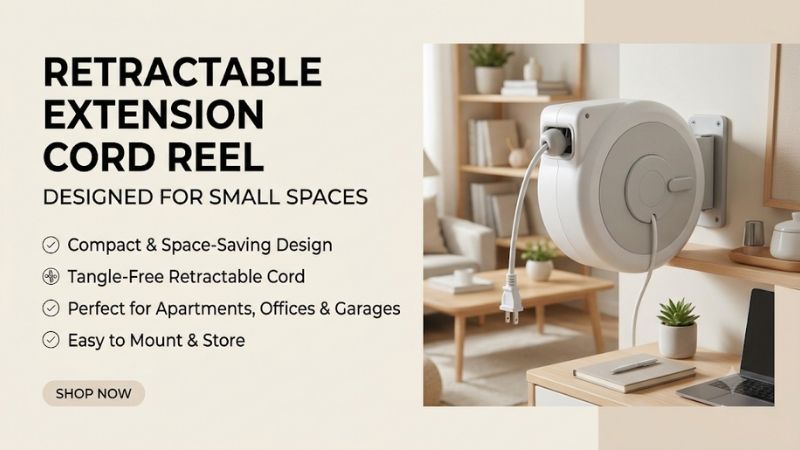
The housing dimensions tell you where the reel body fits. The bracket, mounting plate, and pull angle determine how it actually moves. Check the product drawing and make a full-size outline. Include enough room for your knuckles, the mounting hardware, and the plug.
On a wall between a cupboard and a bench, there may be space for the reel alone. When you pull toward the next work zone, a swivel may turn until the side of the housing approaches the cupboard. The outlet head can also park in a spot where a drawer opens. Mark the reel in its ordinary orientation and at the ends of the allowed swing. Keep the direction of pull within the maker’s limit.
The cord stop can help position the output where you reach it when the reel is stored. Allow clearance for the connector and for the tool plug once connected. Large outlet blocks and transformer plugs can extend the working shape. Check the height when the connector is parked, the direction it moves during return, and the place where you can hold it comfortably.
For a fixed bracket, mark the intended pull axis. The cable should come out along an approved path without rubbing on a cabinet, bench edge, or shelving post. If the best source and mounting point put those obstacles in the way, consider a rated portable cord for occasional use at that bench.
Map the garage door, opener, and everyday traffic
Trace the door and opener through their entire range of travel with the area around them clear. Consider how the reel and cord would sit while moving a car, lifting a tote, or carrying a project. A mount that fits when everything is parked can conflict with a moving part.
Start with the garage door fully closed and identify what sweeps backward or up when it opens. Rollers, tracks, rails, linkages, and the door itself can occupy different spaces during travel. Use the door maker’s instructions for safe observation. Keep the reel and both cords clear of those paths in every planned working position.
Then walk your routine through the room. If an exterior door opens into the bench area, note where someone will step. If the connector hangs over a car roof or hatch, consider how you retrieve it without reaching across the vehicle. A wall position on the work side of the stall may reduce overhead conflicts and provide a clear route with less cable.
Mark a place where the cord can be fully deployed if required and still stay clear of foot traffic. If the only route crosses the primary aisle, spans the doorway, or can be run over, change the layout. A nearer permanent receptacle can remove a route that even a short reel cannot make practical.
Which compact reel works for your most frequent task?
Most small setups are easier to manage when one short reel serves one predictable work area. The right model also depends on current, where the outlet head parks, and whether a bracket or swivel can move inside the available room. Review these before judging by cord length alone.
Choose a short reel for one dry workbench
A short reel can cover an occasional bench tool or task light while keeping the output easy to retrieve. Check the tool’s extension requirements and the reel’s current limit. Measure from the intended mount to all common work positions with the cord routed clear of your feet.
A 25-foot dry-location reel such as the 10-amp Flexzilla FZ8160253 shows how a short path can suit modest loads. A 30-foot model such as the 13-amp Bayco SL-801 is another option when the planned equipment and source need that rating. Compare the whole assembly, including the intended mounting position and the outlet head.
On a crowded worktop, a small end is useful if you only connect one tool. A triple tap can serve a light and another allowed tool when the combined load fits the whole setup. Read the nameplates and manuals first. The sockets share the assembly and source current.
If you connect the same device every day, compare the arrangement with a permanently located receptacle. The reel remains useful for temporary tasks that move along the bench. Put its parked end where it is accessible without reaching around shelves or pulling the power cord over a sharp edge.
Decide when wall mounting is more practical than ceiling mounting
A wall mount typically makes the parked connector easy to reach. A ceiling mount can free the wall for shelving and reduce the need to cross a bench. The better position is the one that has an approved structural support, a suitable supply, and a clear path to the work.
Imagine one bay with cabinets along the back and a narrow exit beside a car. A lower wall bracket could let you draw cable entirely along the work side. A ceiling position might need several feet of downward travel and could move the cord into the opener’s path. A layout sketch should show the reel in use and at rest. Include the full available cable if the instructions call for complete extension.
Another garage has the wall full of bikes and tools. An approved overhead position away from the door system may be more useful if the structure supports it and the end hangs within easy reach. Compare the installed bracket and reel weight, plus the force applied when pulling. Follow the manufacturer’s mounting instructions. Have the substrate evaluated if it is unclear what structure can support the reel.
A product advertised for both wall and ceiling use can still have limits on bracket orientation, rotation, or pull direction. Check the exact hardware supplied. Choose the location before the product if a particular bracket is the only way to keep the cord clear.
Compare outlet head size, cable flexibility, and return control
The head at the end of the cord may be the part you notice most in a confined workspace. A wide multi-outlet block needs clearance when it hangs and moves. A more flexible cable can help it follow the approved path. Check how the mechanism behaves near the stop.
If a large adapter occupies adjacent sockets or pushes the outlet block away from the wall, the extra sockets offer little benefit. Compare the orientation of the receptacles against the plugs you will use. Follow the equipment labels and use the reel as a single assembly. Select a different layout if the plug is hard to reach.
A compact garage can bring the returning head close to tool cabinets, glass, or car paint. Unplug loads before retracting and guide the connector back according to the instructions. A stop should place the outlet head where you can reach it from a clear, stable position. Look at where the last few inches of cord travel, especially if the center of the garage doubles as a parking space.
Check the rated environment. An oil- or weather-resistant jacket describes the cable. The housing, connections, and output head have their own limits. Use the complete assembly only where approved. If rain regularly reaches the chosen mounting area, consider a suitably rated portable setup or have an electrician assess a different source location.
How to plan a retractable extension cord reel for small spaces safely
Use a shortlist that includes the route, the power source, and the approved installation. Review your preferred reel with those measurements before drilling or buying bracket accessories. A small workshop becomes easier to use when each tool has a clear place to connect and a clear place to return.
Read the electrical limits before adding outlets
Compare cable gauge, assembly amperage, and how the manufacturer instructs you to deploy the cord. Check the tool manual for limits on extension length and gauge, and for any requirement to plug in directly. Use the appropriate grounded supply and circuit protection.
A fixture labeled 10 amps plus a pump labeled 4 amps would already call for 14 amps if operated together, before considering manufacturer instructions and startup. A 10-amp compact reel would be too small for that illustrated combination. Give loads that require direct power an appropriate source and use the reel for temporary compatible tasks within the complete assembly rating.
If the reel calls for full deployment, establish a clear route for the whole length. If it provides a lower limit for wound use, follow both ratings and any restrictions. If instructions are unavailable or unclear, ask the manufacturer about the exact model. Repeated breaker trips call for stopping and evaluating the load and setup.
Keep grounding and fault protection as part of the plan. An overload breaker and a GFCI have separate roles. Follow the requirements that apply to the location, and seek qualified electrical help if you are unsure about an older receptacle, grounding, or protection.
Mock up installation and work routes before you buy
Use cardboard for the reel body and string for both cords. Put them at the intended height, then walk the storage and work routes. Check vehicle and door clearance first, then look at bench access, the outlet head’s parked position, and where the extended cord would lie.
Do the mock-up with the work area set up the way it normally looks. A lid that stands open or a chair that moves under the bench can affect the path. Simulate attaching the thickest plug you expect to use and holding the connector while the cable comes back. If you need to grip it over a car or a bench crowded with tools, move the mounting position.
Compare the best mock-up with the exact bracket pattern and approved substrate in the manual. If the mounting surface is unsuitable, get advice before choosing it. A wall location with good cable clearance and proper structural attachment can make a smaller reel more useful than a long reel placed behind a major obstruction.
Make teardown part of the buying decision
After using the reel, disconnect equipment, guide the cable to its parked position, and inspect the cord and connector as directed. Choose a location where you can do that from a clear floor area. Put the equipment, consumables, and temporary cords away in their assigned places.
Pay attention to what happens when someone parks immediately after the work. The output head should be out of the path of a door or hatch, and the source plug should remain accessible. A documented setup is easier to use in a shared garage. Record the model and what loads or jobs it serves, especially if several similar outlets are in the same room.
If the first few sessions show that the cord is frequently dragged across a corner, unplug and reconsider the route. A shorter reel placed closer to the job may fix the problem. Where the task stays in one place, a suitable permanent outlet can be simpler for everyone using the garage.
Plan a setup that another person can use without moving the mount
A shared garage needs room for more than the usual operator. Walk the route as someone putting away a bicycle, closing the door, or reaching for a tote. Decide which work can happen at the same time and where the cable and end block should rest between uses.
A single-car garage might have usable wall space between the bench and a freezer. At first that looks ideal for a reel. But if someone regularly opens the freezer while the reel is in use, the handle can move into the cable. A more useful mount may be at the other end of the bench, where the line stays on the work side. Compare the layouts before buying anything.
Test the path with an empty garage and again with the normal arrangement of shelves and equipment. A parked vehicle can remove access to a reel you can otherwise reach from the center of the room. Tall boxes can limit the angle from which you hold the head. If using a wall bracket, check its usable direction with the normal furniture in place. If using the ceiling, account for storage and door hardware above the working area.
Write down the space you actually need for a close connection
A short run near a bench still needs enough slack and enough room to plug in safely. Account for the connector, tool plug, hand position, and bend in the cable. The distance from the mounting screw to the bench edge is only one measurement in the final working layout.
For a plug near the floor, make sure the cord can reach from the outlet block to the tool without pulling either connector sideways. A large adapter at the end can take up more room than an ordinary plug. In tight cabinets, leave accessible space to grip and unplug it safely as directed. Place the connection away from falling material and spots where a foot can trap it.
Imagine the longest approved tool or attachment at the bench. If it needs room past the mount to rotate, measure the work area independently of the outlet reach. The right assembly fits that space across several tasks, including tool changes and cleanup. Compare the work position with the moment you put the reel away. If returning the connector means reaching past a vehicle or stepping over an obstruction, try a spot closer to the bench.
Conclusion
Choose the shortest reel that serves the measured route and meets the equipment’s electrical requirements. Mock up the housing, swing, plug end, and both cords before mounting. Keep the reel clear of the garage door and traffic, and choose an appropriate fixed supply when a short reel would still cross the aisle.
More from Amazon
Programs that pair well with the guide above. Offers and eligibility are set by Amazon and may change.
Collect the home and kitchen items you want in one registry that guests can shop from.
Create a wedding registrySet up recurring deliveries of everyday items on eligible products. Terms and savings are set by Amazon.
Explore Subscribe & SaveFree shipping on eligible items, Prime Video and more. Eligible new members can start with a free trial.
Start a Prime free trialAudiobooks and podcasts to listen to on the go. Eligible new members can start with a free trial.
Try Audible freeAs an Amazon Associate we earn from qualifying purchases.