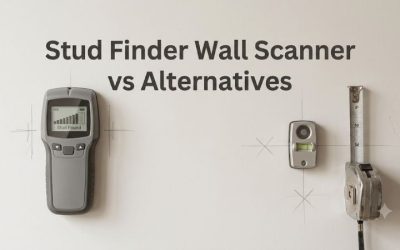
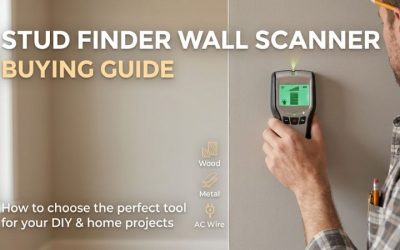
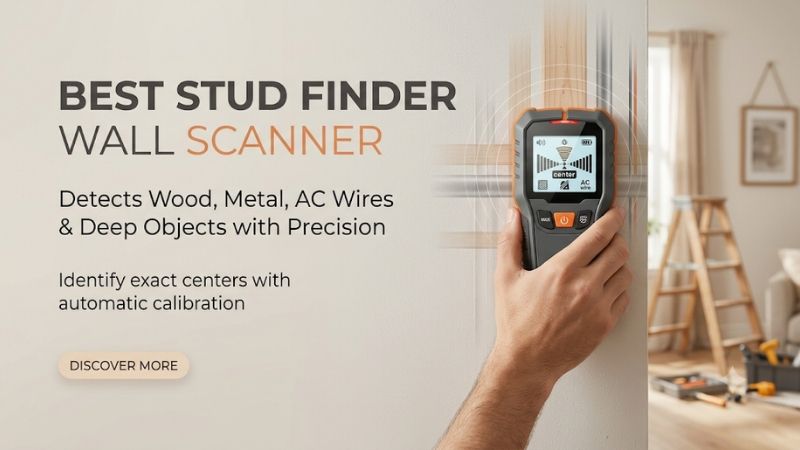
The best stud finder wall scanner depends on what you need to locate. The Franklin ProSensor M210 is a straightforward choice for finding framing behind ordinary drywall. The Bosch GMS120-27 adds dedicated metal detection, while a radar scanner is worth considering if your projects involve several wall materials.
Best stud finder wall scanner picks at a glance
Start with the wall you have and the information you need before making a hole. Finding two framing centers for a shelf is a different job from investigating a possible pipe behind a bathroom wall. The seven tools below range from quick full-width stud finders to scanners with material-specific modes.
| Model | Main detection approach | Standout feature | Best fit |
|---|---|---|---|
| Franklin Sensors ProSensor M210 | Electronic sensor array | 13 sensors and 21 LEDs show the indicated span | General drywall and repeated mounting projects |
| Franklin Sensors ProSensor M155 | Electronic sensor array | 9 sensors, 15 LEDs, and live-wire indication | A full-width display at a lower price than the M210 |
| Bosch GMS120-27 | Standalone multimaterial scanner | Center indication and dedicated metal detection | Drywall work with questions about steel or copper |
| Zircon MultiScanner HD900 | Separate electronic scan modes | StudScan, DeepScan, Metal Scan, and AC Scan | A midpriced tool with deliberate mode selection |
| DeWalt DW0150 | Electronic center finder | Directional indicators and a center-marking channel | Single-point marking for brackets and rails |
| Walabot DIY 2 | Phone-connected RF scanner | An app view of detected objects in supported walls | Visual mapping on drywall with a compatible phone |
| Bosch D-TECT120 | Standalone radar scanner | Drywall, universal, and concrete modes | Recurring work across several supported materials |
How these models were selected
The recommendations use published specifications, manuals, and how the results are presented. If you mount a few things a year, the marking process may matter more than the number of scan modes. If you do renovation work, material clues and suitable wall modes can justify a more elaborate tool.
Detection depth belongs to a specific target and setting. A scanner advertised to detect metal several inches deep may reach less than that for wood or live wiring. Likewise, a stud finder rated for a thicker wall surface under favorable conditions may behave differently over moisture, foil backing, tile, or irregular plaster. Use the figures for the exact material and model before relying on them.
These are specification-based recommendations. They include no independent measurements of missed objects, depth, repeatability, or performance on a particular house. Every model gives you evidence to interpret. If readings conflict, look for additional information from the wall layout, accessible adjacent areas, or a qualified professional. A clear screen or absent live-wire alert cannot establish that a location is safe to drill.
The best stud finder wall scanner for each use case
Choose the section that describes the work you actually do. Small repairs often favor a display you can read while keeping the tool flat. Broader renovation work can benefit from metal information, multiple wall modes, or a visual display that lets you compare detected features as you move along the surface.
Franklin ProSensor M210 for most drywall projects
The ProSensor M210 is the general-purpose pick for ordinary drywall. Franklin lists 13 sensors, 21 LEDs, a maximum detection depth of 1.7 inches, and a live-wire meter. The row of lights is designed to show the indicated width of an object, which helps you see how a reading changes as you move.
For shelves, picture rails, and brackets with more than one mounting point, the display makes it easy to compare readings across a stretch of wall. Sweep horizontally and mark a repeatable position. Then scan at another height to see whether the same alignment continues. A consistent vertical feature offers stronger framing evidence than a signal that appears only beside the original intended screw position.
The wider display can also help you recognize a broad or irregular region. That might reflect doubled framing, blocking, a transition in wall construction, or a different object. The pattern gives you a reason to investigate. For example, if the display stays lit across a wider area close to a doorway, check what happens farther above or below the original scan before interpreting it.
Franklin also lists a bubble level and pencil caddy. Those are convenient for marking, although a separate level is preferable when laying out widely spaced bracket holes. Verify the exact version if the center LED color matters. Franklin says that some M210 versions use a green center LED. Choose the M210 when quick visual feedback is your main requirement. Choose a dedicated material scanner if you regularly need to investigate pipes or other metal objects.
Franklin ProSensor M155 for a lower-cost full-width display
The M155 has nine sensors, a 15-LED display, and a published 1.5-inch detection depth. It includes a live-wire meter and shows an indicated span with a center cue. It is a good fit for buyers who want visual feedback across several points without paying for the M210’s wider display.
The M155 is useful when you are placing a small shelf or closet organizer and want to see where the reading begins and ends. Mark lightly at the project height and verify a second reading. The visible span can help you recognize when a center mark shifts after you change the height or direction of the pass. That is a more useful skill than trying to interpret every change in the number of LEDs.
Its live-wire meter is an additional clue. Wiring may be too deep, de-energized, shielded, or otherwise difficult to detect. Even if no alert appears, check the plausible path of wiring and plumbing. Pay particular attention to adjacent outlets, switches, fixtures, and the opposite side of the same wall. If you cannot resolve a concern, use another location or obtain qualified help.
Choose the M155 when the work is mainly locating likely framing behind drywall and you see value in the display. The M210 earns its extra cost if you regularly compare broad signals across several mounting points. For occasional standard drywall work, the M155 offers much of the workflow at a substantially lower observed retail price.
Bosch GMS120-27 for metal clues alongside stud finding
The Bosch GMS120-27 detects wood and steel studs behind drywall and can indicate metals and live wiring. Bosch lists maximum depths of 4 inches for ferrous metal, up to 4¾ inches for nonferrous metal, and up to 2 inches for copper wiring under the applicable conditions. Those figures describe different targets.
The distinction matters when a simple stud finder shows a narrow, isolated signal. A dedicated metal reading can give you another way to look at it. A small response might correspond to a screw, while a feature that continues in one direction could have another explanation. Compare the pattern at multiple positions and consider the pipe, electrical, and framing layout before assigning an identity.
The color-coded marking ring and center indication help you transfer a repeatable location to the wall. The unit includes AA batteries and a pouch. Bosch lists support for a separate compatible lithium-ion battery, which is an optional purchase. The display operates independently of a phone, a practical benefit if your tools move between job sites or several people use the scanner.
Choose the GMS120-27 when a no-phone tool with metal information matches repeated projects. For standard shelf mounting, a full-width stud finder can be faster to interpret. For plastic-pipe detection or mixed surfaces outside the GMS instructions, consider a scanner that expressly supports those targets and wall types. The strongest buying reason for this Bosch is the extra metal information alongside conventional drywall work.
Zircon HD900 for separate scan modes at a midrange price
The Zircon MultiScanner HD900 offers StudScan, DeepScan, Metal Scan, and AC Scan. Its standard StudScan mode is listed for wood and metal studs up to ¾ inch deep. Switch to the relevant deeper or dedicated mode according to the manual. The separate modes are useful when you want to investigate a particular signal.
For example, start with the appropriate stud setting on a finished drywall wall. If you see a broad or unexpected reading where a bracket would go, compare it with Metal Scan where appropriate. A metal response can tell you that metal is present within the tool’s capabilities. It does not tell you whether the material is a fastener, protective plate, metal stud, conduit, or pipe. The pattern and the surrounding construction remain important.
The mode-specific procedure deserves attention. Zircon’s instructions for stud modes call for placing the tool flat on the wall before turning it on and waiting for calibration before moving. Follow the separate directions for the other modes. Starting over a target or rushing calibration can make a reading harder to interpret. If a pass looks doubtful, restart from an appropriate position and compare a return pass.
Choose the HD900 if you want a dedicated metal mode and a U.S. listing around $60 but do not need a radar scanner. It suits a buyer willing to learn which mode applies to each question. If the job is marking many ordinary studs quickly, a simple LED array may be more convenient. For one or two wood-framing projects a year, a lower-priced center or edge finder can be enough.
DeWalt DW0150 for a clear center mark
The DeWalt DW0150 is a center-finding electronic stud sensor with directional indicators, an audible alert, and a center-marking channel. DeWalt documents wood and metal stud detection through up to 1½ inches of drywall and lists live AC detection. The center-marking channel is its best feature for straightforward layout work.
This model is useful when you want a clear pencil mark for one bracket, a row of hooks, or a rail. Use the indicated center as the starting point for verification. Check the same region at another height. If the center appears to shift significantly or the readout changes at a nearby outlet, decide why before treating it as a usable fastening point.
The directional and audible indicators can be easier to interpret when the tool is at the side of a cabinet or above a worktop. Check whether the marking channel remains accessible at the intended position. If the pencil cannot fit between the scanner and an obstruction, scan where the tool can sit flat and transfer a verified vertical alignment with a level as appropriate.
Choose the DW0150 if you prefer a centered marking workflow over interpreting a row of lights. It is a straightforward, moderately priced drywall tool. Its role is locating likely framing under the documented conditions. If the job calls for telling several materials apart or explaining an isolated metallic signal, use a more suitable material scanner and corroborate the result.
Walabot DIY 2 for phone-based visualization on drywall
The Walabot DIY 2 uses radio-frequency sensing and displays results in a compatible phone app. The maker describes detection of wood and metal studs, pipes, and wires, with a published maximum of about 4 inches under supported conditions. Its value is the visual representation you can compare across a larger pass.
Image Mode can be useful for a homeowner who wants to see how features align as the scanner moves. Expert Mode on this model displays rawer information that can help show complex patterns but also requires interpretation. The screen is a representation of detected signals. Icons and apparent object shapes should be checked against the layout of the building, the device instructions, and other evidence where needed.
Before buying, check your phone and the exact product version. The manufacturer directs direct-store buyers from the original DIY 2 toward the DIY 2 M, while some U.S. retailers have listed the original. Compare the current app requirements, package, and supported features for the model you can obtain. Keep the drywall restriction central to the purchase. The original DIY 2 instructions exclude lath and plaster, tile, concrete, and several other constructions.
Choose this model if you specifically value app visualization and most of the surfaces you need to examine are supported. A basic device is easier to reach for when all you need is a likely stud center. For a property with several construction types, purchasing one visual tool for every surface can create a gap between what the display offers and what the device is designed to scan.
Bosch D-TECT120 for recurring mixed-material work
The Bosch D-TECT120 uses radar and offers drywall, universal, and concrete modes. Bosch lists detection of ferrous and nonferrous metals, wood, live wiring, and plastic pipes in applicable conditions. The maximum published metal depth is 4¾ inches, and the stated copper-wiring maximum is about 2⅜ inches.
The reason to consider it is access to supported modes for several working surfaces. If you repeatedly deal with drywall, solid materials, and concealed-object questions, buying a purpose-built scanner can reduce how often you have the wrong type of tool. The center indication and spot-detection approach may also help when the room does not provide a long stretch for a continuous sweep.
Use its capabilities in context. A blank result cannot clear a concrete slab, a structural member, or a possible service route for drilling. High-consequence work can require site documentation and professional locating methods. A handheld scanner’s radar function adds evidence without replacing those requirements. Pay particular attention to the material and object types listed for the selected mode.
Choose the D-TECT120 if you have enough mixed-material work to justify the price and time needed to read and apply the instructions. For mostly ordinary drywall, choose the M210 or M155. For a standalone device that adds metal clues and costs less than a higher-end scanner, shortlist the GMS120-27 and confirm it supports what you regularly want to find.
What to check before buying your scanner
A headline depth or a long feature list can give two tools similar appeal on a product page. The differences show up in the type of wall you own and the way you transfer a repeatable reading to your project. Use these checks to choose the simplest tool that gives you the information you need.
Name the target and the wall separately
“Behind the wall” describes a location, not a specification. Decide whether you need likely framing, a metal response, a possible energized-wire indication, or a scanner intended to identify certain other objects. Then identify the surface between the sensor and the target, including any known paneling or added layers.
For drywall with standard wood framing, most of a basic electronic finder’s work is showing a change consistent with a stud. In an older wall with wood lath, recurring signals can reflect fasteners and backing layers. With tile or metal mesh, consult the exact device’s approved surfaces. Spending more on a drywall-only tool would leave the same compatibility problem.
Choose for the most common job and one realistic exception. A homeowner who hangs a shelf once and regularly adjusts a closet system may get more from a basic display than added modes. A homeowner who works on several walls near service routes can benefit from better metal or radar information, with independent verification where necessary.
Make the display part of your decision
Think about what you can do with the readout. A wall-mounted rail requires repeatable center marks across several points. A cabinet bracket in a corner can require a display you can read while changing grip. A remodeling task may need a record of the signal pattern before the exact mounting location is chosen.
Compare a point, a spread of LEDs, and an app view against the actual way you work. A center light is quick. A full-width display makes an unusual span easier to spot. A visual app can show more context but adds setup. Make the purchase about the type of question you need to answer, rather than how elaborate the display looks on the box.
Conclusion
Choose the Franklin M210 for frequent drywall layout, the M155 for a lower-cost full-width finder, or the Bosch GMS120-27 when you also want dedicated metal information. Consider the Bosch D-TECT120 for recurring mixed-material work. Verify repeatable readings and resolve any uncertainty about concealed services before drilling.
More from Amazon
Programs that pair well with the guide above. Offers and eligibility are set by Amazon and may change.
Collect the home and kitchen items you want in one registry that guests can shop from.
Create a wedding registrySet up recurring deliveries of everyday items on eligible products. Terms and savings are set by Amazon.
Explore Subscribe & SaveFree shipping on eligible items, Prime Video and more. Eligible new members can start with a free trial.
Start a Prime free trialAudiobooks and podcasts to listen to on the go. Eligible new members can start with a free trial.
Try Audible freeAs an Amazon Associate we earn from qualifying purchases.