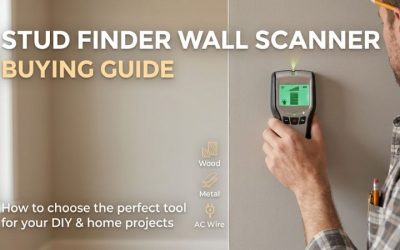
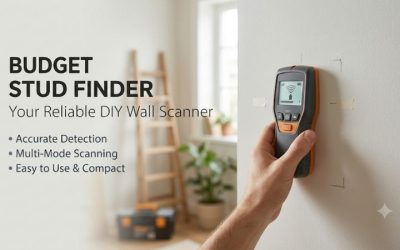
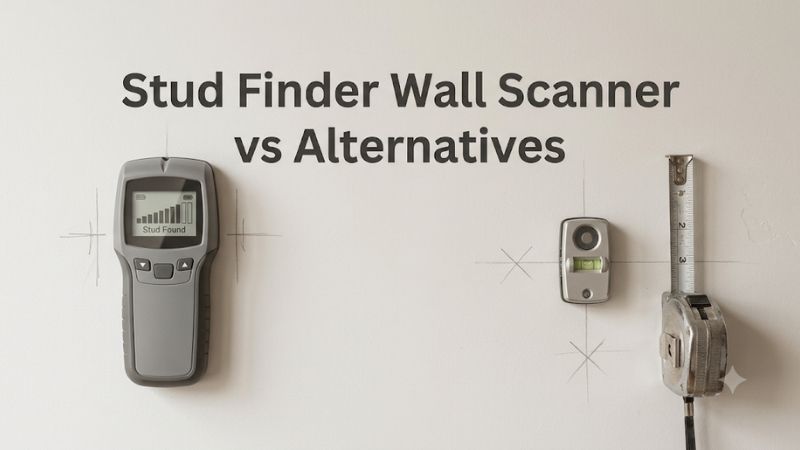
A stud finder wall scanner vs alternatives comparison starts with the evidence you need. A magnet can point to a drywall screw. An electronic finder can show a likely framing edge. A radar scanner can provide more context in supported walls. The right method depends on the surface and what you need to verify before drilling.
Stud finder wall scanner vs alternatives at a glance
Pick a method based on what the result will let you establish. Finding one probable framing line can be a quick job. Confirming a concealed service or suitable structural support can take several kinds of evidence. The options below show what each approach contributes and where another method has a clearer advantage.
| Method | What it contributes | Best use | Limitation |
|---|---|---|---|
| Basic electronic stud finder | An indicated edge, center, or span | Standard drywall with likely wood or metal framing | Material changes can mimic framing |
| Multimaterial wall scanner | Separate indications for selected targets | Projects with a particular metal or service question | The signal may not identify the exact object |
| Magnetic stud finder | A response to some metal fasteners or objects | Checking aligned drywall screws | Does not directly locate wood or clear a utility path |
| Measuring and visible layout clues | A likely framing or service pattern | Choosing where to scan first | Construction varies around openings and repairs |
| Tapping the wall | A rough change in sound | Screening an open section of a compatible wall | Subjective and poor for exact positioning |
| Radar or app visualization | A broader view of supported concealed features | Complex drywall or selected mixed-material work | Surface, target, and mode limitations still apply |
| Existing access, records, or professional inspection | Direct or independently corroborated evidence | Uncertain, high-load, or higher-consequence work | May require more time or specialist equipment |
Separate likely framing from a verified fastening point
A framing indication answers one part of a mounting question. You also need suitable support for the load and a fastener path that does not conflict with wiring, plumbing, or other building components. Decide which of those questions remains unanswered before comparing the tool you already have with another method.
For a light item on ordinary drywall, a repeatable indication and suitable corroborating evidence may provide what you need to choose a location. For a load-bearing installation or work near services, the same electronic signal has to be checked against the relevant building and hardware requirements. A successful earlier hole elsewhere on the wall cannot establish what is inside the next location.
Consider the consequence of getting the interpretation wrong. Missing a stud center can damage the finish or lead to an unsuitable attachment. Hitting a hidden pipe or cable can have a much more serious result. Choose a stronger verification method as the uncertainty and potential consequence increase. If needed, use a different location or get qualified help.
When an electronic stud finder is the simplest choice
A conventional electronic finder is generally a convenient starting tool when the wall is supported and the task is locating ordinary framing. It gives quick feedback across multiple positions and is easy to use alongside a level and pencil. The value comes from a repeatable pattern you can transfer to the actual mounting layout.
Use a center or edge finder for straightforward drywall work
For routine drywall work, an edge-reading model lets you check the feature from both sides. A center model can reduce the number of marks you need. A multi-sensor array adds a picture of the indicated span. All three approaches can be useful when you know the wall surface and have enough space for the required scan.
Suppose you are hanging a rail with several mounting slots. Scan the planned height and mark repeatable centers. Compare the same positions with another pass above or below. Lay the rail against the marks and see which positions meet the installation instructions. Transfer the fastening marks only after checking the support and possible service routes.
A center signal is especially convenient when you are working around furniture. An edge signal can encourage you to look for a plausible width before making a center mark. If the sensor indicates several unexpected positions, examine how each repeats and whether the wall has an obvious reason for a change. Use the display to notice exceptions and investigate them.
Choose an electronic stud finder when the regular job is locating probable framing and you want more precision than sound or measurement alone can usually give. Its speed is an advantage on a long drywall run. A different method may fit better when the construction is unusual, the unit cannot make proper contact, or you need to locate a separate material.
Use a separate material mode to investigate an unclear reading
A multimaterial scanner can help when a simple stud result leaves an additional question. A dedicated metal mode may detect a feature that needs more investigation. A live-wire alert can provide another clue under the model’s stated conditions. Compare the tool’s capabilities with the material you suspect is present.
For example, a narrow signal at one point on a supposed stud line could coincide with a screw, a different piece of metal, or something else. Map the feature across nearby positions. One isolated response and a vertical run of responses have different possible explanations. Look at the other side of the wall, nearby fixtures, and available building information before deciding what the signal means.
Treat missing alerts carefully. A de-energized, shielded, or deeply placed line may produce no live AC warning on a device that relies on detecting an energized field. Likewise, a metal mode cannot be expected to indicate a material outside its capabilities. A scanner helps you gather evidence, and uncertainty remains until you resolve it.
Choose a multimaterial scanner if you repeatedly need more detail than a standard stud finder provides and the modes match the walls you work on. If the question concerns a high-consequence drill point or an unusual structure, a suitable professional check can be the more useful step.
How the alternatives compare in practice
Each alternative can narrow the problem or add evidence that a standard finder does not provide. The strongest choice is the one that applies to the surface and gives information you can corroborate. For many projects, the best workflow combines two complementary observations before you choose a final mounting location.
Stud finder wall scanner vs a magnetic stud finder
A magnetic finder is compact, inexpensive, and often useful for finding steel drywall fasteners. It can help where an electronic reader gives a likely framing line and you want another observation. Its result is the location of magnetically detectable material near the surface. A pattern has more value than one strong attraction.
With a wall shelf, try locating several likely fasteners along the same vertical line. Then compare that line with a suitable electronic stud reading or other reliable information. An isolated magnetic hit can instead be a fastener for an earlier fixture, metal trim, or some other hardware. Check the wall above and below rather than equating the strongest pull with a safe center.
A magnet can be useful in an awkward corner or along a narrow strip where a bulky scanner will not sit flat. In some older walls, looking for a vertical pattern of lath fasteners can provide clues, although the construction may give complex results. Metal mesh or broad metal can make the pattern less informative. You still need to understand what lies behind the finish.
For a low-cost first tool, a magnet can be practical if you want fastener evidence and can verify it. For quickly marking multiple likely centers on normal drywall, an electronic finder gives more direct layout information. Used together, the two methods can support a stronger interpretation without pretending either tool sees everything behind the surface.
Stud finder wall scanner vs measuring from a reference
Measuring from a known framing location can help you choose a starting position. Regular spacing is common in some construction, but doors, corners, remodels, and other changes interrupt the pattern. Measure from verified evidence and use the resulting prediction as a place to check. A measurement alone does not confirm a stud.
If you find a known framing member from construction photos or direct access, use a tape measure to mark likely neighboring positions. Then scan or obtain supporting evidence. An apparently regular room can have a narrower or wider bay near a doorway. The actual face you can fasten into may sit slightly away from the expected centerline.
Visible features can also help map likely service routes. Look for electrical boxes, plumbing fixtures, and accessible areas on the other side of the wall. Those observations can tell you where to be especially cautious. They are not complete plans of how wiring was run or where a pipe turns.
Measuring works best as a low-cost companion to detection. It helps you plan a wider scan, recognize an irregular result, and make a straight reference once something is verified. Choose a scanner or a more direct method when the precise location or service clearance is necessary for the job.
Stud finder wall scanner vs tapping the wall
Tapping can reveal a relative change in sound across some surfaces. It may help you find an area that deserves a scan, and it takes little effort. Its results depend on what you hear and how the wall is built. The method is more useful for screening than for selecting an exact point for a fastener.
Move across an open stretch and compare sounds at similar positions. A change can occur near framing, but it can also reflect thicker material, backing, blocking, or another feature. Use that observation to choose where to take a more reliable reading. A change in sound cannot show that the other surfaces or hidden services are suitable for drilling.
Tapping becomes less informative where textures or layers vary, or where the wall connects to cabinets and trim. Two people may interpret the same sounds differently. It is also hard to compare results across different heights in a furnished room. An appropriate electronic scanner gives a more repeatable reference if the wall type is supported.
Choose tapping to orient yourself before using an appropriate tool. For more than a rough location, confirm with a suitable scanner, evidence of fastener alignment, or known construction. For a wall you cannot verify using accessible methods, use another suitable location or have it evaluated before putting a hole in it.
Stud finder wall scanner vs radar or phone imaging
Basic electronic finders and dedicated radar scanners answer different levels of question. A radar model or phone-based display can provide context about supported objects, and some standalone models have modes for more than one wall type. The cost and analysis make sense when you need that additional information repeatedly.
An app display can be helpful if you want to compare where two detected features run or how far a signal continues. Check the app and phone requirements and the exact surfaces the model supports. Some drywall-focused imaging products exclude tile, concrete, or lath and plaster. Using one on an unsupported wall can leave your question unanswered despite the more detailed interface.
A standalone radar unit can be useful where you need documented modes for multiple materials. The readout can still leave uncertainty about the exact object or how it is supported. For a structural or service-sensitive drill path, use the appropriate records and professional methods. A polished image does not establish what the scanner may have missed.
Buy radar or phone imaging when it serves the walls and projects you regularly encounter. For a single ordinary shelf installation, an LED array or center finder plus a magnet can be faster to learn and less expensive. If you want additional detail about one unusual project, compare what a professional check would cost with buying a tool that may sit idle afterward.
Stud finder wall scanner vs direct inspection and records
Direct information can come from drawings, photos taken before a wall was closed, or an existing accessible view. Use it to confirm the location, orientation, and kind of construction. The more direct the information, the more useful it can be for deciding what a scanner’s ambiguous pattern represents.
Look for images or drawings tied to the actual room. Renovation photos can show blocking and service lines if you can relate them to permanent features. A general floor plan may omit the final location of pipes and wiring. Check the date and whether work might have changed after the information was recorded.
Where you can see construction from an accessible area without disturbing services, compare it with the mounting layout. Wall features can line up differently on two sides of an assembly, so establish the exact reference you use. A suitable inspection method or qualified person can help where there are no existing reliable views. Do not create an exploratory opening at a position with unresolved hazards.
Choose direct verification where the support or concealed service path must be established with confidence. A basic scanner is a first-stage tool for mapping likely framing. Direct or professional confirmation is especially valuable when a mount must carry a significant load, the wall has been remodeled, or indications remain inconsistent.
Stud finder wall scanner vs a different mounting approach
Sometimes the best response to an unsuitable spot is moving the mount or using a system designed for the verified wall construction. A rail with suitable mounting positions may let you place fasteners where support is available. Check how the manufacturer allows the system to be attached and what load it is intended to hold.
A picture on a known wall may allow more placement flexibility than a safety-critical installation. A wall type and rated load determine which hardware is suitable. Use only an installation method designed for the particular use and verified construction. Some items require direct attachment to suitable framing or dedicated backing.
This alternative can save time where a shelf position is flexible and a scanner shows an unresolved feature near the original location. Move the installation to a better-supported area if the layout allows. Check that the new location clears plausible utilities and that its support meets the mount’s requirements. A different fastener cannot resolve unknown conditions inside a wall.
Consider the alternative early for heavy items, guard or accessibility hardware, and other installations with specific support requirements. Read the equipment instructions before shopping for a detector. The scanner can help lay out a safe plan, but it cannot supply framing where the wall does not have the support you need.
Choose the right combination for three common projects
Choose the simplest combination that provides repeatable evidence and meets the mounting requirements. The method for a shelf in a newer drywall room can differ from the method for an old plaster wall or a bathroom installation. Compare the consequence of an incorrect reading alongside time and cost.
A shelf rail on ordinary drywall
On suitable drywall, start with an electronic finder and verify likely centers at more than one height. Use a magnet as a secondary check when aligned fasteners are detectable. Set the rail against the verified layout and see whether the allowed positions match. Resolve any nearby utility concerns before making the holes.
For an occasional project, a basic array or center finder can provide most of the information you need. There is usually little reason to buy a radar device just to create more detailed views of ordinary framing. Spend time on confirming that the mounting system’s instructions, fasteners, and support all agree with the wall you have.
An older plaster wall with irregular readings
On older plaster, identify the wall assembly before choosing an electronic option. A strong magnet may give useful fastener clues in some constructions, while mesh or other metal can make those readings ambiguous. Use building records, accessible areas, and a suitable documented scanner when they can help confirm the actual structure.
If the uncertainty remains, choose a different location or obtain qualified help. Repairing plaster after exploratory holes can be more involved than revising the mounting plan. Above all, confirm the support and drill path at the selected location. A repeating pattern elsewhere on the wall is useful context, not final verification.
Bathroom or utility-area mounting near services
Near plumbing fixtures, electrical boxes, or laundry appliances, start by understanding the likely service paths from both sides of the wall. Use a scanner only where the model supports the surface and target. Give more weight to independent verification than to a clear screen, a convenient stud alignment, or a weak negative result.
If a suitable mounting point can be moved to a verified area, that may simplify the project. For positions near a service route you cannot establish, or for hardware that supports a person or a significant load, arrange appropriate professional confirmation. Select the mounting method after the wall and location are established.
Conclusion
Use an electronic finder for routine drywall, a magnet to check likely fastener alignment, and a documented material or radar scanner when you need additional clues. Measure and tap to plan where to check. For uncertain support or possible concealed services, use direct evidence or qualified verification before choosing a fastening point.
More from Amazon
Programs that pair well with the guide above. Offers and eligibility are set by Amazon and may change.
Collect the home and kitchen items you want in one registry that guests can shop from.
Create a wedding registrySet up recurring deliveries of everyday items on eligible products. Terms and savings are set by Amazon.
Explore Subscribe & SaveFree shipping on eligible items, Prime Video and more. Eligible new members can start with a free trial.
Start a Prime free trialAudiobooks and podcasts to listen to on the go. Eligible new members can start with a free trial.
Try Audible freeAs an Amazon Associate we earn from qualifying purchases.