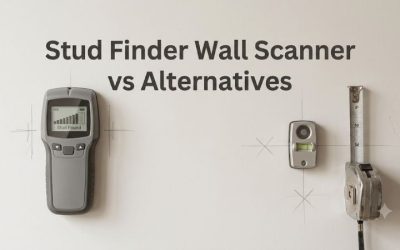
This stud finder wall scanner buying guide starts with your wall and the thing you want to find. A basic stud finder is often enough for a shelf on drywall. If the wall may conceal metal, piping, or wiring near your planned location, choose the right detection method and confirm the result with independent evidence.
A stud finder wall scanner buying guide by target and surface
Write down the surface, the intended mounting position, and the evidence you need from a scanner. A wood framing center and a copper pipe are different targets. The tool’s ability to find a target also depends on the material in front of it. Start with those two facts before you compare price or depth.
Identify the wall surface and possible layers
Visual clues can tell you where to start. Painted drywall may offer a broad, smooth scan lane. Older plaster can be thick or irregular, and its lath or mesh can change readings. Tile, plywood, paneling, and foil-backed materials each affect which tools and modes are documented for the job.
Where safe and accessible, review building drawings, prior renovation information, or visible construction details. Look at the opposite side of the wall and what services pass nearby. A smooth coat of paint does not reveal how many layers are present. If you do not know whether the wall is drywall over framing or plaster over lath, do not choose by depth alone.
Look for the exact material in the manufacturer’s instructions. A scanner that works through one kind of drywall under specified conditions may not be appropriate for a tile installation. Even if the marketing page shows several renovation scenes, read the limitations in the manual. Check whether the features you need work on the particular surface rather than in only one mode.
If the framing and materials remain uncertain, build that into your purchase. Choose a tool for known, frequent surfaces and use a suitable separate method for the exception. A budget finder for a drywall addition and professional verification for an older masonry area can be more effective than hoping one tool will address every wall in the house.
Decide whether you need framing, metal, or another clue
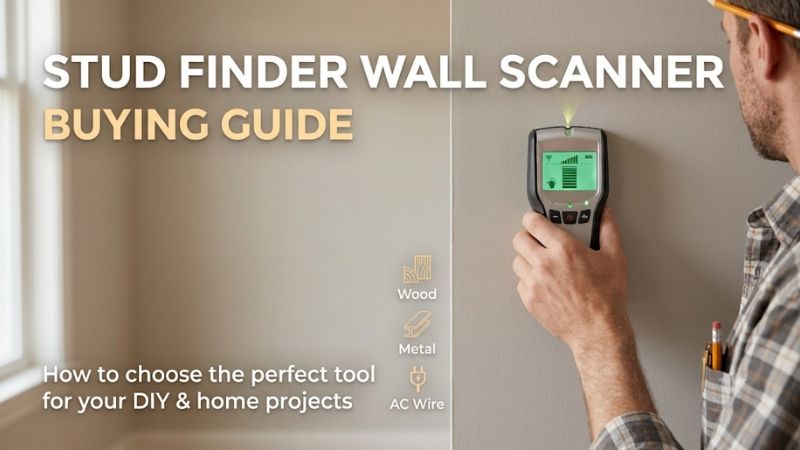
For a shelf or a mounting rail, you generally want the location of suitable framing or approved backing. An electronic stud finder can provide a likely center or edges behind a supported wall. If you are trying to distinguish possible metal or investigate another kind of object, use a mode or tool designed for that purpose.
A stud reader’s “wood and metal” description can mean wood and metal studs. It does not establish that the tool has a separately selectable metal scan for pipes, plates, and other objects. Read the feature description closely. A model with a dedicated Metal Scan can give additional context. Matching a repeated signal to a specific kind of object still requires interpretation.
For live AC warnings, pay attention to the target and conditions. Voltage has to be present for a live-wire feature to respond to it. Shielding, conduit, depth, wall material, or other conditions can make a line hard to detect. A missing alert cannot clear the hole for drilling. Check the plausible route and secure or isolate relevant services as appropriate before work.
Some radar scanners can detect additional objects, including certain plastic pipes in supported configurations. Read the manual for the actual target, material, and mode. If the consequence of a mistake is high, use suitable professional locating or inspection. A product page should never be the only basis for deciding that a wall or slab is clear.
Use the scope of your projects to set a price range
Occasional drywall hanging often calls for an inexpensive edge or center finder and a way to corroborate the results. Frequent mounting and longer rails can justify a full-width display. Repeated questions about mixed materials may make a dedicated metal mode or a more advanced scanner worth buying.
Separate the one project that brought you here from the work you are likely to do next. If you are hanging two small shelves and already know the wall is standard drywall, a simple tool can be economical. If you manage several properties with documented differences in construction, better mode selection and clearer documentation can save more time.
Also price what the tool needs to operate. Check battery type, which cells are included, or whether a dedicated charger is necessary. If a scanner depends on a phone, verify device and app compatibility before purchase. Know what you’ll do if the phone changes or a shared shop needs the reader to work without anyone’s personal device.
Set the budget for reliable information and a practical workflow. That can mean a simple primary tool and a modest second method. A magnetic finder, for example, can provide evidence about fasteners that complements the electronic reading. For a complicated surface or high-consequence task, a suitable professional assessment can be more valuable than putting all the money into a more expensive handheld scanner.
How to compare sensor types and displays
The main options are magnetic locators, electronic stud sensors, dedicated material scanners, and radar-based devices. They differ in what they respond to and how much interpretation the display requires. Identify which output will help you make a repeatable mark in the place you intend to work.
Magnetic locators for fastener evidence
A magnet commonly helps you locate steel screws or nails close enough to the surface. Trace a few individual points and check whether they line up vertically. That pattern can provide evidence for likely framing behind drywall and complement the result from an electronic finder. A magnet can be inexpensive, compact, and ready to use.
The limitation is what the magnet responds to. The strongest spot may be a screw rather than the stud’s exact center. It can also respond to metal corner details, mesh, hardware, or cover plates. A deeply set fastener may be difficult to detect. No response gives little information about materials the magnet does not attract.
Use it where a discreet fastener mark would answer a real question. If a wide electronic readout suggests a vertical feature and a magnet finds aligned screws along that line, the two observations can strengthen a framing hypothesis. Continue to check where the fastener needs to go. The location of a screw elsewhere on a line does not clear the drill path.
Buy a magnetic locator for inexpensive confirmation, a physically small tool, or simple work where likely fastener positions are useful. Choose a tool with a direct stud indication or a separate material mode where your regular projects demand that information.
Electronic stud finders for edges, centers, and full-width views
A conventional electronic stud finder responds to changes sensed behind the surface. Models can show one edge, a calculated center, or a span across an array of sensors. Choose a workflow you will use consistently. How a feature repeats across scans often tells you more than the first light or beep.
An edge finder is useful when you like approaching from both directions and comparing the results. A center finder speeds up marking when you get a good repeatable signal. A multi-sensor display can show a broad or irregular span that makes you check for multiple framing members or other objects. None of those display choices removes the need to confirm what the pattern represents.
Look for the calibration procedure. Some tools require you to start with the device flat in an appropriate position and wait before moving. Others document a different approach, including ongoing calibration or no user calibration. Use the procedure for the exact mode. If the starting position makes a reading questionable, repeat it from a different point permitted by the instructions.
For frequent work, check readout visibility and marking access. Do you need to see the display from below? Can you mark the indicated center without moving the scanner? A separate alert can help when you are focused on maintaining contact. Select the display that matches your work position rather than comparing the number of lights on its own.
Multimaterial scanners for separate modes
A standalone material scanner can add dedicated information about metal and live electrical signals alongside stud finding. Choose it if you often need to examine a feature after the basic stud scan. The useful purchase question is whether the extra mode identifies a class of material clearly enough to inform the next check.
Dedicated metal detection can be helpful when you want to investigate a response near a proposed mounting point. A reading might reflect a normal fastener, metal framing, a plate, or a pipe within the tool’s capabilities. The scanner cannot always distinguish among them. Survey the area, map the response, and see whether visible fixtures or construction details offer an explanation.
Choose the relevant mode and pay attention to limitations. Compare at more than one height or angle as the instructions allow. Do not interpret a weak signal as permission to drill or assume a broad result is one solid object. Record uncertain points separately from verified fastening locations.
A standalone scanner can be useful in a shared shop because there is no app setup. Check how clearly it indicates material or center and whether the marker is easy to use. For known standard drywall and occasional hanging, basic sensors may be enough. For regular work near plumbing or metal-containing assemblies, dedicated modes can justify the extra cost.
Radar and phone imaging for more involved questions
Radar-based scanners can provide useful information about supported wall materials and object types. Some display immediately on the tool. Others pair with a phone and present graphical or rawer data. Consider which surfaces and targets the exact model supports, and whether you will have the space and time to use it as directed.
A visual screen can provide context when several features appear to intersect. Rawer views can help experienced users examine a pattern without forcing every signal into an icon. Both still represent sensor results. Use drawings, accessible parts of the building, and independent verification to determine what a feature means before basing a significant installation on it.
Check the equipment’s supported materials and detection depth by target. One consumer app device may be designed primarily for drywall. A professional standalone unit may have modes for additional materials. In either case, the maximum advertised depth generally applies under stated conditions. It does not describe reliable detection of every material or service at that depth.
Buy for repeated questions. If you continually scan mixed structures and need several modes, a suitable radar tool may be a worthwhile investment. If you already have a reliable drywall workflow and one unusual project needs evidence beyond it, consider a specialized service before buying hardware you may seldom use.
How to read detection depth and verify the result
Treat every depth specification as part of a sentence. It should identify the target, the applicable surface or mode, and any conditions the maker describes. Depth also has little meaning if the area is too narrow for proper contact or if the result cannot be repeated. Compare the whole procedure.
Compare maximum depth by material and mode
Start with the thickness of the surface and the expected object behind it. A depth figure for a ferrous or nonferrous metal target cannot be applied to wood framing, plastic pipe, or energized cable. Put each relevant target on its own line when you compare models and look for the appropriate mode and surface.
If you know the wall has a second layer added during an earlier remodel, look for documentation supporting the thickness and composition. A deep stud mode can help under some conditions. Behind mixed or irregular layers, more depth can also bring in more signals and make the indication less specific. Use the least extensive appropriate mode that can answer the question.
The difference between an ordinary ¾-inch setting and a deeper one can matter when checking several layers of material. It does not tell you which setting is best on thin drywall. When the standard mode provides a good reading, continue with it and verify from another position. Use additional modes where they answer a separate question.
If the surface is beyond the manual’s scope, choose a different method. Do not extrapolate from the largest number on the front of the package. A clearer result on a compatible wall tells you more than an extended signal under unapproved conditions.
Check repeatability at more than one height
Do one careful pass according to the manual, recording an indicated center or both edges as applicable. Make a return pass where you have room. Check another unobstructed position above or below it. For ordinary vertical framing, agreement at multiple heights can strengthen the interpretation, particularly if nearby marks fit the construction.
Look for features that change shape. A short signal around fixture height can have several explanations. A vertical pattern can also represent a pipe or another member. Give more weight to observations that agree with multiple sources, such as known framing, fastener locations, visible construction, and the opposite side of a wall.
Distinguish a framing reference from an approved hole location. A likely stud may carry wiring through it, and there can be protective plates where services cross. Avoid any unexplained metal or likely utility path until it can be resolved. A blank live-wire display should never be used as the final check for electrical safety.
Before putting up the hardware, check the installation and fastener instructions for the item being mounted. The tool’s role is to help you locate a suitable support area. The mounting system and building conditions determine how the connection can safely carry a load.
Plan what to do when readings disagree
A confusing result can involve battery condition, poor contact, an unsuitable mode, irregular surface, or more than one concealed object. Start by checking the manual, battery, and placement. Repeat the scan from a better starting position on the same compatible surface and compare the pattern before interpreting it.
If the result is still inconsistent, use another source of evidence. A magnet can locate some fasteners. Photos or drawings may show a part of the wall before it was finished. Accessible spaces may reveal an actual route for plumbing or electrical services. Give the most weight to evidence that confirms the same wall and location.
Change the mounting position when doing so meets the project requirements and eliminates uncertainty. If the exact position is necessary and cannot be established, have it checked by someone qualified. The same applies where a drill path near a service or structural component could cause significant harm. Avoid making a hole to discover what the scanner might have missed.
What to verify before you buy
Confirm the full model number, the manual for that model, the readout you want, and the battery or phone requirements. Then check that the scanner works on the exact wall and target you listed at the start. This final comparison prevents useful features from getting buried under model names and retail descriptions.
Compare the whole working package
Make a short table of exact model numbers for yourself. Include the approved surfaces, modes, target-specific depths, operating method, and any accessories in the box. Pay attention to whether similar names refer to a revised tool or a different display. Keep the package that matches the manual you have reviewed.
Decide how you will store and use the device. A basic finder with replaceable cells is simple to keep in a household tool drawer. A radar or app-based unit may deserve a dedicated setup and space for charging. A tool that is easy to bring out and operate according to its instructions is more valuable than unusual features you rarely use.
Review the need for a separate marker, a tape measure, and a level. These ordinary tools help convert observations into a practical layout. Count them in the cost if you do not own them. For a long rail, a good reference line and repeatable centers contribute more than a particularly deep scan that the job never requires.
Choose a representative wall for your first check
Before depending on the finder for your hardest project, get familiar with its behavior on a suitable surface where you know enough about the underlying construction to interpret the results. Learn where the sensing area sits and how the product identifies an edge, center, metal response, or possible live wire.
Practice transferring the indication to a pencil mark or removable reference. Confirm whether the device stays flat while you work. Then repeat that process at another height. A short practice pass can show whether you prefer the direct center signal, the information in an LED array, or the extra control of separate modes.
Bring the same habits to the final project. Start with the right surface and mode, document repeatable readings, and resolve uncertainty before drilling. If the tool does not support a particular material or you cannot verify the proposed hole location, use a suitable alternative method.
Conclusion
Choose the scanner by wall type and target before comparing depth. A center finder or LED array is usually enough for routine drywall framing. A dedicated metal or radar scanner can help with specific supported questions. Read the exact manual, confirm repeatable results, and verify the intended fastening point independently.
More from Amazon
Programs that pair well with the guide above. Offers and eligibility are set by Amazon and may change.
Collect the home and kitchen items you want in one registry that guests can shop from.
Create a wedding registrySet up recurring deliveries of everyday items on eligible products. Terms and savings are set by Amazon.
Explore Subscribe & SaveFree shipping on eligible items, Prime Video and more. Eligible new members can start with a free trial.
Start a Prime free trialAudiobooks and podcasts to listen to on the go. Eligible new members can start with a free trial.
Try Audible freeAs an Amazon Associate we earn from qualifying purchases.