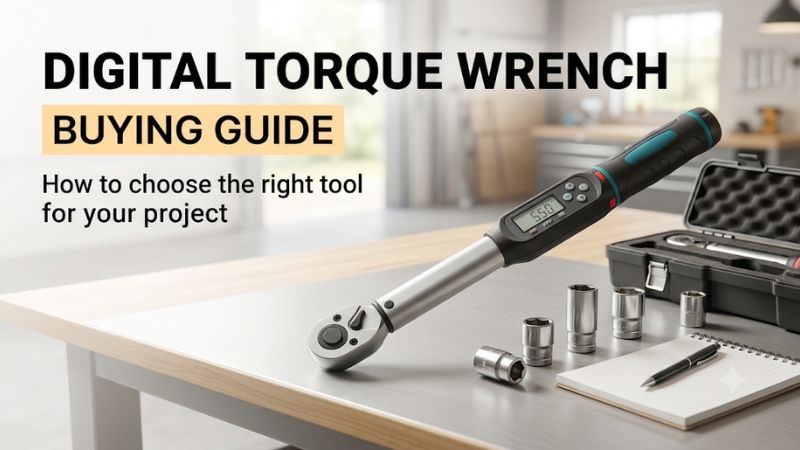
This digital torque wrench buying guide shows how to match an electronic wrench to your fasteners, workspace, and budget. Start with the smallest and largest torque values in your service information. Then compare accuracy by direction, socket fit, target alerts, and whether your work calls for an angle mode.
What should you buy first?
Buy for the group of jobs you do most and check the exact specifications for those joints. A 3/8-inch electronic wrench is a useful starting format if your recurring targets fit its accuracy band. For light fasteners or frequent higher-torque work, you may gain more from a tool built around a different range.
Write down the equipment and joint, the torque and units, the tightening direction, the angle requirement if any, and the socket needed. Include whether the service procedure specifies new fasteners, dry or lubricated threads, or a tightening sequence. Those instructions affect your choices before you ever enter a number into the wrench.
| Buying decision | What to check | Why it matters |
|---|---|---|
| Torque range | Target plus documented accuracy band | Selectable values can fall outside the accuracy claim |
| Direction | Clockwise and counterclockwise ratings | Reverse ratcheting alone says little about reverse accuracy |
| Physical fit | Head, installed socket, handle length, and grip path | A tool can cover the number and still miss the fastener |
| Operator feedback | Approach and target alerts | A useful signal remains recognizable in the working position |
| Angle capability | Modes, reset rules, and test conditions | Required rotation is a separate part of the procedure |
| Ownership | Batteries, storage, verification, and support | Keeps the wrench usable and traceable over time |
Read the torque specification before the tool label
Fasteners on one vehicle can call for different units, stages, and procedures. A broad 1/2-inch wrench may cover a wheel while missing the documented band for a smaller housing bolt. Build the purchase around the actual service information, including which targets occur regularly and which jobs may need another instrument.
Keep the original torque unit visible
Foot-pounds, inch-pounds, and newton-meters appear frequently in garage work. A digital wrench that can switch between them can simplify reading. Record the original unit beside each target and verify the screen setting. A conversion done correctly is useful, while a bare number without its unit creates room for error.
One foot-pound equals 12 inch-pounds. A specification of 96 in-lb is 8 ft-lb. If the same number is entered as 96 ft-lb, the intended torque is multiplied by twelve. Mark the unit on your job notes before working and verify it again whenever you change modes or use a stored preset.
For work specified in newton-meters, use that unit directly if the wrench supports it. When conversion is necessary, preserve enough precision for the job and follow applicable service guidance. Round only after doing the conversion. If you repeatedly work in inch-pounds, a smaller tool with a useful accuracy band in that region can be easier to control.
Use the joint condition in the service instructions
A torque wrench measures resistance to rotation at the drive. The relationship between the torque and the clamping force depends partly on friction in the threads and under the head or nut. Different surface conditions can change clamp load even when the instrument reaches the same numerical reading.
Follow the specified thread preparation, lubrication condition, hardware replacement requirements, and sequence. Adding anti-seize or oil to a dry-thread procedure can change the joint response. If the manufacturer gives separate procedures for different finishes or hardware, identify the exact assembly before selecting the torque value.
A shop example is a wheel with surface conditions changed by corrosion or previous service. Use the manufacturer’s instructions for that vehicle and wheel. Record any required stages so you can tighten the fasteners in the specified order. A preset makes it easier to repeat a value after it is verified, while the instructions define which value and conditions the job calls for.
Understand measuring range, resolution, and accuracy
Three numbers on an electronic wrench can describe three separate things. The range shows what it can measure or display. The resolution describes the size of the display increments. The accuracy specification describes permitted error under stated conditions. Compare them together before turning price or features into a purchase decision.
Find the band covered by the accuracy specification
Read the model documentation for any lower boundary on the published accuracy claim. A 10–100 ft-lb wrench may list ±2% clockwise only from 20% to 100% of full scale. For that example, the documented claim starts at 20 ft-lb even though you can select or display a lower value.
Do the same calculation for every model you are comparing. Twenty percent of 250 ft-lb is 50 ft-lb. Twenty percent of 37 ft-lb is about 7.4 ft-lb. Those calculations apply to models with the stated 20% condition. Some manufacturers document models with different ranges and test points.
If your common target is 15 ft-lb, look for documented accuracy at 15 ft-lb. Do not assume an advertised minimum of 10 makes it suitable. If you cannot find applicable documentation, a different instrument with a covered range gives you more confidence. A broad nominal range is useful only when the evidence supports the parts you plan to use.
Check what the percentage refers to
Some product specifications refer to a percentage of the reading, while others use full-scale error or describe another test convention. The denominator matters, especially toward the bottom of a broad range. Compare only like claims when you can establish how each figure was stated and verified.
For illustration, 2% of a 40 ft-lb reading is 0.8 ft-lb. Two percent of a 100 ft-lb full scale is 2 ft-lb. Those are different permitted errors at the same target under their respective definitions. Before using a percentage in a calculation, confirm that the manufacturer actually defines it that way.
A display increment of 0.1 ft-lb describes how finely the electronic readout is presented. It can help you follow changes as you pull, but the calibrated measurement can still have a wider tolerance. Focus on the conditions under which the figure applies and on repeatable technique at the correct grip.
Check the direction as a separate specification
A wrench can ratchet in two directions and have different accuracy claims for clockwise and counterclockwise measurement. Some electronic models document both, while others give an exact percentage in only one direction. Confirm the intended direction at the actual fastener and compare it with the published claim.
A left-hand thread may require a reverse measurement. Turning the switch to reverse can establish that the ratchet works in that direction. Calibration documentation and the product manual establish whether the sensor and its claimed tolerance cover that use. If the documents for a model are ambiguous, check another model or confirm with the manufacturer.
Check the same condition if the tool has a separate angle specification for each direction. Treat angle accuracy and torque accuracy as two measurements, with potentially different test conditions. Buying both functions in a single housing makes setup easier only if both functions cover the procedure.
Compare drive sizes and geometry
Drive size describes how the wrench accepts sockets. It often predicts the scale of the rest of the tool, but range and length vary by model. Use the drive that accepts a suitable socket and the torque wrench that covers the actual specification. Then measure the space needed to keep your hand and the tool aligned.
Use a 1/4-inch drive where the joint and range suit it
A 1/4-inch drive often accepts a compact socket and comes with a narrower head. That helps near covers, lightly fastened assemblies, and other small parts. Check the lower accuracy boundary and verify the exact socket fit. An electronic wrench in this drive size can still be too large for very light fasteners.
A torque screwdriver may be a better fit if the work centers on fasteners specified at low inch-pound values. Use a model rated for the joint and compatible bits. For small hex fasteners with shallow clearance, also check whether the bit socket makes the total assembly too tall even when the wrench head is thin.
A shorter handle generally makes it easier to control a light pull. Some 1/4-inch electronic wrenches have relatively long bodies, so compare length and grip location. Sometimes a short fixed design is the better choice. If headroom is the limitation, look at the socket and head together.
Use a 3/8-inch drive for verified mid-range work
The 3/8-inch format is common for mixed garage use. It can cover several moderate automotive and equipment jobs while taking less room than many long 1/2-inch wrenches. Compare the minimum and maximum you actually need, and pay close attention to how far below the midpoint that first target falls.
Two 3/8-inch digital tools can be very different. A short 3.7–37 ft-lb model serves lower work and places less handle in a narrow space. A 10–100 ft-lb model reaches farther in torque. A buyer may need both ranges if the lower tool’s maximum and the higher tool’s accuracy floor leave different parts of the work uncovered.
Decide whether flex or a finer ratchet is worth the extra complexity. A flex head can route the handle around a bracket. A fine ratchet can reset with a shorter movement. Check physical access and the final pull for the exact socket. The best feature is the one that solves your actual obstruction.
Choose 1/2-inch drive for suitable higher-torque work
A 1/2-inch electronic wrench often provides more leverage and a useful range for larger socket work. Its long handle can help you reach a high target without an abrupt pull, provided there is room around the fastener. Check total reach from the head to your grip before committing to a long model.
A broad 250 ft-lb rating can be useful for owners who service equipment or vehicles with higher verified targets. A smaller high-range model may suffice if your jobs stop well below that. The purchase decision should account for the actual lower accuracy band, not simply the distance between minimum and maximum on the package.
Avoid using a long torque wrench as a breaker bar. For removing a resistant fastener, use a suitable removal tool under the service procedure. Preserve the precision wrench for controlled measurement. A tool overloaded while breaking hardware loose can need verification before it is used again for final tightening.
Evaluate electronic controls and angle mode
Digital wrenches vary in how they let you set a target and recognize it. Some have a live trace, a stored peak, or several alert stages. Angle-capable models add another measurement. Choose the controls that match a real procedure and check their behavior before doing the first critical pull.
Trace readings and peak readings solve different needs
Trace mode shows torque as it is being applied, which makes it useful for approaching a target. Peak mode can retain the highest recorded torque for review. This helps if the display is hidden during the pull or if you need a reading after removing the wrench from a recessed assembly.
Check how the wrench resets a stored peak and saves a record. A displayed peak can be left over from the previous fastener. Confirm it is ready for the next operation. If the wrench recorded an overshoot, follow the service instructions for how to handle that fastener. A second pull to the original value does not necessarily undo the original overtorque.
When shopping, compare how the two modes are accessed. A simple screen is a benefit when you use the wrench occasionally and want to avoid changing settings unintentionally. If you work on multiple recurring groups, a clear preset system can reduce entry steps. Distinguish saved settings from saved results.
Pick a target alert you can identify reliably
A buzzer is convenient when the display faces away. A sequence of lights can be useful in a well-lit bench setup when you keep the screen in view. Vibration can help in some noisy environments. Try the alert format in your intended working position if the retailer or manufacturer gives you a way to see how it behaves.
Find out how the wrench signals approach, target, and overshoot. Use an approach indication to slow down. Stop according to the manufacturer’s instructions at the target and release the pull. Electronics can improve feedback, but your hand still controls how far and how quickly the tool moves.
If your work involves only a few common torque settings, simple alerts can outperform complexity in day-to-day convenience. More presets, stored records, or an app become useful when you repeatedly log work. Compare whether data can be exported and how it identifies each job before you pay for those features.
Pay for angle only if the service procedure uses it
Some joints specify an initial torque followed by a turn in degrees. An angle wrench can measure both stages with one instrument, depending on the model. Check how it zeros the angle and whether it allows repositioning or ratchet resets during a turn. These details matter if the available sweep is limited.
An integrated angle mode and a separate angle gauge can both be appropriate when supported for the application. A separate gauge may take additional space and need a stable reference. An integrated tool can simplify the setup. Review its accuracy statement and unit behavior so you can clearly distinguish the torque stage from the rotation stage.
Whether a particular fastener may be reused comes from the service information. A wrench with angle measurement does not answer that question. Obtain the right hardware before starting. Record every stage and the tightening order, then choose a tool configuration that can carry out all of them without improvised changes.
Plan for calibration and ownership
The purchase price is one part of owning a measuring tool. Check which batteries it uses, how to store it, and what verification options are available. Calibration support becomes especially important when the wrench sees frequent use or you need documented readings for safety-critical, repeatable work.
Read the paperwork for the exact wrench
An individual certificate can identify the tool and report measured test points. Check direction, units, date, and the relationship between those points and your regular targets. A general accuracy statement describes the model. An individual record can help establish how the tool you received performed when it was checked.
Manufacturer-specified verification schedules and the conditions of use should guide follow-up. A dropped wrench, suspected overload, stiff ratchet, or erratic display is a reason for inspection and verification before further critical work. Telephone or online service support is useful if you can identify the tool and know where testing is available.
Do not confuse a garage comparison between two wrenches with controlled calibration. A side-by-side check can alert you to a discrepancy, but it cannot identify which tool is correct without a reliable reference and proper method. If the result matters, use qualified verification.
Budget for accessories and keep the wrench ready
Price the appropriate sockets, any approved crowfoot or extension, and spare batteries. Compare the wrench with a mechanical alternative and a digital adapter if cost is decisive. An adapter can be attractive in open space, while the extra height can make it unsuitable in a cramped recess. Buy for the complete operating setup.
Store the tool according to the manual and protect it from impacts and unsuitable environmental conditions. Some manufacturers advise removing batteries for extended storage. Learn whether your specific tool keeps presets after battery changes. Verify the units and selected preset whenever it comes back into use.
Use the supplied protective case or another suitable storage arrangement when moving the tool. Keep heavy objects from striking it. If an electronic wrench is your only option for a recurring important procedure, stock the right batteries or know what verified backup tool covers the same range.
Frequently asked questions
Choosing a digital wrench usually becomes simpler once the exact job is in front of you. These answers cover common decisions about the first model, storage, wrench fit, and calibration. Keep any vehicle-specific values and service instructions separate from general product guidance so you can verify them at the point of use.
Can I buy one wrench for every home garage job?
One wrench can cover many jobs if their targets occupy the same usable band and the drive and head fit. A garage that works on delicate fasteners and higher-torque wheel or equipment joints often benefits from separate ranges. Write down both ends and compare the documentation before choosing one broad instrument.
Do I need to set a digital wrench to its lowest value for storage?
Follow the digital wrench’s manual. Mechanical micrometer storage guidance often concerns spring tension and does not automatically apply to an electronic model. For electronics, pay attention to batteries, moisture, impacts, and the case. Follow the separate storage instructions for any click or split-beam wrench you own.
Does a digital torque wrench prevent overtightening?
It can warn you as you approach or reach the target. In typical hand-operated electronic models, you still control the torque and stop the pull. Learn the alerts and use a smooth approach. If you overshoot a critical fastener, follow the assembly’s service guidance for the appropriate response.
What should I do if my wrench was dropped?
Set it aside from safety-critical work and follow its inspection and verification instructions. Look for visible damage or a change in display or ratchet behavior. A normal-looking tool can still have an accuracy problem. Qualified verification is the appropriate next step when readings need to remain dependable.
Conclusion
Buy a digital torque wrench whose documented accuracy covers your recurring targets in the required direction. Check the installed socket and handle clearance, then choose alerts and angle functions that suit the work. Budget for verification and accessories alongside the wrench so you can use it as intended.
More from Amazon
Programs that pair well with the guide above. Offers and eligibility are set by Amazon and may change.
Collect the home and kitchen items you want in one registry that guests can shop from.
Create a wedding registrySet up recurring deliveries of everyday items on eligible products. Terms and savings are set by Amazon.
Explore Subscribe & SaveFree shipping on eligible items, Prime Video and more. Eligible new members can start with a free trial.
Start a Prime free trialAudiobooks and podcasts to listen to on the go. Eligible new members can start with a free trial.
Try Audible freeAs an Amazon Associate we earn from qualifying purchases.