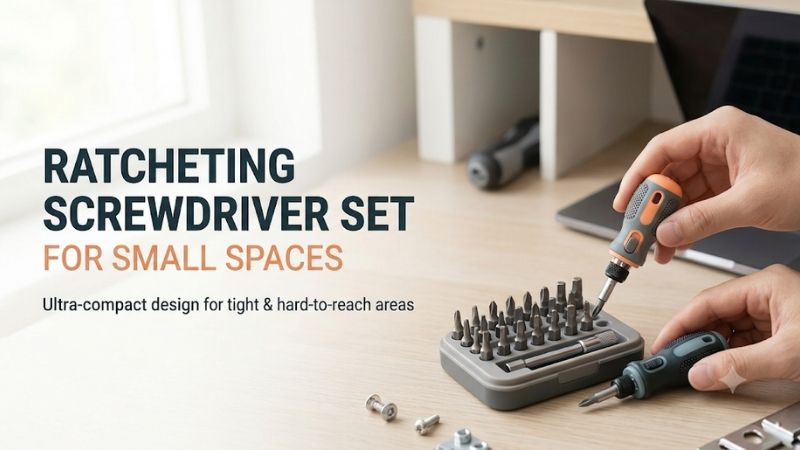
A ratcheting screwdriver set for small spaces should fit with the correct bit installed and still leave room to reset the handle. Choose a stubby for straight access with limited depth, a slim bit ratchet for low overhead clearance, or a long and narrow driver for a recessed screw with room behind it.
How to size a ratcheting screwdriver set for small spaces
A screwdriver can be short in the catalog and still hit the obstruction once the correct bit is installed. Measure the clearance along the screw axis, the width of the approach, and the space beside the screw for your hand. Each dimension can favor a different handle shape.
Measure from the screw head to the first obstruction
Axial clearance is the space available directly behind the screw head as you look along the screw’s centerline. Measure to the first solid obstruction. Include the room needed to seat the bit, hold the tool square, and move it away as the screw backs out.
Start at the face of an actual fastener. A screw at the bottom of a recessed pocket begins at a different depth from the surrounding cabinet. A protruding washer or exposed head can make the gap smaller than the one between the two panels. Use a rule if it can sit on the intended line. Where the opening is difficult to reach, take a small piece of cardboard trimmed to the apparent clearance and confirm whether it can move in and out without bending.
A bracket screw with barely an inch available above it often favors a flat driver and short bit. An advertised stubby handle can still need more room when you combine the bit, nose, and grip. Compare the full stack from bit tip to the back of the tool. For a side ratchet, also consider the portion of the bit that sticks through the head. A longer bit or an adapter can change the result even if the head itself is slim.
Leave allowance for removal. If a screw rises a quarter inch as it unthreads, a tool that fits only with the screw seated may bind partway through. At that point you might have to remove the tool and finish by hand, if the fastener is accessible. Planning for that movement avoids buying a driver that only works for the first few turns.
Check head width and the approach path
The widest part of the tool may be the ratchet housing, a quick-release sleeve, or the bit holder rather than the handle. Measure the opening along the route you will use to bring the tool in. Then check the minimum width immediately around the fastener.
A deep screw well creates a specific problem. A bit point can reach the head while its holder stops at the rim. A narrow fixed-shaft driver, a compatible long insert bit, or a suitable extension can put the bulky part outside the recess. Verify that the full usable length is enough from the tip to the first shoulder. The screw profile and the width of the well matter as much as its depth.
A bit ratchet with a broad head can be difficult to position between two walls close to the screw. Make a simple template the width of the head and the approximate thickness of the tool with its bit. Try inserting it from the side you actually have access to. If installation requires approaching over a pipe or around a hinge arm, make sure you can still seat it squarely once it arrives.
Pay attention to how you remove or change bits when the tool is in position. In some openings you can fit the ratchet only after installing a bit. In others you have to insert the bit first and then place the ratchet over it. Choose a retention system and working method that let you retrieve the parts when you are done, especially above a cavity where a dropped bit is hard to reach.
Estimate the handle sweep with your hand in place
A fine ratchet needs less nominal rotation between engagements, but your hand and the space around the handle determine how much of that sweep you can actually use. Account for the selector, the bit’s fit in the recess, and any movement needed to take up play.
The Klein Tools 65200, for example, has a specified 5-degree sweep. At a point two inches from the pivot, five degrees corresponds to roughly 0.17 inch of arc travel. That is the tool’s nominal motion at that point. The clearance in a cabinet needs to accommodate the width of the lever, your grip, and any extra motion from play. Use the nominal movement as a starting figure and check how much extra room the assembled tool takes up.
Wrap masking tape around a pencil or cardboard outline to mark where your fingers would sit. Swing it where you expect to reset the ratchet. If the lever hits a partition, can you turn the tool over or reset it from the opposite side while keeping the drive direction correct? If you can only move a few degrees with a cramped grip, a very short lever or a different approach could be easier than trying to force the tool through the opening.
A coarse mechanism can feel fine at an open bench. A finer one helps most when you can get several useful small strokes in the gap. For a long screw, estimate how many resets the available arc will require. Sometimes a choice that gives a little more sweep is faster than a head with a smaller published angle.
Which ratcheting driver shape fits each space
Match the driver’s shape to the obstruction. A short inline body keeps your palm behind the screw. A side lever trades some axial control for overhead clearance. A longer shank puts the handle outside a narrow recess. The screw and the surrounding hardware determine which of those benefits matters.
Choose a stubby for limited straight-on depth
A stubby is a good candidate when you can place the tool directly in line with the screw but lack room for a full-length handle and shaft. It preserves a straight push into the bit and is useful for short, accessible fasteners that need steady control.
Consider an exposed hinge screw inside a cabinet with a shelf mounted close above it. A stubby can seat into the head if the shelf leaves enough room for your fingers and the bit. Use a body diameter small enough to clear the hinge arm. If the device has a removable holder, check the dimensions with the bit directly installed and see whether the wider handle hits the shelf edge before you can aim straight.
The Husky 00582 is an example of a ratcheting stubby with six double-ended bits. A buyer working across several locations should check both the profiles and the ways replacement bits seat. A design with few loose components is convenient under a sink or in a utility room. A separate bit assortment is more useful when you can predict several uncommon head types.
Expect the short grip to change the experience on a tight fastener. A round stubby can still give good control, but a large screw that needs a lot of force is a poor match if you cannot seat your hand securely. Clear the obstruction or use a more appropriate manual driver when that option is practical. The main reason to buy a stubby is to reach a screw squarely in limited straight-line space.
Choose a low-profile bit ratchet for a shallow ceiling
A bit ratchet puts the handle beside the fastener and can save space directly behind the bit. It works well when an overhang is close to the screw but the lever can swing to one side. Compare the head and bit together and check your ability to push down on the head.
For a clip screwed to the underside of a bench shelf, a flat bit ratchet can slide into position from the exposed side. A short insert reduces the height, and a thumb on the back of the head helps hold the tip in the recess. Run the tool by hand with little force until you confirm good contact. If you can turn the lever but cannot keep the head aligned, change the setup before trying to break loose a tight screw.
Some low-profile sets also include sockets or a square-drive adapter. Put the full assembly on the target hardware before measuring its clearance. A deep socket may be tall enough to hit the same obstruction you were trying to avoid. A direct bit arrangement is generally the lowest version of a bit ratchet. For a hex head you may have better access with a suitable box-end wrench or another shallow tool.
Choose a set whose smallest bits include the screw sizes you expect to encounter. If buying the Klein 65200 for its compact head, plan for a separate compatible Torx or hex insert when those profiles are necessary. A broad catalog claim about low-profile access creates value only when the head, bit, and hand all fit together in the intended position.
Choose a narrow shaft for a deep screw well
Deep recesses often need reach with a small cross-section. A short driver can get the tip near the opening while leaving the screw untouched. Measure how deep the fastener sits and how much of the tool’s shaft can enter before the first wider shoulder reaches the rim.
Picture a screw at the bottom of a plastic housing. A conventional 1/4-inch insert in a thick magnetic holder might reach almost far enough, then stop around the edge of the well. A long bit with a narrow working section may reach the head. A dedicated precision driver can be better when a screw is small and the bit holder would also block your view. Check the actual working length of the slim section.
Extensions help when the path is straight and the holder can stay outside the well. Each connection adds some movement and width, so keep the stack as simple as the job allows. A flexible extension may reach around a bend, but it can twist and make axial pressure difficult to maintain. Use it for accessible light running when the bit can seat firmly. A fixed shaft gives better control where there is clear straight access.
When a recess blocks your view, identify the screw using a light. Seat the tip gently by feel, then make sure the driver stays centered before applying normal force. A long driver lets the hand stay clear of the opening, but a poor tip fit is easier to miss at a distance. Match the bit before buying a longer extension.
How to build a ratcheting screwdriver set for small spaces
A kit for small spaces starts with the fasteners you actually find and the access shape that repeats across your jobs. Pair one primary driver with a small set of matching bits. Add a second geometry only if it reaches screws the first tool physically cannot approach.
Choose bit length and retention for the gap
The shortest bit that reaches the screw well can reduce the stack height. A longer bit can move the thick holder away from a recessed head. Choose the bit length according to the opening and confirm that the holder grips it firmly and still lets you remove it.
A short standard insert must project far enough for its working tip and be easy to retrieve. Some holders are deeper or use a retention feature that only fits a particular groove. Some handle-storage systems are designed around double-ended bits. Check the product’s documentation and try the bit in the exact drive position. A bit that fits the removable holder may differ from one that fits the compact direct position.
A magnet can hold a compatible steel bit or screw during assembly, but it helps to have a plan for dropped parts. Set a cloth below an accessible gap if the location allows it. It can keep a screw or bit from vanishing into the bottom of an empty cabinet. Keep the retrieval method outside moving parts. If the opening is inside a piece of equipment, secure and disconnect it as directed before opening covers.
For mixed household work, list the relevant profiles and sizes on a strip. Phillips #2 appears on many assemblies, while smaller Phillips, square, Torx, hex, or Pozidriv sizes depend on the item. Use a profile and size that fill the head. Order the few exact replacement bits you commonly lose or wear out instead of filling a small pouch with redundant sizes.
Set up the first turn and the final turn deliberately
The first turn often needs steady pressure to break the fastener loose or start threads squarely. The middle turns are where a ratchet saves time. At the finish, use a controlled stroke and the equipment manufacturer’s specification when the assembly calls for a defined torque.
If removing a screw, use a correctly fitting bit and bring the tool onto its axis. On a straight ratcheting driver, a locked setting may make it easier to feel the initial movement. For a side ratchet, press the head against the screw before moving the lever. Stop if the bit begins to climb out. A loose or damaged recess can deteriorate quickly when a driver slips repeatedly.
For installation, start threads by hand when accessible. For a machine screw in an existing thread, gently turn it backward until the threads settle, then start forward with light pressure. If it begins to bind early, stop and check alignment. The ratchet makes motion easy to repeat, which is useful only after the screw is tracking the threads cleanly.
As a screw seats, shorten your motion and keep the bit centered. Plastic housings and small brass hardware offer little margin once the part comes together. When a specified torque matters, use an appropriate calibrated tool that fits the location and range. The handle shape and number of clicks provide no reliable measure of the torque you are applying.
Test the kit on your two hardest screws
Try one job with limited overhead clearance and one with difficult reach. Use the exact bits needed for both. The trial should show whether the tool can enter the space, stay square during the return stroke, and leave the opening once the screw has moved.
Before making a purchase decision, time the setup in a practical way. You might find that a low-profile ratchet reaches a shallow bracket in seconds but requires many short resets. A stubby that just clears the same bracket could finish sooner if you can sweep smoothly. Conversely, a knob with no finger space may fit on paper and fail in use. Judge a full removal or installation to see how much time and movement the job requires.
A compact pouch is useful when it has room for the bits you tested and a straight driver that covers the other common jobs. If using a small open rack, make sure you can see which piece is missing. Carry the attachment required for a socket or extension only if the test confirms it has enough space.
Write down the position that worked when the job will recur. A note such as “short PH2, approach from left with door open” gives another person a repeatable setup. A tiny selection of proven bits is more valuable in a narrow work area than a large kit that requires trying several pieces by feel.
Conclusion
Buy a stubby for limited straight-on depth, a low-profile bit ratchet for shallow overhead clearance, and a narrow long shaft for deep screw wells. Measure the assembled tool with the correct bit, leave room for your fingers and the screw’s travel, and test the hardest approach before relying on the kit.
More from Amazon
Programs that pair well with the guide above. Offers and eligibility are set by Amazon and may change.
Collect the home and kitchen items you want in one registry that guests can shop from.
Create a wedding registrySet up recurring deliveries of everyday items on eligible products. Terms and savings are set by Amazon.
Explore Subscribe & SaveFree shipping on eligible items, Prime Video and more. Eligible new members can start with a free trial.
Start a Prime free trialAudiobooks and podcasts to listen to on the go. Eligible new members can start with a free trial.
Try Audible freeAs an Amazon Associate we earn from qualifying purchases.