This magnetic tool holder buying guide will help you choose a rail that suits your tools, mounting surface, and daily work. Start with the tools you use most, then measure their contact points and removal clearance. Compare mounting instructions and working loads before deciding how much rail to buy.
What should you buy first?
For a stable bench wall with suitable support, start with one screw-mounted rail sized for your most-used steel tools. For a flat, compatible steel cabinet, consider a magnet-backed strip if you want to move it later. Keep tools that are heavy, sharp, or a poor fit in mechanical storage suited to their shape.
Begin with a small working set. Pick the two or three tool categories you repeatedly look for while standing at the bench. Write down which items need to be within reach and which can stay in a case. You can add a second rail later if you find a separate cluster of tools that belongs at another station.
| Purchase decision | What to compare | Why you should check |
|---|---|---|
| How the rail attaches | Fasteners, approved support, or magnetic backing | The rear mount has to withstand tool removal |
| Which tools fit | Exposed magnetic material, contact area, shape, and weight | A tool can slip or tilt within a published load limit |
| How large to buy | Active face, overall size, hole pattern, and hand clearance | A long rail can still feel crowded |
| What the rating means | Working load, rated orientation, and test conditions | Published figures may describe different forces |
| Where it belongs | Reach, aisle space, door travel, and exposure to dust | Good placement improves retrieval and maintenance |
| What you will spend | Item, delivery, appropriate hardware, and storage for odd tools | Upfront price covers only part of the setup |
Choose between fixed and removable mounting
A magnetic holder has a front interface that holds the tools. Its rear interface can use screws, magnets, or another specified attachment. Confirm both interfaces from the exact product instructions, especially when a listing calls a rail magnetic but shows several possible installation surfaces.
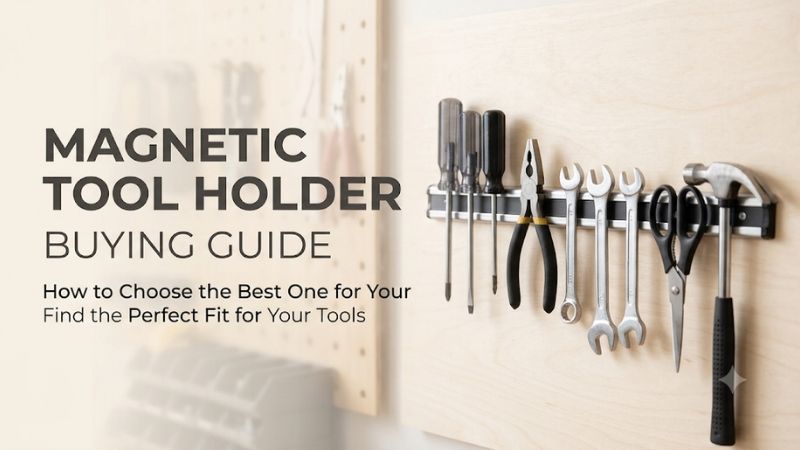
Screw-mounted bars for permanent workstations
A screw-mounted bar attaches to an approved substrate and keeps a consistent position. This suits a repair bench where wrenches and screwdrivers come off repeatedly. Measure the hole pattern rather than choosing by bar length alone. For example, holes at a documented spacing can simplify alignment with suitable backing.
Inspect the planned support and use hardware approved for the surface and load. A well-supported backer can make installation easier when the existing wall layout does not match the rail’s hole spacing. Check what lies behind the mounting area and use an appropriate installation method for the building. If you are unsure about concealed services or support, get the mounting location checked before drilling.
A permanent mount can be helpful when you remove tools with one hand or have several people returning tools to the same station. The trade-off is that moving the bar leaves holes and requires rechecking the support. Make a temporary position template before committing, and check that the mounting tabs remain accessible later.
Magnet-backed bars for suitably flat steel
A magnet-backed holder attaches to a suitable ferromagnetic surface, typically steel. This is convenient on a fixed cabinet side if you expect to move the row or cannot modify the cabinet. Both the weight of the tools and the force of removing them matter to the stability of the rear mount.
Start with a flat patch large enough for the entire back. A rib, flange, small air gap, thick finish, or debris can reduce useful contact. A cabinet badge can keep the bar from seating even when a small magnet sticks readily to the surrounding panel. Check the exact spot the bar will touch and follow its approved mounting orientation.
Consider the difference between a stationary cabinet and a cart that moves around the garage. Shocks, a closing door, or dragging a tool sideways can disturb a holder that stays still in other conditions. Use positive retention or enclosed storage for tools that must stay secure while things move. For a stationary mount, clean the surface as directed before installing and check again if you rearrange tools.
Adhesive options need their own instructions
An adhesive-mounted product relies on the adhesive’s bond to a particular finish for the rear support. That bond is separate from the front magnet’s grip. Check the approved material, loading, orientation, and any preparation or cure time before you choose this type for a rented room or painted wall.
Thermal changes, workshop dust, oily residue, and weak paint can affect the actual installation. Consider how your hand pulls against the support thousands of times over the holder’s life. Given the choice between an adhesive bar with poorly documented limits and a steel cabinet with a suitable removable holder, the option with clear mounting instructions is easier to evaluate.
Use the exact product’s authorized mounting system. Generic tape and improvised adhesive can behave differently from a tested attachment, even if the same tape conveniently holds a lightweight sign. If you lack a suitable attachment surface, a shallow drawer organizer or freestanding tray may solve the same storage problem.
Learn what magnetic ratings can tell you
A number in pounds can refer to straight-off pull, an approved working load, or another product-specific test. Read the words around it and check the mounting conditions before comparing numbers across brands. This matters most when the bar hangs vertically and your tools have different shapes and finishes.
Separate straight-off pull from vertical loading
A straight-off pull figure describes force perpendicular to a reference surface under specific conditions. On a vertical bar, gravity acts downward and the tool can slide along the face. Friction and the shape of the contact affect how much resistance it has. Different surface materials and coatings can change both factors.
A poster magnet often illustrates the distinction. You may need a firm tug to pull it straight off a flat steel panel, yet it can slide down more easily when pushed sideways. A rail can show the same difference. Avoid a universal percentage conversion from pull to shear. Product geometry and surface conditions vary too much to turn a generic ratio into a working load.
A manufacturer may publish a working load for a specific mount or a defined configuration. Use the limits and orientation it provides. If you cannot tell what a high advertised number means, use it as a reason to read further before buying and leave dense or expensive tools in known storage.
Check rear grip and front grip separately
Think through the forces during retrieval. On a fixed rail, screws and support carry the forces from the rail and the tool. On a magnet-backed rail, the back must stay in place even as you peel a tool away from the front. You can see the difference if the bar begins to move each time a wrench comes off.
A high front grip may make retrieval more deliberate. This can be useful for a few tools on solid support. On a rear-mounted bar with poor contact, it may make the entire bar move. Switching to a stronger magnet on the front will not necessarily solve the rear problem. Reposition the holder on a suitable area or select a fixed mounting style.
Tool angle also has an effect. A large insulated screwdriver handle can hold much of the shaft away from the bar. A round shaft has a narrower line of contact than a flat tool surface. A long pry bar can act as a lever if it is knocked at the far end. Judge the intended tool in the position it will actually occupy.
Use ratings with an inventory of real tools
Weigh the planned tools if the holder has a published working-load limit, and keep the arrangement within the instructions. Then inspect how each contact patch feels. This is especially useful when your usual selection includes one unexpectedly dense tool. Removing that item can make a light-duty rail practical for everything else.
Keep the inspection conservative. With the holder installed as directed in a clear area, add lighter tools first and check for slipping, rotating, rocking, or a panel that flexes under normal removal. A tool that needs to be balanced exactly or reseated after every use is a poor candidate for an exposed row.
For heavy, sharp, or delicate pieces, use storage that supports the tool as intended. An edge guard, dedicated clip, fitted tray, or drawer can be a better use of space. This approach also makes it easier to buy a smaller, less expensive rail for the tools that actually benefit from magnetic access.
Measure the usable face and the room around it
Overall length tells you whether a rail can fit in an available space. The usable face tells you how many tool contact points can sit on the magnets. The distance between handles, the room behind them, and the route your hand takes to remove a tool determine whether those positions work.
Model the row before choosing a length
Place the intended tools on a flat surface with their contact areas aligned along a strip of paper. Move the handles apart until you can grab one without touching its neighbor. Mark where each tool touches and measure the distance between the outside contact points. Add the practical access room at each end.
A multipack may list nominal 8-, 12-, and 18-inch strips. In a documented example, GRIP 67446 lists actual magnetic lengths of 6, 9-1/2, and 15-3/4 inches. The gap between the body and active face can matter most on the shortest strip. Ask for both measurements if the location is unusually tight.
Check the installed position with the longest handle. If a driver hangs down over the work or a wrench overlaps a drawer pull, consider shifting the row, staggering the tools, or using two shorter bars. Buying more length makes sense only when you have a continuous mounting area and enough room below it.
Check hardware, projection, and reach
A rail can project enough to help your hand get behind a tool. It can also create a snag point in a narrow bay. Measure from the wall or panel to the furthest part of the tool as it rests. Then check the few additional inches needed by your hand when taking the tool down.
Include fastener access and end plates. A bar that technically fits under a shelf can still be difficult to install if you cannot reach the screw at a reasonable angle. Raised tabs and nearby brackets need their own space. For a cabinet side, open the drawers to see if their handles interfere with the proposed rail.
Try reaching the spot with a typical project laid out on the bench. Long stock, a vise, or clamps may make the highest shelf awkward to reach. Use the accessible spot for everyday tools and reserve less convenient areas for items you retrieve occasionally from a suitable holder.
Choose the right home for each kind of tool
Most rails earn their keep by holding a few commonly used tools. Sort the collection by shape and frequency. Give a magnetic row the pieces that sit flat and come off cleanly, and consider the alternatives for small sets, precision edges, power tools, or items with little magnetic material.
Wrenches, drivers, and pliers
Many steel wrenches sit well because they offer a broad contact area. Long insulated drivers may touch mainly at a narrow exposed section. A pair of pliers can be suitable if its jaws make stable contact, but its handles can crowd a neighboring tool or change the angle at which it hangs.
If you normally retrieve one wrench at a time, a small rail can keep common sizes in reach. If you carry the whole set to different tasks, a fitted holder keeps the sizes grouped and easy to carry. For pliers, check clearance with the handles in their natural storage position so they fit as you will actually return them.
Sockets, bits, and small components
Open-face rails can catch some small steel pieces, but shape and handling matter. Round sockets may have limited resting contact and can obscure adjacent size markings. A fitted socket holder or drawer tray can keep sizes ordered and help you spot a missing piece quickly at the end of a repair.
Small bits can be awkward to pick off a strong magnetic face. For frequently swapped driver bits, a labeled organizer often improves handling. Leave loose hardware in a suitable tray rather than covering the whole bar with small items. A tray with a magnetic base and a bar with a magnetic tool face solve different tasks.
Precision, cutting, and bulky equipment
Precision measuring faces can be damaged by trapped grit or by falling from an exposed rail. A fitted case also helps keep different instruments from striking one another. Follow the tool’s storage directions. For chisels and similar edged tools, keep the edge protected and put the holder away from traffic or nearby hands.
Plastic housings, aluminum bodies, and some stainless steels provide limited or no attraction at the surface you want to use. Even where a tool contains steel, it may be hidden inside a plastic cover. Heavy power tools generally need hooks, brackets, or shelves designed for their shape and weight.
Budget for installation and upkeep
Compare the cost of the setup you can actually use. Include appropriate hardware and delivery, then consider how the surface affects maintenance. A basic rail works well when you need one row and already have compatible support. A specialty mount earns its extra cost when it solves a repeated access or relocation problem.
Buy the pieces that solve today’s layout
A basic single bar can be enough for a first setup. Compare a multipack only after naming each location and confirming that the active lengths suit the planned tools. Unused pieces do not reduce the cost of the rail you install. An existing drawer can already handle the tools you reach for rarely.
If a bar needs a suitable backer or additional mounting hardware, add those prices before choosing. When a magnet-backed strip fits an existing steel panel, the saving may come from avoiding installation work, even if the strip itself costs more than a screw-mounted rail. Check what happens if you move to a nonmagnetic cabinet later.
Check maintenance in the actual shop
Near a grinder or file, the rail can pick up small steel particles. Near a vise, it can attract chips carried over from the tools. Clean the contact areas as directed, and avoid dragging a holder through gritty deposits on a finished panel. Wipe oils from tools and leave painted surfaces clean before repositioning a magnetic back.
Inspect the mounting after unusual loads, impacts, or movement. Keep people out of the potential drop path for heavy tools. Follow product guidance around items sensitive to magnets and keep small magnet pieces out of children’s reach. A tool that keeps shifting is information to change the storage, even if the rail still appears securely attached.
Frequently asked questions
Many buying mistakes are easy to avoid once you know which dimension or specification to check. These questions focus on changes buyers commonly make after the first installation, including whether to move the bar, how to assess a second row, and what happens when a tool’s finish changes the fit.
Should I choose ceramic or neodymium magnets?
Choose a completed holder by its documented working use, mounting method, and fit. Magnet material is one input. Size, arrangement, housing, gap, and the tool surface can all affect the assembled product. A material name alone is a poor way to estimate how many tools belong on the rail.
If you want to compare two products, check the approved orientation and load descriptions. The more useful bar is the one that stays stable with your tools and lets you retrieve them comfortably.
How can I compare two bars with different ratings?
Read the instructions for the same intended use. A mounting load for a specified model is more useful than a pull figure for an unspecified test surface. If one manufacturer explains its rated installation and the other gives little context, treat the first figure as easier to apply to your project.
Check physical fit as well. Neither capacity number tells you whether a tool’s handle holds it away from the face, or whether your hand has enough room behind the largest tool.
Can I install two bars one above the other?
Yes, on a suitable support with approved mounting. Mock up the tool outlines before drilling so the longest tools on the top row clear the lower row during removal. Staggering the rows may give you more access if the workbench is short or a shelf sits directly above it.
Think about visibility. When the top row overlaps the bottom row, small tools can disappear even though both bars are technically within reach.
Does stainless steel always stick to a holder?
Different stainless steels respond differently to magnets. Check the exact tool or panel you want to use. Pay attention to the contact face rather than an exposed screw or nearby frame. A part can contain magnetic steel somewhere and still have a poorly suited mounting face.
If the contact is weak, choose a clip, hook, or tray that supports the item mechanically. For mounting the rail, use approved fixed support or choose another location.
Conclusion
Choose a magnetic tool holder by matching the rear mount to the surface and the front face to a small set of frequently used tools. Compare the active length, grip clearance, and documented limits before ordering. Start with one bar you can place well, and use fitted storage for tools whose weight, shape, or edges make a magnetic row inconvenient.
More from Amazon
Programs that pair well with the guide above. Offers and eligibility are set by Amazon and may change.
Collect the home and kitchen items you want in one registry that guests can shop from.
Create a wedding registrySet up recurring deliveries of everyday items on eligible products. Terms and savings are set by Amazon.
Explore Subscribe & SaveFree shipping on eligible items, Prime Video and more. Eligible new members can start with a free trial.
Start a Prime free trialAudiobooks and podcasts to listen to on the go. Eligible new members can start with a free trial.
Try Audible freeAs an Amazon Associate we earn from qualifying purchases.