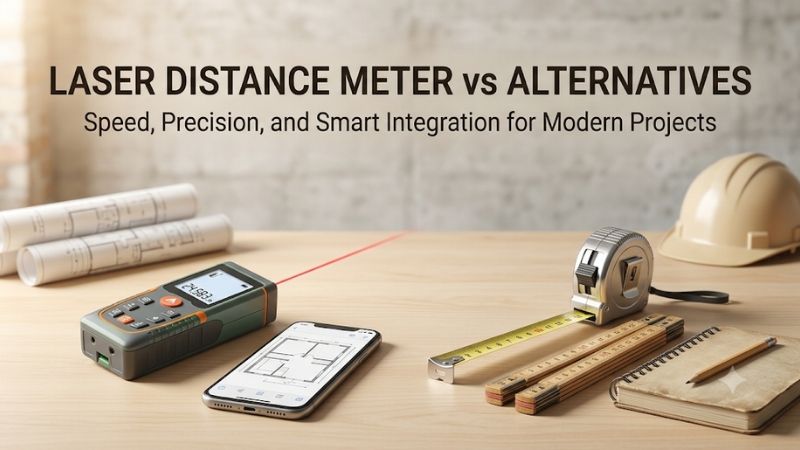
A laser distance meter vs alternatives comparison starts with the line you need to measure. A laser saves steps across a room. A tape helps transfer a mark, a wheel follows a route, and a phone app provides approximate dimensions. Use the tool that matches the shape, endpoints, and tolerance of the job.
Laser distance meter vs alternatives at a glance
Choose according to the path the measurement must follow. A beam reports a straight span to a target. A physical blade can touch a workpiece, a rolling wheel records travel, and a phone marks points in a scene. Those methods produce different useful numbers for common jobs.
| Tool | Best application | What usually limits it | Practical verification |
|---|---|---|---|
| Laser distance meter | Clear straight spans to a suitable target | Obstructions, target surface, reference setup, and aiming | Repeat with the same endpoints and compare a suitable known span |
| Tape measure | Contact dimensions, cut marks, and furniture fit | Blade sag, bend, hook positioning, or needing a helper | Reseat the hook and check the actual mark |
| Flexible tape | Curved or conforming surface dimensions | Stretch, twist, and unclear start or end points | Follow a marked route twice with consistent tension |
| Measuring wheel | Routes along pavement or ground | Slip, rough patches, and inconsistent travel paths | Repeat along the marked route and check against a known distance |
| Phone measuring app | Rough dimensions and preliminary sketches | Tracking, point placement, and scene conditions | Confirm important numbers with a dedicated measuring tool |
| Ultrasonic distance measure | Approximate straight distance to broad targets | Nearby objects, sound reflections, and model-dependent limits | Test the selected target and compare with a contact or laser measure |
The measurement path comes before the tool
Ask whether the job needs a straight span, length along a surface, position from a known edge, or approximate dimensions for a first look. Picture the two endpoints before choosing a method. A straight line across a route and the distance traveled along it answer different questions.
Consider a curved planting bed. The straight span between its endpoints tells you how it fits on a plan. The length along the bed’s curve tells you how much edging to buy. A laser can capture the chord if it has a target. A flexible tape can follow a short curve. A wheel is practical over a longer route where it rolls reliably. Add the manufacturer’s allowance for joints or trim after measuring the relevant path.
For a different example, an eight-foot wall span tells you roughly where a cabinet could fit. To drill mounting holes, you need the distance from a physical edge to a specific point. An instrument that reports the first value quickly may need a separate tool to place the second. If you choose the method based on the endpoints, you can take the room measurement and mark the cabinet with the tools that suit each operation.
Choose a method that can reproduce its endpoints
Good repeatability begins by putting the instrument and target back in the same places. Write down the two reference surfaces, the measurement height, and the unit. A good-looking display can still represent a beam hitting a baseboard or a tape resting against a hinge.
For a mudroom project, the front of the trim sets the path for moving a bench into place. The back corner sets its final position. Write those dimensions down separately. A distance reading along a clear wall is useful for the initial plan. A physical template or direct width check can confirm that a unit will move past the trim and door hardware.
You can test whether two tools agree by first making sure they measure the same line. Tape hook placement and a laser’s rear reference have to use the same plane. Both need the same target height. If measurements disagree by more than you expect, examine the setup and method before choosing one of the numbers. Offsets from body length or target thickness can easily exceed the tolerances listed on a spec sheet.
How a laser distance meter compares with other tools
A distance meter earns its place when you need a straight shot to a defined surface and want to work without stretching a blade. The alternatives can be quicker when both ends are within reach, a route follows a curve, or you only need a preliminary estimate.
Laser distance meter vs tape measure
A laser is quick for repetitive wall-to-wall and floor-to-ceiling measurements when the target is clear. A tape is usually more direct for marking a screw location, checking the length of stock, or measuring an opening where you can touch the two exact faces.
An interior painter estimating several rooms saves time by taking measurements alone with a laser and writing down each labeled span. The tool can sit at the reference wall while the opposite face supplies the return. A tape may take two people to hold flat across a large room. In a bathroom, however, a narrow recess behind a fixture might block the beam. A tape, rigid rule, or transfer stick can still reach appropriate points.
A tape also turns a number into a mark. When making a cut list, a laser can capture a rough length from a room or a bench. The tape lets you hook a defined edge, find the value, and mark the stock where the cut belongs. Read the blade along the surface and check hook position. Many tapes use a small amount of hook travel to account for measuring from an inside or outside contact point.
Choose both if you regularly move from estimating to fabrication. Use the laser to capture the larger dimensions while you have access to a room. Use a tape or rule to verify installation limits and to mark workpieces. That handoff also reveals an out-of-square opening where an overall size alone is insufficient.
Laser distance meter vs measuring wheel
A laser measures a direct line to the target. A measuring wheel records how far it rolls along the surface. This distinction matters on curved walks, sloped ground, and routes with several turns. Decide whether the drawing or material order needs the straight span or travel length.
A contractor sketching a straight line from a fixed pad to a shed could use a laser with a properly placed target. Someone estimating a cable run along the edge of a curving driveway may get a better starting value by rolling the marked route. The same start and finish can yield two different distances because the paths differ. Record the path specifically before converting it to a materials quantity.
A wheel depends on surface contact. Soft gravel, uneven grass, sharp turns, and wheel bounce can reduce repeatability. Push it consistently on a marked line and use a clear zero position. Repeat in the same direction and compare a known segment on a similar surface if the reading will determine an order. If the site is steep, clarify whether the plan needs slope length or its horizontal projection.
A laser requires line of sight and a surface that can return the beam. A stake with a suitable target can help across an open area, but the face needs to align with the intended endpoint. For land boundaries or survey-grade distance, use equipment and methods appropriate to that work. For a basic landscaping estimate, choose a wheel for routing and a laser or tape for straight layout where the target geometry allows it.
Laser distance meter vs phone measuring app
A phone app can estimate a nearby object’s dimensions and can be sufficient for quickly deciding what to inspect next. A dedicated laser meter gives a reading to the target from a defined reference. Use it when a named straight distance must be repeated and checked.
Consider browsing for a sofa while you are waiting for access to a property. An app can help estimate the scale of a wall or opening during a short visit. Apple’s Measure guidance describes its readings as approximate and advises using nearby, well-defined objects. A boundary that is shadowed, rounded, or partly hidden can make it hard to place the onscreen point predictably. Record the result as approximate and keep photos or notes that later explain the chosen points.
A dedicated meter is convenient when you can rest it on a wall and aim at the exact opposite face. It is still possible to measure a different path if the laser is angled or resting against the wrong datum. Keep the reference icon visible and repeat significant readings. For an object too small or awkward for the meter, a ruler or tape may be a better check.
Phone cameras can add context to site notes. A photo of the opening and the position of a hinge can complement a laser dimension. An app alone can help narrow a furniture search if a rough estimate is sufficient and there is time to verify before ordering. Once a custom product or installation depends on the number, take a measurement with a tool that suits the actual tolerance and can locate the relevant contact faces.
Laser distance meter vs ultrasonic distance measure
An ultrasonic tool estimates distance from a reflected sound pulse. The sound field can include a nearby object even if an aiming indicator points at the surface you intended. In an open room with a broad target, a basic unit may be adequate for a rough span.
Suppose shelves line one side of a storage area and you want the far wall. A broad ultrasonic field can encounter shelving or other objects before the intended face. The exact behavior depends on the device and its placement. Try measuring with nearby obstructions removed or deliberately take the same measurement from more than one position where the target geometry is known. If the readings shift, confirm the span using another tool.
Some products describe a laser pointer as an aiming aid while using ultrasound to measure. Read the specification for the measuring technology when shopping or when identifying a secondhand tool. A visible dot can identify where the user is pointing even when the device calculates distance from sound. An optical laser meter is often better for picking a small part of a target in a cluttered scene, provided the optical return is usable.
Choose an ultrasonic tool if you already own it and can confirm approximate distances across broad, clear spaces. For repeated room surveys with clutter, multiple depth planes, and defined endpoints, a dedicated laser usually offers easier target selection. Keep an alternative handy for glass surfaces, challenging sunlight, or very short gaps.
Laser distance meter vs flexible tape or rigid rule
A flexible tape follows the face of a curve. A rigid rule or caliper can register short features and contact surfaces. A laser sees a direct point along its beam, which is helpful for the opening as a whole and less informative about the contour inside it.
For a circular tabletop, the direct chord across two points can be useful for rough furniture placement. A flexible tape can run around the edge when you need an estimate of banding length. Keep the tape on the same profile height, especially if the edge is rounded. Use consistent tension and a clear overlap point. A rigid rule helps check the stock width or setback at a mounting bracket.
For trim against a nearly square wall, a laser may establish the long dimension but miss a small bow. A rigid straightedge or fitting template lets you inspect the contact line. Take more than one measurement across the opening and note the height. If a scribe strip is part of the design, record its intended placement before interpreting the space dimensions.
Choose the flexible or rigid tool based on what it can physically touch. A short direct tool can reference a hole center or exact face that is hard to aim at optically. A tape lying along a curve can provide a legitimate surface length provided the measuring path is the one you intend to cut or cover.
Laser distance meter vs alternatives on common projects
A simple choice works for most projects. Use the laser for clear room spans, keep a physical tape or rule for contact checks and marks, and pick a wheel when the route itself is the measurement. Verify significant dimensions with a tool that can reproduce the intended endpoints.
Planning furniture and flooring
Start with long room dimensions and identify areas the finished piece must pass through or cover. A laser speeds up the initial sketch. Then check the path, trim, and narrowest opening with a tape or template. Flooring and furniture decisions depend on different details.
For a large sofa, take the clear opening with the door in the actual delivery position. Note protruding hardware and where the piece must turn. Even a perfectly measured door width does not establish whether the sofa can rotate through the hall. Sketch the route and include fixture projections. Ask for the packaged and unpackaged dimensions, because the delivery plan may depend on moving the piece in a particular orientation.
For flooring, sketch alcoves and closet openings, then take manageable rectangles or other clearly defined shapes. Label where the rectangles meet so you avoid double counting. When a bay has an angled face, record the geometry required for an appropriate area calculation. Follow product-specific waste and packaging requirements before ordering.
Laying out a bench or cutting trim
A laser can provide the distance available between two fixed positions. For drilling and cutting, the measurement must transfer onto the workpiece at a fixed datum. A tape, rigid rule, square, story stick, or template lets you mark the location and check rough surfaces.
An installer might use a laser to collect room dimensions before bringing materials inside. At the actual cut, a story stick can capture two boundaries directly and transfer them without copying a fraction. For a set of repeated pilot holes, a template or gauge can preserve the spacing between pieces. Label the reference edge so the pattern does not get mirrored.
Check that the final number represents the finished face. Measure from the base or trim only if the part actually makes contact there. A wall-to-wall laser span is still useful in a sketch, but the closest, physically reachable dimensions should guide the fit where clearances are small. Recheck after flooring, trim, or hardware changes the opening.
Estimating an outdoor route or straight site span
Use a rolling wheel when a quote depends on distance traveled. Use a laser when you need a direct span to a visible endpoint and can confirm the target. For either method, make the start and finish explicit and write down whether slope or turns are included.
A service line that runs along a walkway, turns at a gate, and follows a fence needs route length. Separate the route into clear sections and record where the transitions occur. A fence that runs along direct diagonals needs the distances between its actual post positions. Verify the line-of-sight target and decide whether the estimate needs ground length or horizontal distance.
Repeat an important long measurement after a short break with the same marked endpoints. If the wheel path changes to avoid mud or the beam hits a patch behind a post, label the resulting dimension with its own path or target. Accurate notes make it easier to compare a second method and understand where a discrepancy came from.
Checking a reading against a second method
A cross-check makes sense when a dimension will determine a custom order, a cut, or the layout of several other parts. Measure the same line with another suitable tool. If the readings differ, look first at how each method establishes its starting point and endpoint.
Suppose a laser and tape disagree on the inside width of a closet by a quarter inch. Mark the spot where the laser lands and the plane where the rear housing sits. Hold the tape to those points at the same height. Check whether the tape blade bows as it crosses the opening or whether the tape’s case length needs to be included. Then repeat the laser reading after reseating the meter. If the discrepancy disappears, record the reading you can reproduce with both tools seated at the intended endpoints.
For a critical measurement that affects an expensive part, use a stable, appropriate method to verify the dimension directly. A shop can work from a template if edges curve or if the part must rotate into place. On plans, annotate the dimension with its height and the contact surfaces. That makes it possible for another person to repeat the check using the tool they have. Label the earlier estimate clearly so the fabricator can identify the confirmed measurement.
Conclusion
Use a laser distance meter for clear straight spans, a tape or rule for contact measurements and cut marks, and a wheel for longer routes. A phone app can support early estimates, while a flexible tape follows short curves. For critical dimensions, confirm the actual endpoints and repeat the measurement.
More from Amazon
Programs that pair well with the guide above. Offers and eligibility are set by Amazon and may change.
Collect the home and kitchen items you want in one registry that guests can shop from.
Create a wedding registrySet up recurring deliveries of everyday items on eligible products. Terms and savings are set by Amazon.
Explore Subscribe & SaveFree shipping on eligible items, Prime Video and more. Eligible new members can start with a free trial.
Start a Prime free trialAudiobooks and podcasts to listen to on the go. Eligible new members can start with a free trial.
Try Audible freeAs an Amazon Associate we earn from qualifying purchases.