Key takeaways
- Screwing into the dust cover or a hollow panel. Screws pull out within a week. Find the solid bottom rail.
- Mounting the two halves at different heights. Even a quarter-inch mismatch keeps the connector from engaging fully.
- Using one connector on a long joint. A single bracket lets the far end pivot. Use two on any joint over 5 feet, and always two on a chaise.
- Skipping pilot holes. Kiln-dried hardwood rails split easily near the edge.
- Bolting frames together permanently with through-bolts. You lose the ability to reconfigure or move the sofa through a door.
- Fixing the connectors but not the floor. The whole assembled sectional will then slide as one large unit when someone flops down.
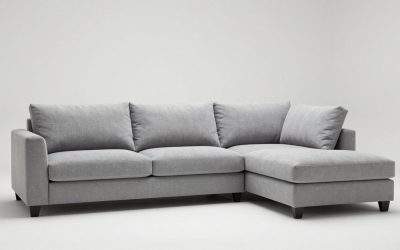
A sectional that drifts apart is more than an eyesore. The gap between pieces swallows remotes and phone chargers, the unsupported cushion edge on each side of the gap sags within a few months, and if someone sits right on the seam the two frames rock in opposite directions and stress the rails. The usual quick fixes tend to backfire. Pushing the pieces back together every evening wears grooves in the floor and eventually loosens the legs. Shoving a rolled towel in the gap does nothing for the structure. Screwing the frames together permanently means you can never move or vacuum under the sofa again. The right approach is a removable mechanical connector plus a grip fix under the feet, and on most sectionals that takes under an hour.
What You Need
| Item | Why | Optional? |
|---|---|---|
| Heavy-duty screw-on sectional connectors | Two-part interlocking brackets that bolt to each frame and slide together; they hold pieces tight but still let you lift one section off. The HOWDIA 4 Pack Sectional Couch Connector with Screws runs about $24.99 and covers two joints. | No |
| Budget metal interlocking clips | Lighter-gauge alternative for small or lightweight sections. The S SYDIEN 20-piece Sectional Couch Connectors set is about $7.12, enough for many joints or a whole modular set. | Alternative to the above |
| Cordless drill with a 1/8-inch bit and a Phillips driver | Pilot holes keep screws from splitting the frame rail. | No |
| Tape measure and pencil | Both halves of a connector must be at identical heights or they will not engage. | No |
| Rubber furniture grippers or non-slip pads, 2 to 4 inches square | Stops the legs from skating on hardwood, tile, or laminate. | No |
| Non-slip rug pad (if the sectional sits on a rug) | A rug that slides takes the sofa with it. | Only for rug placement |
| Flashlight | Finding the factory connector slots underneath. | Yes |
| Helper | Sections weigh 60 to 150 pounds each and need to be tipped safely. | Strongly recommended |
Step-by-Step
Step 1: Find out why it is sliding (10 minutes)
Pull the cushions and look at the joint. Sectionals fail for one of three reasons: factory connectors were never engaged or have bent, the floor is slick and the legs skate, or the sections were never designed to connect and rely on friction alone. Check the underside of each frame at the joint for existing hooks, slotted plates, or alligator clips. If they are present but bent, straighten them with pliers and retry. If they are missing or the brackets have pulled their screws, move on to installing new ones.
Our top picks


As an Amazon Associate we earn from qualifying purchases at no extra cost to you.
Step 2: Fix the floor first (10 minutes)
Tip each section slightly and place a rubber gripper under every leg. On a rug, add a non-slip pad beneath the rug. Push the sections back together and test with a firm sideways shove. On many homes with hardwood or tile this step alone stops most of the drift, and it also protects the floor.
Step 3: Mark connector positions (10 minutes)
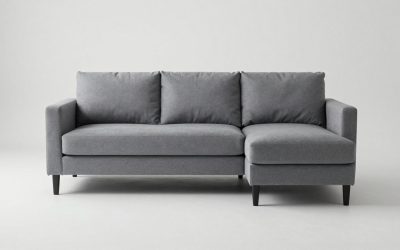
Push the sections together in their final position with the seat cushions aligned flush. On the underside of each frame at the joint, find a solid rail, usually a 1-inch-thick hardwood or plywood member 2 to 3 inches tall along the bottom edge, not the thin dust cover or a particleboard panel. Measure and mark a spot about 6 to 8 inches in from the front on both frames at exactly the same height. For sections longer than 60 inches, plan a second connector 6 to 8 inches from the back.
Step 4: Install the first bracket half (10 minutes per connector)
Hold the male half of the connector against the marked rail on one frame with its edge flush to the joint line. Drill 1/8-inch pilot holes through each screw slot, about 3/4 inch deep, then drive the supplied screws. Screws should sink into solid wood; if they spin freely you hit a hollow or particleboard and need to move to a better spot on the rail.
Step 5: Install the mating half and engage (10 minutes per connector)
Slide the female half onto the installed male half so they are fully engaged, then push the second frame into place against it. Mark the screw positions through the slots, separate the pieces, drill pilot holes, and screw the second half down. Slide the frames back together until the connector clicks or seats fully. Lifting one section straight up should be the only way to separate them now; lateral shoving should move both as one unit.
Step 6: Repeat, level, and test (15 minutes)
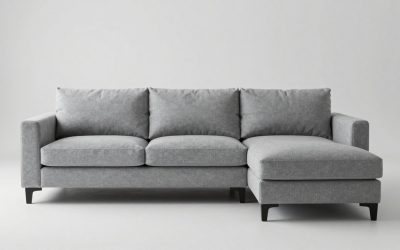
Add connectors at every joint, including chaise and corner pieces. Once all are engaged, check that the seat cushions sit at the same height across joints; a difference of more than a quarter inch means one bracket is mounted low and should be re-set. Finish by sitting directly on each seam and rocking side to side. Nothing should shift or creak.
Mistakes to Avoid
- Screwing into the dust cover or a hollow panel. Screws pull out within a week. Find the solid bottom rail.
- Mounting the two halves at different heights. Even a quarter-inch mismatch keeps the connector from engaging fully.
- Using one connector on a long joint. A single bracket lets the far end pivot. Use two on any joint over 5 feet, and always two on a chaise.
- Skipping pilot holes. Kiln-dried hardwood rails split easily near the edge.
- Bolting frames together permanently with through-bolts. You lose the ability to reconfigure or move the sofa through a door.
- Fixing the connectors but not the floor. The whole assembled sectional will then slide as one large unit when someone flops down.
How Often
Check connectors every 6 months, or any time you vacuum under the sofa. Tug the joint; if there is play, tighten the screws a quarter turn. Screws in hardwood rarely loosen, but in softwood frames they may need retightening once a year. Replace rubber grippers when they flatten or turn glossy, typically every 2 to 3 years on hard floors. Any time the sectional is moved for cleaning or a room rearrangement, re-engage every connector before the cushions go back on; a joint left disconnected for a week will shift out of alignment and start wearing the cushion edges.
When to Call a Pro or Replace
Call a furniture repair technician if the bottom rail is cracked or crumbling and will not hold a screw, since a rail splice costs $100 to $250 and is worth it on a sectional that retails above $1,500. Call one as well if the frame is particleboard throughout and there is no solid wood to anchor into; the fix there is a plywood reinforcement plate glued and screwed to the underside, which a shop does in an hour. Replace the sectional when joints have loosened so badly that legs are wobbling and cushions have permanent creases at the seams. In 2026 a mid-range modular sectional with factory-installed interlocking connectors runs $900 to $2,500, and choosing one with metal plate connectors rather than plastic hooks avoids this whole problem.
FAQ
Will sectional connectors damage my sofa?
They leave four to six small screw holes in the underside of each frame, hidden by the dust cover and never visible. On a rental or a sofa you plan to resell, this is a minor cosmetic point. The alternative, unsupported seams and sagging edges, does far more damage.
Can I connect a sectional that was not designed to connect?
Yes, as long as both pieces have a solid bottom rail of roughly the same height. Screw-on interlocking connectors do not require factory slots. If the rails differ by more than an inch, mount a hardwood spacer block on the lower frame to bring the connector halves level.
Will furniture grippers work on carpet?
Rubber grippers are for hard floors. On carpet, sofas slide less to begin with, but if yours does, use gripper cups with a textured base or a strip of rubberized shelf liner under each leg. Spiked carpet cups also work on low-pile carpet.
How much weight can a connector hold?
Connectors are not designed to bear weight; the legs do that. Their job is to resist sideways pull, which is rarely more than 40 to 60 pounds of force from someone sitting down hard. Any steel connector at least 1/16 inch thick handles that easily when screwed into solid wood.