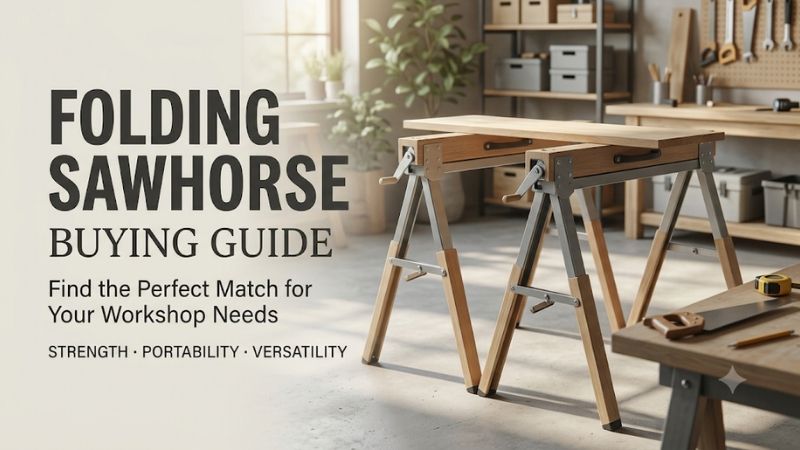
This folding sawhorse buying guide starts with three questions. What will the supports hold, where will the feet sit, and which parts do you need to buy? Once those answers are clear, you can compare capacity, working height, clamps, and folding mechanisms without paying for features you rarely use.
How a folding sawhorse buying guide starts with the job
A good purchase matches the workpiece, the floor, and the way you will apply force. Write down your most frequent job, the largest supported piece, and the tools you expect to use. Those details determine what a horse needs to do and which accessories are worth having.
Identify the workpiece and where it needs support
Describe the length, width, weight, and shape of typical material. A long board loads the horse differently from a sheet or a partly assembled box. Record where the work will rest and where you need to cut, clamp, or push on it before comparing top designs.
A trim project may need two narrow support lines and a clear section where a cut can happen. A cabinet box requires space for rails, a top, and room to reach fastening points. A door under repair may need a clean surface and suitable support under hardware or a panel. A versatile pair can serve all three with approved configurations, provided its geometry and working height suit each session.
For a first purchase, write one support drawing per repeated operation. Put the contact points on paper and show the direction in which your hands or tools apply force. For a saw, use its manual to plan support at the cut and blade clearance. For clamping, account for jaw and handle space. If the job requires a heavy stationary tool, confirm that the stand is designed for that machine and the planned attachment.
Do the same exercise for the largest load you will handle. An occasional project might be better served by renting or borrowing an appropriate setup. If a large load is common, put it on the regular buying list and check the entire work configuration instead of choosing by a picture of the horse alone.
Read the load rating and its conditions
Find out whether the capacity applies to one horse, a matched pair, a sawbuck or bracket, or a table configuration. Read the model’s manual for how the load must be placed. The highest number on the box may describe a different setup from the one you plan to use.
A label with 1,300 pounds for one horse and 2,600 pounds for two describes two rated configurations. Another product may give a figure only for a pair. Use the stated terms and check the manual for a separate rating if you plan to use one unit. For your own setup, include the materials, tools, and any topper or rails according to the relevant instructions.
A centered load and an off-center force can have different effects even at the same total weight. A long workpiece can act like a lever if you clamp or push far from the supports. Sliding stock sideways can shift what each unit carries. Choose a stable setup approved for the task, and follow any placement and distribution requirements.
A capacity comparison is also a useful time to read labels in the store. Retailers may summarize a property such as “1,000-pound capacity” without displaying the basis prominently. Photograph or record the manufacturer label for the exact model and check it against the manual. If the seller and maker publish conflicting ratings, resolve which rating applies to the item supplied before designing the work around it.
Choose by the finished working height
Measure the surface where the project will actually rest. A pad, rail, and worktop can all add height. Think about whether you usually look closely at small joints, work across a broad sheet, or need an accurate transfer from another established support surface.
For close detail, a higher surface can reduce bending and make marks easier to see. A taller assembly might need a lower support to keep the work at a comfortable reach. The right number depends on your posture, the task, and the height of the piece. Mock up the finished plane using a stable existing surface while you compare options. Then include the actual thickness of any approved top and rails.
Adjustable legs are useful when you can identify more than one recurring setting. Review the documented height steps. A model may cover the advertised range in increments that miss your required height. A fixed pair can work well when a worktop brings it to the right level and the goal is consistent height every day.
For an outfeed support or a related station, follow the primary tool instructions. Measure the surfaces as they will be used and verify material moves through the appropriate path. A workbench and a cutting table can both be comfortable at different heights. The transfer between them has its own alignment requirements.
Which sawhorse features change how you work?
Compare leg locks, top geometry, and transport as part of the same job. A feature earns its place when it makes opening, supporting, or securing your work easier. Review what the maker allows before treating a rail bracket, predrilled top, or clamp as interchangeable hardware.
Compare the body material and the carry weight
Steel horses often serve buyers who want a stout frame, legs that fold into a beam, or support brackets. Molded designs can keep a pair light and easy to carry for ordinary projects. Aluminum and mixed constructions can also suit specific products. Check the stated limits.
Compare weights on the same basis. If a retailer gives the shipping weight of a twin pack, that number includes a box and may include accessories. The weight you carry on a normal day should include the hardware that travels with the pair. Take the actual handles into account. A manageable load becomes harder to carry when the two bodies can shift independently or the grip is difficult to reach.
Look closely at the top and the feet. A high-friction pad may make it easier to position material, while a smooth surface can be easier to wipe clean. Protect clean or painted stock with compatible materials when needed. Foot placement and condition determine whether the frame sits as intended. Match the material and design to the work environment.
If storage includes a vehicle or damp work area, read the product’s care instructions and keep the supports clean and dry as required. Dirt near a hinge or foot can interfere with movement or contact. A low-maintenance form earns its price if it keeps the pair easy to set up and put away through repeating projects.
Check leg deployment and positive engagement
Open a display model unloaded if the store allows it, and watch how the legs and braces engage. The mechanism should make the fully deployed position identifiable. Check where your hands grip the body, where the release sits, and how the folded legs stay in place.
Some models favor quick opening. Others need separate legs to be deployed in a particular sequence. Follow the setup and folding instructions. Check each leg before adding tools or stock. A fast release can save time during setup, and the final check confirms that every leg is in the intended position.
An adjustable system has a second job. Its leg extension should stay in the approved positions. See how you can check both units at the same height before loading. Where the manufacturer permits individual adjustment on a suitable surface, follow the documented procedure and confirm the open stance. Loose scraps used as improvised feet can shift under load.
Check the folded position too. A release that is easy to reach when setting up may catch on something as you carry the folded unit. Check the maker’s intended carry points and control pinch areas. If somebody else will use the kit, choose a mechanism clear enough that they can identify a properly opened unit without guessing.
Buy rail brackets, pads, and clamps for recurring work
A rail bracket can help make an approved table assembly. Top pads can protect or hold work in position. Built-in clamps or tracks help when you frequently secure pieces in the same area. Match each accessory to the exact rail size, position, and fastening procedure.
Look at the rail orientation. Lumber placed flat in a designated support will be at a different height from the same lumber standing on edge. A bracket may accept only certain nominal dimensions. Check the exact SKU and manual for the size and position. Do the same with the top that goes over the rails. Make sure you understand the supported span and whether the top is meant to be attached.
A sacrificial surface may be useful on a cutting setup where the manufacturer describes it. Check the blade path and any fasteners underneath it. Support the material as the saw manual directs. A replaceable wood strip can protect the tool’s beam in an intended setup, and a broad panel may need continuous support for a different cut.
Clamps also have geometry. The jaw needs to reach the spot where you want pressure without hitting the frame. Make room for the handle and your hand. Clamping force refers to the clamp’s action. Check the support rating separately. Think about what happens if the workpiece is vertical, unusually wide, or held near one edge.
How to finish a folding sawhorse buying guide at checkout
Compare the actual pairs and attachments you would use at home or on site. Check the price of two if the listing shows one. Read the instruction diagrams, compare storage dimensions, and plan a short dry setup so you can confirm the product solves the job that prompted the purchase.
Calculate the cost for a complete setup
A single horse might have an attractive price. A useful estimate includes the required pair, approved rails or topper, protective surfaces, and compatible clamps. Existing parts can reduce the total only when their size and use match the instructions for the product.
Suppose a $55 unit needs a partner and new rails before you can build the worktable you expect. Compare the price for two and the required material with a pair that offers the key feature out of the box. Anyone who already owns a suitable folding bench may need to buy just one support under the maker’s instructions. Price that actual use.
Consider the cost of replacement parts. A clear model number can make it easier to find the correct foot, clip, or clamp. Check the availability of special parts during purchase if the mechanism depends on them. Retain instructions and any package labels. They matter when another person needs to confirm the rating or buy a matched replacement later.
Availability can change between a store and its online catalog. Confirm pack size and the same model at checkout. If you need a matched pair immediately, check both units before taking them to the job. A lower single price can be a false economy if you cannot obtain the second model or have to switch setups later.
Run a dry setup with the same people and tools
Try the unloaded opening and folding process on the sort of surface where you will work. Inspect the stance and top plane. Mark the usual contact points for your material, then verify that both people and tools can approach the setup in the configuration you planned.
For an assembly table, put the rails and panel in place using the documented setup. Verify that the contact and required fasteners are correct before adding project weight. Check the spots where you normally clamp or press. Remove the materials and equipment before folding. If a longer piece of stock is part of the planned configuration, use an appropriate mock-up to test clearance and movement.
For portable work, take the supports from their storage position, set them down, and return them after folding. Check whether a door, rear seat, or other obstacle prevents the motion. If the support will be carried often, choose by the time and effort the full sequence takes.
Store the manual where the next user can find it and review the load marking before changing configurations. At each setup, confirm the floor is suitable, the legs are fully engaged, the supports are correctly placed, and the proposed load fits the stated instructions.
Match the purchase to the limit you actually encounter
Take the first three jobs you wrote down and identify the single constraint that would stop each one. It may be the height, a missing place to clamp, or the ability to carry both units. Pick the model that addresses regular constraints with the fewest additional parts.
A painter who moves a long way from storage might value light weight and clean contact pads. A remodeler who assembles a table every day might prioritize rail brackets and rapid deployment. A home woodworker with a permanent bench could use one compact compatible support only when the work extends past the existing surface. Those purchases differ because the same horse would spend its day doing different things.
Put the rare challenge on a separate line. For an unusually heavy assembly, arrange suitable equipment and a stable setup for that project. Buy your everyday pair for the work it is meant to do repeatedly. That keeps the storage burden, expense, and setup consistent with what the shop actually uses.
Check whether the next project will change the setup
A good purchasing decision remains useful when one dimension of the work changes. Review what happens if the stock grows longer, the project becomes taller, or the working surface moves to a different room. Each change can expose a different limit in the frame or accessories.
For a bench extension you may start with light stock, then find that a larger workpiece needs additional support at the other end. Check how the available positions affect your cuts or assembly. Position a stable supplemental support where the tool instructions allow. Follow how the workpiece will move throughout the operation. A project that extends beyond the available support may need another bearing point in an approved position, even if it weighs well below the limit.
A separate constraint is whether someone else will operate the setup. If you share the garage, agree on the intended working position and where the accessories belong. A label on a specific attachment box helps keep parts by model and prevents two similar rail systems from getting mixed. If both of you can set up the unit from the same instructions, it becomes easier to catch an incorrectly opened leg or missing part.
Compare portability with a stable storage location
Portability has two parts. One is lifting the folded tool. The other is whether its whole profile can travel through your door and fit in its destination. Measure the pack where you will load it, including the length of handles and the space available to move your hands.
A person using a pair in a workshop may stack it on a suitable shelf. The same pair could be awkward to carry in a small vehicle with a narrow hatch. Try the shape with a comparable length and measure the combined depth. Follow the vehicle maker’s cargo securing instructions for transport. Price the full set you can actually bring to the job before comparing operating features.
Consider the route again with every accessory included. A simple pair can travel without much hardware. A table configuration can add rails, top sections, and clamps. A kit is portable in practice when you can carry and store all the pieces without having to change your intended sequence.
Conclusion
Buy a folding sawhorse for the piece it will support, the floor it will stand on, and the working height you need. Confirm capacity for the exact configuration, choose accessories for jobs you repeat, and compare the entire setup price before buying one unit or a matched pair.
More from Amazon
Programs that pair well with the guide above. Offers and eligibility are set by Amazon and may change.
Collect the home and kitchen items you want in one registry that guests can shop from.
Create a wedding registrySet up recurring deliveries of everyday items on eligible products. Terms and savings are set by Amazon.
Explore Subscribe & SaveFree shipping on eligible items, Prime Video and more. Eligible new members can start with a free trial.
Start a Prime free trialAudiobooks and podcasts to listen to on the go. Eligible new members can start with a free trial.
Try Audible freeAs an Amazon Associate we earn from qualifying purchases.