
Key takeaways
- Warranty Description: 2 Year Manufacturer
- Tension Supported: 1000 pounds
- Handle Type: Fixed Handle
Measure your ceiling before you shop. That single number decides more about your rack than brand loyalty ever will. A full cage with a pull-up bar wants roughly 84 to 92 inches of clear height, and in a garage you also have to clear the door track, the opener rail, and whatever the previous owner bolted to the joists. I have watched two people buy a 250-pound steel cage and then discover their pull-up bar sits four inches into the path of a rolling door. Tape measure first, cart second.
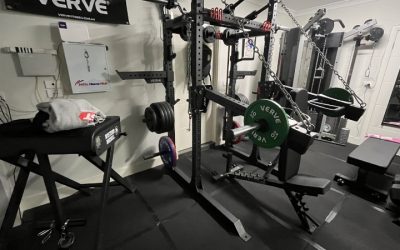
Once height is settled, the real question is shape. A four-post cage surrounds you: two sets of uprights, safety spotter bars front to back, and a footprint somewhere near 4 by 4 feet. A half rack keeps the two front uprights, adds a shallow base, and gives you the bench and barbell path without the enclosure. Cages win on solo-lifting safety and attachment options. Half racks win on floor space, walk-in access, and the ability to shove the whole thing against a wall on Sunday so the car fits. CAP Barbell sits in the middle of that argument with a family of racks and bolt-on attachments priced for people building a first serious setup rather than a commercial floor.
Our top picks
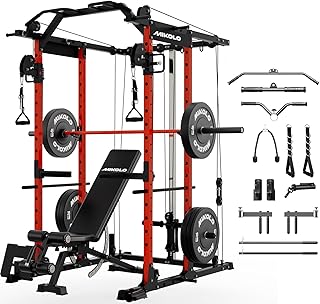
 ULTRA FUEGO Power Cage
- Warranty Description: 2 Year Manufacturer
- Tension Supported: 1000 pounds
- Handle Type: Fixed Handle

 DP01 Power Cage
- Warranty Description: 2 year
- Tension Supported: 2000 pounds
- Grip Size: Standard



As an Amazon Associate we earn from qualifying purchases at no extra cost to you.
Quick Comparison
| Feature | Full Power Cage (4-post) | Half Rack / 2-post | CAP Barbell Racks & Attachments |
|---|---|---|---|
| Typical footprint | ~48″ x 48″ plus bar clearance | ~48″ x 24-30″ | Model dependent; both styles offered |
| Clear ceiling needed | 84-92″ | 72-86″ | Check the height spec on your exact SKU |
| Solo squat safety | Best — full-length spotter bars | Good — depends on strap or pin length | Cage models include safety bars or pins |
| Attachment ecosystem | Dip bars, lat towers, landmines, storage | More limited by rear anchoring | Brand-matched add-ons sold separately |
| Assembly effort | 60-120 minutes, two people | 30-60 minutes | Bolt-together, hardware included |
| Best for | Dedicated gym room, heavy squats | Shared garage, tight basements | Budget-conscious first build |
How to Choose
- Verify three numbers, not one. Overall height, upright-to-upright inside width (nothing under 42 inches is comfortable for a wide squat stance), and depth including any plate-storage pegs that stick out the back. Pegs are the sneaky dimension people forget.
- Match capacity to your ceiling, not your ego. Budget racks often list a headline weight rating that assumes even loading on the safeties. Read whether that figure applies to the J-hooks, the pull-up bar, or the whole frame, and treat your working max plus 50 percent as the realistic target.
- Look at hole spacing. Tighter spacing near bench-press height means you can dial the bar in without shoulder-shrugging off the hooks. Anything wider than about 3 inches gets frustrating for pressing.
- Decide about bolting down. Two-post and shallow half racks generally expect to be anchored to concrete or attached to a wall. If you rent, or your slab is finished with expensive flooring, that constraint may push you toward a freestanding four-post cage weighted with plate storage.
- Plan the attachments before you buy the frame. Dip handles, lat/low-row towers, and landmine sleeves are brand and upright specific. Buying a rack and hoping a generic attachment fits later is how people end up drilling their own holes.
Top Picks Reviewed
CAP Barbell Power Racks and Attachments
CAP’s appeal is straightforward: steel that does the job at a price that leaves money for a bar and plates, which is where beginners actually feel the difference. The lineup spans compact squat stands, half racks, and enclosed cages, so you pick the geometry your room allows instead of forcing one design into a space it hates. Uprights use powder-coated square tubing with laser-cut adjustment holes, numbered on most models — a small touch that saves real time when you go from a 12-inch bench height to a 44-inch squat height and back.
What I like practically: the cage versions ship with safety bars or pins that let you squat alone without a partner, and the pull-up bar is part of the frame rather than a clamp-on afterthought. Plate storage on the rear uprights adds ballast, which matters if you cannot anchor to the floor. The attachment catalog — dip handles, landmine sleeves, J-hook replacements, and lat-pulldown towers on select frames — means the rack grows with you instead of capping your programming at squats and presses.
Where you should temper expectations: this is value-tier steel, not 11-gauge competition equipment. Bolted joints benefit from a wrench check after the first two weeks and again a couple of months in, because break-in settling is normal on any bolt-together frame. Bumper plates dropped from height are harder on a budget cage than a welded one, so plan to control the bar down rather than treating it like a drop platform. Assembly runs smoother with a second person and a socket set rather than the flat wrench in the box. Confirm the exact height, inside width, and rated capacity on the specific model you order — the range is wide across the line, and the spec sheet is the only thing that tells you whether the pull-up bar clears your garage door track.
Frequently Asked Questions
Can I use a half rack safely if I train alone?
Yes, with discipline. Set the safeties or straps low enough to catch a failed rep but high enough that you can slide out from under the bar. Then test them empty-handed at working depth before you load a single plate. If you routinely grind near-max singles by yourself, a full cage’s front-to-back spotter bars are the more forgiving option.
Does a power rack need to be bolted to the floor?
Four-post cages with plate storage usually do not, especially once 200 pounds of iron sits on the rear pegs. Shallow half racks and two-post stands are a different story — anchoring or wall-mounting is strongly recommended because the tipping moment during a rack pull or a missed press has nowhere to go. Check the manual for your model; manufacturers are explicit about this.
What ceiling height do I need for pull-ups inside the rack?
Add about 12 inches to the rack’s overall height for clearance, then confirm your own reach. A 6-foot lifter needs roughly 7.5 to 8 feet of clear space for full hangs. In low basements, a rack with a bar mounted slightly below the top rail, or a half rack with a wall-anchored pull-up bar, solves the problem better than compromising the squat.
Which attachments are actually worth buying first?
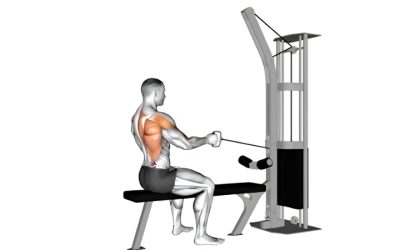
Dip handles and a landmine sleeve deliver the most new exercises per dollar. A lat/low-row tower is the next step up and genuinely broadens back training, but it adds meaningful depth to the footprint — measure again before committing. Spare J-hooks with thicker liners are an underrated purchase if you care about your bar’s knurling.
Final Thoughts
Pick the rack that fits the room you actually have, not the gym you imagine. If you have a dedicated corner with headroom, a four-post cage is the safer, more expandable choice and worth the extra square footage. If your rack shares space with a car, a water heater, or a low basement ceiling, a half rack with anchored uprights keeps you training without a fight over floor space. CAP Barbell covers both approaches at a price that lets you spend the rest of your budget on a decent bar and enough plates to actually progress — which, two years from now, will have mattered far more than the gauge of your steel.
Write Your Review
No reviews yet. Be the first to share your experience!