Key takeaways
- Measure the strip, knife handles, cabinet doors, and nearby switches.
- Confirm the wall can accept the chosen fastener and locate a stud if possible.
- Mark a level line 8–12 inches above the countertop, then check reach and clearance.
- Install every supplied screw, bracket, or anchor rather than relying on one fastener.
- Wait for adhesive or filler to cure according to the manufacturer’s instructions.
- Test the empty strip first, then add the lightest knife and gradually increase the load.
- Recheck screws and adhesive after a week, especially in a humid kitchen.
The best magnetic knife strips match your wall space and knife collection first: choose a 16–18-inch stainless-steel or hardwood strip for most kitchens, a longer 24-inch model for large collections, and a screw-mounted design whenever you need dependable weight support.
Best magnetic knife strips by kitchen situation
| Kitchen situation | Best choice | Why it works | What to avoid |
|---|---|---|---|
| Small apartment or narrow galley kitchen | 12–16-inch strip, 1.5–2-inch projection | Stores essential knives without consuming much backsplash space | 24-inch bars that compete with cabinets, switches, or prep space |
| Large knife collection | 24–30-inch strip or two separated 16-inch strips | Provides room for 8–12 knives with safer spacing | Overcrowding one short bar |
| Renters | Adhesive-mounted strip rated above the intended load | Installs without drilling, provided the wall is smooth and sound | Adhesive on textured, greasy, damp, or freshly painted walls |
| Homes with children or pets | Strong screw-mounted strip installed high and away from traffic | Reduces the chance of the bar detaching or being reached | Light adhesive bars near a counter edge or doorway |
| Heavy cleavers or thick tools | Full-length, screw-mounted bar with a continuous magnet | Distributes weight and gives a larger contact area | Small decorative bars with weak magnets or isolated magnetic points |
What separates the best magnetic knife strips?
Magnet strength and coverage
A strip’s stated magnet type matters less than how much magnetic force reaches the knife. Neodymium magnets generally provide stronger attraction in a slimmer housing than ceramic magnets, but the construction still determines performance. A steel face with magnets distributed across the full length usually holds more reliably than a bar with only two or three magnetic zones.

Modern Innovations 16 Inch Stainless Steel Magnetic Knife Bar with Multi-Purpose Functionality as a Knife Holder, Knife Strip, Magnetic Tool Organizer, Art Supply Organizer & Home Organizer
Included for 'Best Magnetic Knife Strips for Organized Kitchens' because the listing specifies Knife Strip and Magnetic Tool Organizer, details this guide uses to compare options.
View on Amazon
HOSHANHO Magnetic Knife Strips, Magnetic Knife Holder for Wall 16 Inch
Included for 'Best Magnetic Knife Strips for Organized Kitchens' because the listing specifies Magnetic Knife Holder for Wall 16 Inch, details this guide uses to compare options.
View on Amazon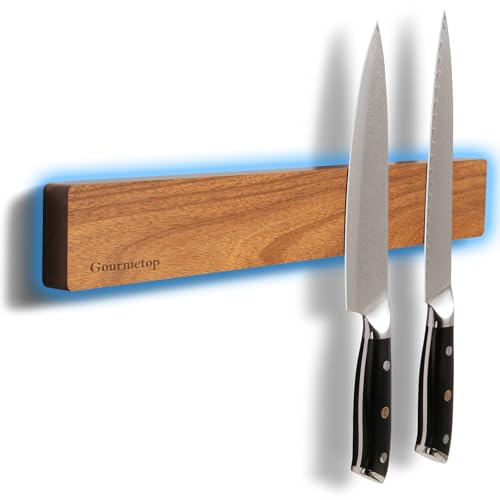
Gourmetop Magnetic Knife Holder for Wall 16”, Acacia Wood, No Drill Fridge
Included for 'Best Magnetic Knife Strips for Organized Kitchens' because the listing specifies Acacia Wood and No Drill Fridge, details this guide uses to compare options.
View on Amazon
Modern Innovations Magnetic Knife Holder, 12 Inch, Acacia Wood
Included for 'Best Magnetic Knife Strips for Organized Kitchens' because the listing specifies 12 Inch and Acacia Wood, details this guide uses to compare options.
View on AmazonFor everyday chef’s knives, paring knives, and bread knives, look for a strip that can support at least 10–15 pounds when properly mounted. That gives useful capacity without operating at the limit. If you plan to hang a cleaver, thick kitchen shears, or a heavy Japanese-style knife, choose a model rated for 20 pounds or more and verify that its mounting hardware is attached to studs, masonry anchors, or a solid backing surface.
Do not judge strength by whether a knife snaps onto the bar dramatically. Excessive pull can make removal awkward and may encourage users to twist the blade against the wall. A secure strip should hold the knife still but allow it to be lifted away with one hand.
Strip length and realistic capacity
Manufacturers often describe capacity by knife count, but blade width varies widely. A 16-inch strip may hold six slim knives or four broad knives comfortably. Leave roughly 1.5–2 inches between handles so one knife can be removed without striking the next handle.
| Strip length | Practical knife capacity | Recommended wall area | Typical use |
|---|---|---|---|
| 12 inches | 3–5 knives | At least 14 inches wide by 5 inches high | Essential tools in a compact kitchen |
| 16–18 inches | 5–8 knives | At least 20 inches wide by 6 inches high | Most everyday households |
| 24 inches | 8–12 knives | At least 28 inches wide by 6 inches high | Large collections or shared cooking spaces |
| 30 inches | 10–15 knives | At least 34 inches wide by 7 inches high | Professional-style storage and wide walls |
Measure the actual wall, not just the empty section between cabinets. Allow at least 3 inches from a cabinet side, backsplash corner, or wall return so the end knife can be gripped easily.
Mounting method: adhesive, screws, or concealed hardware?
Screw-mounted strips are the safest long-term choice. They handle more weight, remain stable during repeated knife removal, and are less affected by kitchen heat and humidity. Install them into a stud where possible. If the location does not align with a stud, use anchors matched to the wall: masonry anchors for brick or concrete, and appropriate hollow-wall anchors for drywall.
Adhesive mounting is useful for renters, but it is not automatically damage-free. A 16-inch bar loaded with eight knives can create a substantial downward and outward force. Clean the wall with the adhesive manufacturer’s recommended method, let paint cure fully, press the strip in place for the stated time, and wait before adding knives. Never exceed the adhesive’s load rating, and inspect the bond regularly.
Concealed screw mounts give the cleanest appearance, while exposed screws are usually easier to install and remove. A mounting plate that spans most of the strip is preferable to two tiny brackets because it distributes force and reduces rocking.
Surface material and cleaning
| Surface material | Advantages | Limitations | Best for |
|---|---|---|---|
| 304 stainless steel | Moisture-resistant, durable, easy to wipe clean | Can show fingerprints and may scratch softer knife finishes | Busy kitchens and modern interiors |
| Solid hardwood | Warm appearance and good resistance to everyday wear | Needs careful cleaning; unfinished wood can absorb moisture | Traditional, Scandinavian, or natural kitchens |
| Tempered glass or glass-look panels | Sleek appearance and nonporous surface | Shows smears and can chip if struck by a heavy tool | Minimalist kitchens with light knife use |
| Plastic or painted metal | Usually lightweight and affordable | May scuff, discolor, or feel less rigid over time | Temporary installations and low-weight collections |
Choose a smooth, sealed face with no deep decorative grooves. Grooves can collect flour, oil, and food residue, while a knife touching a rough surface may develop scratches. The strip itself does not replace knife cleaning: dry blades before storage, especially with carbon-steel knives.
Wall clearance and safe placement
Wall clearance is easy to overlook. Most magnetic bars project about 1–2 inches from the wall; the knife handle can extend another 2–4 inches depending on its shape. Keep at least 6 inches of clear space in front of the mounted strip so a hand can approach from above or below without hitting a cabinet or appliance. For unusually deep handles, allow 8 inches.
Mount the bar high enough that the blade is not at a child’s shoulder level, but not so high that removing a knife requires stretching. A useful starting point is 8–12 inches above the countertop. Check the full swing of nearby cabinet doors before drilling. Keep the strip away from the heat plume of a cooktop and from a sink splash zone; repeated steam and grease can weaken adhesive and accelerate corrosion.
Place knives with the cutting edge facing upward or toward the wall, depending on the bar’s design and your removal motion. Lift the knife away rather than dragging its edge along the surface. The safest arrangement leaves the heaviest knife at one end and keeps pointed blades away from common hand paths.
Head-to-head: the main strip styles
Stainless-steel bar versus hardwood bar
A stainless-steel bar is the practical choice for maximum moisture resistance and easy sanitation. It suits rental kitchens, contemporary cabinetry, and households that cook frequently. A hardwood bar blends better with wood cabinets and is less visually industrial, but its finish can wear first around the mounting points and where wet handles touch the surface.
Continuous magnetic bar versus segmented magnetic bar
A continuous bar gives predictable holding power across its entire length and is usually better for wide blades. Segmented bars can look slimmer and may make installation easier, but a knife positioned between magnetic zones can feel less secure. For a mixed collection, continuous coverage is the safer default.
Open strip versus enclosed magnetic rack
An open strip displays the knife handles and makes the blade visible before removal. An enclosed rack hides much of the magnet and can offer a softer visual appearance, but it may provide less feedback about exactly where the strongest holding area is. Enclosed designs are useful when you want a cleaner wall, while open designs are easier to inspect and wipe.
Installation checklist before adding knives
- Measure the strip, knife handles, cabinet doors, and nearby switches.
- Confirm the wall can accept the chosen fastener and locate a stud if possible.
- Mark a level line 8–12 inches above the countertop, then check reach and clearance.
- Install every supplied screw, bracket, or anchor rather than relying on one fastener.
- Wait for adhesive or filler to cure according to the manufacturer’s instructions.
- Test the empty strip first, then add the lightest knife and gradually increase the load.
- Recheck screws and adhesive after a week, especially in a humid kitchen.
Bottom line
For most homes, the best magnetic knife strips are 16–18 inches long, have full-length magnet coverage, project no more than about 2 inches from the wall, and attach with screws to a solid surface. Choose stainless steel for low-maintenance durability, sealed hardwood for warmer styling, and adhesive only when drilling is not possible and the load will remain modest. Prioritize safe clearance and dependable mounting over an attractive knife-count claim: a slightly longer, firmly installed strip is usually better than a crowded bar that makes every knife harder to remove.