Key takeaways
- Never use metal tools or sharp objects to chip ice. Scratching the interior lining can expose insulation and lead to refrigerant leaks.
- Lay old towels or a shallow baking sheet on the bottom shelf before you start — it catches runoff and prevents water from reaching your floor.
- Defrost sprays work best on ice that’s a quarter-inch thick or less. For massive buildup, combine spray treatment with ambient warmth by placing a bowl of hot water inside and closing the door for ten minutes first.
- When you plug the fridge back in, let it run empty for about fifteen minutes before reloading food so the compressor reaches a stable operating temperature.
What's inside
- Step 1: Empty the Fridge and Plan Your Timing
- Step 2: Speed Up the Melt With the Right Defrosting Spray
- Step 3: Remove Loosened Ice and Dry Everything Thoroughly
- Step 4: Address Water Line Issues If You Have an Ice Maker
- Step 5: Prevent Ice Buildup From Coming Back
- Tips
- Frequently Asked Questions
- Conclusion
- Related Articles
Mini fridges are deceptively high-maintenance. A quarter-inch of ice on the interior walls doesn’t just eat up shelf space — it forces the compressor to work harder, silently driving up your energy bill every single day the buildup goes unchecked. Most people don’t think about defrosting until the freezer door won’t close properly or their ice cream has freezer burn. By then, you’ve already lost efficiency, food quality, and patience. If your mini fridge runs on a manual-defrost system (and the vast majority do), getting ahead of ice accumulation is one of the easiest wins in home appliance maintenance.
- Step 1: Empty the Fridge and Plan Your Timing
- Step 2: Speed Up the Melt With the Right Defrosting Spray
- Step 3: Remove Loosened Ice and Dry Everything Thoroughly
- Step 4: Address Water Line Issues If You Have an Ice Maker
- Step 5: Prevent Ice Buildup From Coming Back
- Tips
- Frequently Asked Questions
- Conclusion
- Related Articles
This guide walks you through the entire defrosting process step by step, covers the gear that actually speeds things up, and flags the mistakes that turn a twenty-minute task into a soggy afternoon project. Whether you’re prepping a dorm-room fridge for the semester or maintaining a garage unit, everything here applies to standard mini fridge models under six cubic feet.
As an Amazon Associate we earn from qualifying purchases.


🛒 Best Price Today on Amazon
Prime members get fast, free shipping on everything above, plus member-only deals. New members get a 30-day free trial — cancel anytime.
Step 1: Empty the Fridge and Plan Your Timing
Start by removing every item — food, shelves, drawers, the lot. Toss anything that’s been lingering past its prime; defrosting day doubles as a clean-out. Stash perishables in a cooler with ice packs if you’ll be offline for more than an hour. The whole job takes roughly thirty to ninety minutes depending on ice thickness, so pick a window when you don’t need access to the fridge. Unplug the unit entirely. Leaving it plugged in while the door sits open wastes electricity and stresses the compressor for no reason.
Step 2: Speed Up the Melt With the Right Defrosting Spray
Here’s where most people waste time holding a hair dryer or chipping at ice with a butter knife (please don’t — one slip punctures a refrigerant line and the fridge is toast). A dedicated freezer defrosting spray is engineered to break the bond between ice and the freezer wall without scratching surfaces or producing toxic fumes. Products like the 2PCS Freezer Defrosting Spray and the Fridge Defrosting Spray (120 ml) are formulated for food-safe interiors and work by lowering the ice’s melting point on contact. Simply coat the icy surfaces, wait a few minutes, and watch the sheets loosen. The Freezer Defrosting Spray designed for both fridges and car windshields offers extra versatility if you’re maintaining multiple vehicles in your household.
Step 3: Remove Loosened Ice and Dry Everything Thoroughly
Once the spray has done its work, use a soft plastic scraper or a wooden spatula to gently lift away loosened chunks. Microfiber towels absorb the meltwater fast — keep a stack on hand and wring them out into a sink as you go. Pay special attention to the rear interior wall and the gasket groove around the door, where water pools and invites mold. The 4oz defrosting sprays like the Defrosting Spray for Fridge Freezer (4oz) are particularly handy for tight corners and door seals where a larger canister is awkward to aim. After every surface is visibly dry, leave the door open for another ten minutes so residual moisture evaporates before you plug back in.
Step 4: Address Water Line Issues If You Have an Ice Maker
If your mini fridge includes a water dispenser or ice maker, frozen lines can compound the problem long after you’ve defrosted the main compartment. The Unfreeze Water Line Tool — a compact 20ml unit with a thin 60-inch hose — is purpose-built to clear blocked dispenser lines without disassembling the fridge. Feed the hose into the water line, apply the solution, and let it dissolve the blockage from the inside. This step is frequently overlooked and accounts for many “my ice maker stopped working” service calls that cost sixty dollars or more.
Step 5: Prevent Ice Buildup From Coming Back
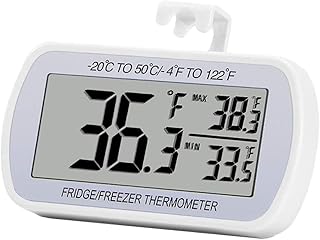
Set a reminder to inspect your mini fridge every four to six weeks. Thin frost is exponentially easier to deal with than a solid sheet. Make sure the door gasket seals cleanly — a worn or warped gasket lets warm, humid air in constantly, and that moisture is the raw material for every frost problem. If the seal is compromised, replacement gaskets run under fifteen dollars and take minutes to swap. Keeping the fridge at its optimal temperature range (typically 37–40°F for the fridge section and around 0°F for the freezer) also reduces excessive frost formation.
Tips
- Never use metal tools or sharp objects to chip ice. Scratching the interior lining can expose insulation and lead to refrigerant leaks.
- Lay old towels or a shallow baking sheet on the bottom shelf before you start — it catches runoff and prevents water from reaching your floor.
- Defrost sprays work best on ice that’s a quarter-inch thick or less. For massive buildup, combine spray treatment with ambient warmth by placing a bowl of hot water inside and closing the door for ten minutes first.
- When you plug the fridge back in, let it run empty for about fifteen minutes before reloading food so the compressor reaches a stable operating temperature.
Frequently Asked Questions
How often should I defrost my mini fridge?
Most manual-defrost mini fridges need attention every four to eight weeks. If you notice ice accumulating faster than that, check your door gasket and room humidity levels — those are the two most common culprits behind premature frost buildup.
Can I use a hair dryer to defrost my mini fridge?
You can, but it’s inefficient and risky. The concentrated heat can warp plastic panels or damage the interior lining if you hold it too close. A defrosting spray is safer, faster, and doesn’t require you to stand there holding a cord for half an hour.
Are defrosting sprays safe around food?
The products listed here are designed for food-contact surfaces, but it’s good practice to wipe down the interior with a mild baking soda solution after defrosting and before reloading food. That eliminates any residual chemical scent and leaves the fridge smelling neutral.
Why does ice keep building up so quickly after defrosting?
Rapid re-icing almost always traces back to a failing door gasket, a fridge set too cold, or the unit being stored in a humid space. Replacing the seal is the cheapest and most effective fix in the majority of cases.
Conclusion
Defrosting a mini fridge isn’t glamorous, but it’s one of those small maintenance habits that pays off every single day your unit runs — lower electricity costs, more usable space, fresher food, and a compressor that lasts years longer. Grab a defrosting spray, set a recurring reminder, and give the unit a quick service every few weeks. Twenty minutes of attention now saves you from a much bigger headache later.