Key takeaways
- Always cut face-down. The cleanest edge forms on the entry side of the blade. Putting the finished face against the table means the splintered exit side is hidden behind the board.
- Use painter’s tape along the cut line. Pressing tape firmly onto the pegboard surface before cutting dramatically reduces surface chipping on melamine-coated and standard hardboard varieties.
- Mark with a fine-point pencil, not a marker. Ink bleeds into hardboard pores and stays visible even after sanding. A sharp pencil line stays crisp and disappears under paint or sealer.
- Let the blade do the work. Forcing any saw — manual or powered — through pegboard increases vibration and raggedness. Steady, moderate pressure produces the cleanest result every time.
What's inside
Pegboard is one of the most underrated materials in home organization — it turns empty walls into tool stations, craft corners, and kitchen storage with minimal fuss. But getting a clean, splinter-free cut is where most people run into trouble, especially if you’re working around outlets, shelves, or oddly shaped wall sections. A ragged edge or a cracked panel can turn a quick weekend project into a frustrating do-over.
This guide walks you through exactly how to cut pegboard cleanly, the tool categories that actually make sense for the job, and the factors that matter most — from blade selection to securing your workpiece. You’ll walk away knowing which approach fits your skill level, budget, and the type of pegboard you’re working with.
As an Amazon Associate we earn from qualifying purchases.


Understand What You’re Cutting
Most garage and workshop pegboard is tempered hardboard — a dense, resin-impregnated fiberboard typically sold in 1/4-inch or 1/8-inch thicknesses. It cuts differently than plywood or standard MDF. The surface is surprisingly tough and prone to chipping on the exit side if you aren’t careful. Some pegboard is melamine-coated or even perforated steel, and each variant demands a slightly different blade and technique. Before picking up any tool, flip the board over and identify the material. That single step determines whether a basic manual saw will do the job or whether you need a powered option with a fine-tooth blade.
Match the Tool to the Cut
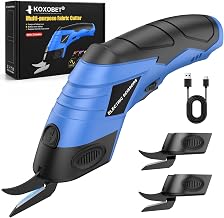
Straight crosscuts across a full sheet call for stability and a guide rail. A compact power saw like the SEESII Mini Circular Saw — a 4.8A corded unit with a laser guide and 45-degree bevel capability — gives you both speed and precision on hardboard pegboard. The laser line keeps you honest on long rips, and its dust extraction port helps you see your cut line without blowing debris everywhere. For shorter cuts or notch work, a multi-purpose manual saw like the 8-In-1 Multi Blades Hand Saw with its quick-change blade mechanism lets you swap to a fine-tooth configuration that handles drywall and thin hardwoods equally well — both materials closely related to pegboard’s composition. If your project involves softer composite pegboard or you’re trimming multiple thin sheets, the Multi-Cut 401 handheld cutting tool handles soft wood and similar materials with surprising control, though it won’t bite into compressed hardwood variants.
Secure and Support the Workpiece
Cutting pegboard that’s wobbling or unsupported leads to blowout, wandering cuts, and potential injury. Clamp the board flat to a stable work surface — a pair of quick-grip clamps and a pair of sawhorses will cover most home scenarios. If you’re cutting a small piece, place sacrificial foam board or scrap lumber underneath so the blade exits cleanly without damaging your table. Leave at least two inches of clearance along the cut line. For overhead or wall-mounted pegboard you need to trim in place, score the cut line deeply with a utility knife first to reduce chipping, then follow with your saw at reduced speed.
Choose the Right Blade for Clean Edges
Blade tooth count is the variable most people overlook. For pegboard, you want a high tooth count — 60 teeth minimum on a circular saw blade, or the finest available teeth on a manual saw. Fewer teeth remove material faster but leave rough, fuzzy edges that collect dust and look sloppy. A fine-tooth blade running at moderate speed produces a cut that barely needs sanding. If you’re using a rotary or oscillating tool, a fresh blade matters enormously; dull teeth grab and tear hardboard instead of slicing through it.
Plan for Finishing and Fit
Even a good cut benefits from a light sanding pass with 150-grit sandpaper along the exposed edge. This knocks down micro-splinters and ensures pegs and hooks slide in without catching. When measuring for fit — around a light switch plate, for instance — add an extra 1/16 inch of clearance on each side. Pegboard expands slightly with humidity changes, and a tight fit can buckle. Dry-fit every piece before fastening anything permanently.
Tips
- Always cut face-down. The cleanest edge forms on the entry side of the blade. Putting the finished face against the table means the splintered exit side is hidden behind the board.
- Use painter’s tape along the cut line. Pressing tape firmly onto the pegboard surface before cutting dramatically reduces surface chipping on melamine-coated and standard hardboard varieties.
- Mark with a fine-point pencil, not a marker. Ink bleeds into hardboard pores and stays visible even after sanding. A sharp pencil line stays crisp and disappears under paint or sealer.
- Let the blade do the work. Forcing any saw — manual or powered — through pegboard increases vibration and raggedness. Steady, moderate pressure produces the cleanest result every time.
Frequently Asked Questions
Can I cut pegboard with standard kitchen scissors or a box cutter?
Not reliably. Tempered hardboard is significantly tougher than corrugated cardboard or craft foam. A box cutter may score the surface, but forcing a blade through 1/4-inch hardboard risks snapping the blade, tearing the material, and injuring your hand. Use a tool designed for wood or composite cutting instead.
What is the best way to cut a notch or irregular shape in pegboard?
For curves and interior cutouts, drill a 3/8-inch starter hole inside the waste area, then insert a jigsaw or coping saw blade and follow your marked line. A rotary multi-tool also works well for tight curves. Always support the board around the cutout to prevent vibration-induced cracking.
How do I prevent pegboard from cracking near the edges?
Keep your cut at least one inch from any pre-drilled peg hole when possible. If a cut must pass close to existing holes, reduce your saw speed and support the board directly beneath the cut zone. Scoring with a utility knife before sawing also helps distribute the stress.
Should I seal pegboard edges after cutting?
If the board will be in a garage, workshop, or any area with fluctuating humidity, yes. A coat of shellac, polyurethane, or even clear spray sealant on the cut edges prevents moisture absorption and swelling. In climate-controlled rooms this step is optional but still extends the board’s lifespan.
Conclusion
Cutting pegboard cleanly comes down to three things: identifying the material, picking a blade with enough teeth for the job, and supporting the board so it stays flat and still while you work. With the right setup and a bit of patience, even a first-timer can get workshop-ready results on the first pass.